I actually bought this stamp set Ornate Leaves quite a while ago from Simon Says Stamps and I had fun playing with it. I decided to play with the pumpkin and chose to stamp several times with inks from Hero Arts. I used Orange Soda, Tangerine and Caramel for the pumpkin, for the green swirls, Moss was used. After I got the look I wanted, I stamped again with VersaMark Ink and sprinkled with Clear Embossing Powder, and set with the heat tool. I knew I wanted a specific color to back my stamped image so out comes the Distress Oxide Inks and Distress Blender Brushes. Ripe Persommon, Wild Honey and Spiced Marmalade achieved that color. Next comes die cutting with my Big Shot. Majestic Label Die Set and Stitched Rectangles cut both the stamped image, backing and base. Some bakers twine and sequins from my stash helped to bring my card together. The sentiment is stamped and heat embossed.
Have a great day and keep on crafting!
Affiliate links used at no cost to you. Not all links are affiliate, I just want to share what I used. All products were purchase by my unless noted. I don’t sell anything nor am I employed. This is my hobby and I hope to inspire you to play :)
Friday, October 26, 2018
Friday, October 19, 2018
Simple card with barely any shimmer!
If you've noticed, I like shimmer, sparkle and shine on all my cards! This one has just the tiniest bit of shimmer - feels so ...wrong! I'm using the October 2018 Kit from Hero Arts.
Like most cards, I started with 110lb Card Stock and stamped my images with Tuxedo Black Ink and colored with Copic Markers. Using my Big Shot, I die cut all the colored images with coordinating dies. Next the background, starting with Distress Oxide Ink, I blended the background and die cut with Stitched Rectangles Die. Then for the mound of snow, I used Stitched Hillside Border Die and adhered it to the background. Using foam tape and wet glue I arranged my tree and critters. Glossy Accents was used on the light bulbs and black pearl pen on the critters eyes. Finally, using VersaMark Ink I stamped my sentiment, covered with silver embossing powder and set with my heat tool. Trimmed that and used a Stardust pen around the edge.
Have a great day and keep on crafting!
Affiliate links used at no cost to you. Not all links are affiliate, I just want to share what I used. All products were purchase by my unless noted. I don’t sell anything nor am I employed. This is my hobby and I hope to inspire you to play :)
Labels:
Copic Markers,
Sizzix Big Shot
Wednesday, October 17, 2018
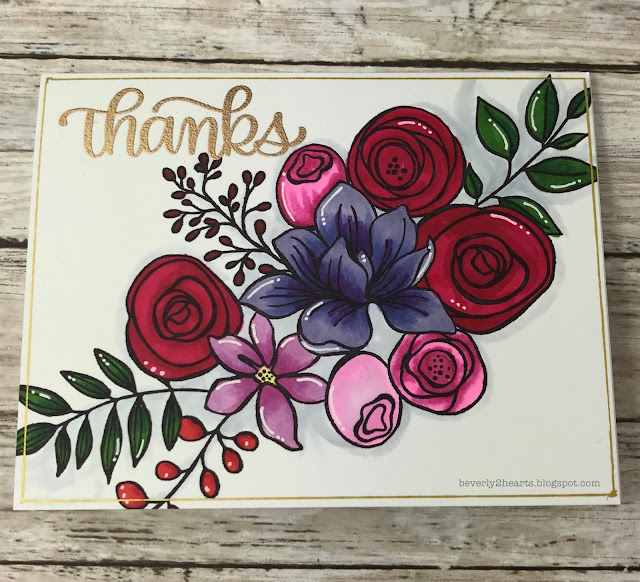
I love coloring flowers Card
This beautiful floral spray is from the October Card Kit from Simon Says Stamps. I'm sorry to say it's sold out but take a peek at all that came in the kit by clicking on the link above. I'm not a subscriber but I couldn't pass up this one up.
As usual, 110lb Card Stock is my base and is stamped with Tuxedo Black Ink and colored with Copic Markers. Details were added with a White Gel Pen. My sentiment is stamped with VersaMark Ink, sprinkled with Gold Embossing Powder and set with my Heat Tool. To add just a bit more, I drew a frame with a Gold Gel Pen.
Update on my skin cancer: still sporting a 2x3 inch telfa pad on my left temple, it's been three weeks. I'm feeling a tad like Frankenstein but hanging in there. People, please wear Sunscreen and a Hat!
Have a great day at keep on crafting!
Affiliate links used at no cost to you. Not all links are affiliate, I just want to share what I used. All products were purchase by my unless noted. I don’t sell anything nor am I employed. This is my hobby and I hope to inspire you to play :)
Labels:
Copic Markers
Wednesday, October 10, 2018
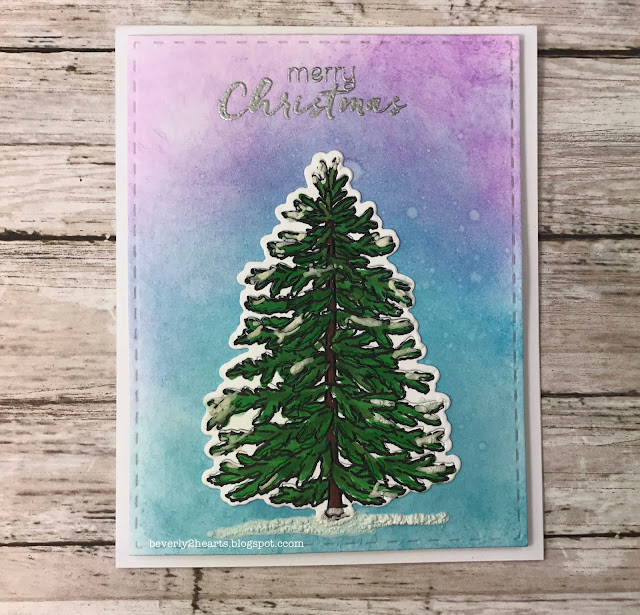
October 2018 My Monthly Hero Simple Card
I was ecstatic to receive my October kit so quickly! It came on Sunday, and considering it was shipped on Friday - I was doing my happy dance! The tree stamp and die just really appealed to me so that's what I started with first. Using Tuxedo Black Ink, I stamped on 110lb Card Stock and colored with Copic Markers. Used my trusty Big Shot die cut the pop up tree limbs and border. I got my hands on a Marvy Snow Marker and couldn't wait to use it - so I used on my tree. A bit of heat tool on it made it puff up. For my background, I used three shades of Distress Oxide Inks - wilted violet, salty ocean and broken china - and the blender brushes by Tim Holtz to blend my night sky. A spritz of water gave a reaction to resemble stars. Using Stitched Rectangle Dies I die cut the panel. Then using VersaMark Ink, I stamped my sentiment and heat embossed with silver embossing powder. Then, I mounted the panel on fun foam and attached to the card base.
Have a great day and keep on crafting!
Affiliate links used at no cost to you. Not all links are affiliate, I just want to share what I used. All products were purchase by my unless noted. I don’t sell anything nor am I employed. This is my hobby and I hope to inspire you to play :)
Have a great day and keep on crafting!
Affiliate links used at no cost to you. Not all links are affiliate, I just want to share what I used. All products were purchase by my unless noted. I don’t sell anything nor am I employed. This is my hobby and I hope to inspire you to play :)
Labels:
Hero Arts,
My Monthly Hero Kit
Friday, October 5, 2018
Altering a Die Cut to Fit Your Needs
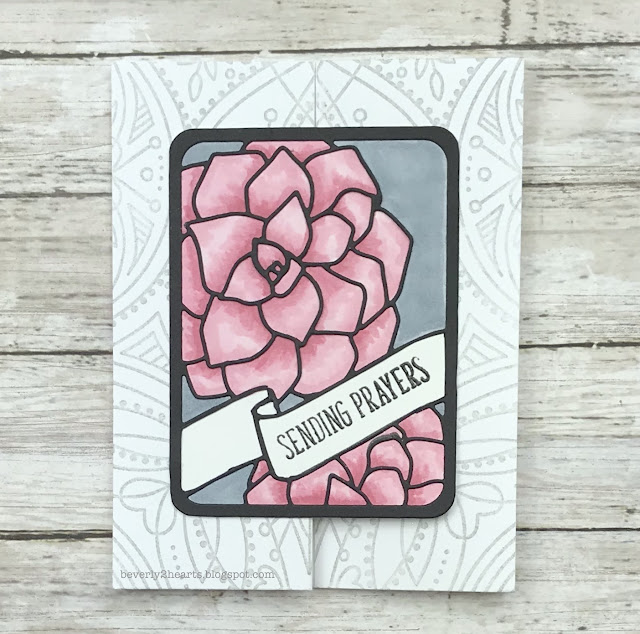
Hello there! Today I'm using stamps and dies from Neat and Tangled. Succulent Journaling Card Stamp Set and Die Set is one of my favorites! It's easy to color and has several perfect sentiments. But for today's cards I wanted a lighter look to them so I chose to alter the die cut a bit. Let me back up, first I stamped using Tuxedo Black Ink on to 110lb card stock and colored the flowers with Copic Markers. Next, I used my trusty Big Shot to cut the overlay die out of black card stock. When I placed it over the colored image, I decided I wanted the sentiment black stamping on white instead of reverse. So I pulled out a Pen Blade and cut away the area where the sentiment goes, following the indents made by the die. (See picture below) Next, I stamped the sentiment with Black Onyx Ink and heat set Clear Embossing Powder with my heat tool.
To pull the cards together, one is mounted on grey card stock and tied with a sheer ribbon and added Glossy Accents dots.
The next card is a gatefold card. The front is stamped using Cloud Ink and Center Cut Heart Stamp.
Here's a picture showing the die cut and the part I cut away.
Hope you have a great day and keep on crafting!
Affiliate links used at no cost to you. Not all links are affiliate, I just want to share what I used. All products were purchase by my unless noted. I don’t sell anything nor am I employed. This is my hobby and I hope to inspire you to play :)
Labels:
Sizzix Big Shot
Subscribe to:
Comments (Atom)


