Showing posts with label Copic Markers. Show all posts

Wednesday, March 19, 2025

"Bruce" Birthday card with his "Flat Stanley" adventure

Like many others, I struggle with masculine cards.  But when I saw Unity's Bruce stamp, inspiration struck.  Bruce was in my cart and I grievously paid for shipping.  I prefer to meet the minimum for free shipping but not today.  

Now for the "flat Stanley" adventure:  Following the tracking information - Bruce left New London MN and traveled to St Paul MN, on to St Louis MO within 2 days.  He then spent the night in St Louis MO and went to San Francisco CA where he spent the night, on to Oakland CA where he spent 2 nights, back to San Francisco CA and arrived in Memphis 2 days later, next night in St Louis MO where he rested for 4 days before making to my mailbox. Now, I would have loved to accompany him, particularly to the warmer weather, while we had frigid temps and snow.


Finally, time to create!  I decided to color with Copic Markers and used Onyx ink on Neenah card stock, then used YG03, YG09, YG17, BG96, RV11 and C1.  I used Hero Arts Circle Infinity Dies to cut Bazzill Quicksand and Patch card stock in my Empress Elite. To make Bruce's eyes shine I applied Glossy accents.  

For the background I used Large Sprinkled Dots Stencil with Frayed Burlap, Bundled Sage and Peeled Paint.  Once I was happy with that I sprayed Distress Mica Spray in Decayed for shimmer.  To bring the card together I used Bearly Arts Glue to attach "Bruce" and the sentiment.  Tiny Words Stamp from Simon Says Stamps added the perfect Happy Birthday!

Have a great day and keep on crafting!

Affiliate links used at no cost to you.  Not all links are affiliate, I just want to share what I used.  All products were purchase by me unless noted.  I don’t sell anything nor am I employed.  This is my hobby and I hope to inspire you to play :)

Wednesday, January 20, 2021

Sympathy Cards, Needed but I wish it was Happy Moments!

 Unfortunately Sympathy cards are needed.  I sent out two recently and will probably need more soon.

Decided to use a "new to me" Altenew set called Crown Blooms and got to use brand new inks from Pink Fresh Studio as a Christmas gift.  I started with my MISTI and stamping the outline in amalgam ink and then stamping the layers with Ballet Slippers, Sparkling Rose, Bubble Gum and Raspberry Bliss for the flower.  Leaves were also stamped in layers with Olive and Key Lime.  Die cutting came next and then the sprig was colored with Copics.  After arranging the bouquet I decided I wanted a background cover die so I reached for an older die from Darice making a chicken wire.  Using E6000 spray made gluing those slim pieces easier.  Using Precision Tip Glue I adhered my bouquet along the left side.  Crystal Stickles adds a bit of sparkle.

My sentiment is die cut three times and layered then attached.

Altenew Crown Bloom


The next card is done exactly like the first but is larger, the first is an A2 card and this is a 5x7 size.  The Plaid A7 Cover Plate Top covers the card base.  A few more flowers and a sentiment strip is stamped and heat embossed.

Plaid A7 Cover Plate Top


Jennifer McGuire Ink offers many valuable tips and tricks to inspire and better your craft.  I purchased heavy weight card stock for layering and I have to say, it really makes the card substantial!  If you haven't before go check out her blog www.jennifermcguireink.com

Have a great day and keep on crafting!

Affiliate links used at no cost to you.  Not all links are affiliate, I just want to share what I used.  All products were purchase by me unless noted.  I don’t sell anything nor am I employed.  This is my hobby and I hope to inspire you to play :)

Wednesday, January 6, 2021

Pickup Truck Birthday Card

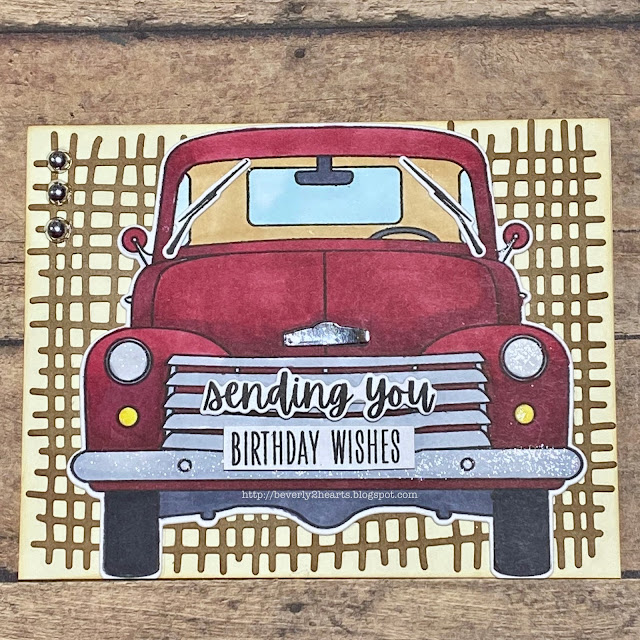
 The Big Pickup Cab stamp and die just called to me.  I had to have it and a few others from Honey Bee Stamps, so I indulged!  Now was time to play and have some fun doing it.  

http://beverly2hearts.blogspot.com


Once the truck was stamped on copic friendly paper with amalgam ink, I went to town coloring, and it really is an easy image to do that.  A little sparkle pen over the "metal" parts gave some shimmer.  The emblem was die cut using mirror card stock.  Also stamped were the wiper blades and the sentiments.  So cool that HBS includes dies for the sentiments too!  All the die cutting went through my Gemini Jr.  This was the first time I brought out the Burlap die and added a little Vintage Photo Distress Oxide ink around the edges.  Then I adhered it to the ivory card stock using Honey Bee Glue, I like that it is a larger tube-makes it a little easier for me to hold.  Next I added the pickup and a few silver baubles that I had in my stash.

Affiliate links used at no cost to you.  Not all links are affiliate, I just want to share what I used.  All products were purchase by me unless noted.  I don’t sell anything nor am I employed.  This is my hobby and I hope to inspire you to play :)

Thursday, July 16, 2020

Butterfly Kisses Card

I just adore Birdie Brown images!  This one, from My Favorite Things is called Butterfly Kisses and was so fun and quick to color.  Unfortunately it is sold out. 

I stamped with Tuxedo black ink in my MISTI and colored with Copic markers. A gold pen added earrings, shoe buckle and bracelet while a white gel pen added details. 

Gemini Jr made die cutting the image, stitched rectangles and hexagon stipple plate background a breeze. 

Fun foam raises the rectangle. The sentiment is stamped with sea glass ink. And a stardust pen adds interest to the sentiment strip. Connect glue attaches all the components to the card base 


Have a great day and keep on crafting.

Affiliate links used at no cost to you.  Not all links are affiliate, I just want to share what I used.  All products were purchase by me unless noted.  I don’t sell anything nor am I employed.  This is my hobby and I hope to inspire you to play :)

Wednesday, June 24, 2020

60th Birthday Card


Got a card for a Big birthday …at least that’s what he keeps saying.  My love is turning 60 and I made him a special card.  

I’m using products from lots of companies today.  Starting with the Quintuple Slider from Simon Says Stamps.  Decided to have the Balloon Numbers from Honeybee Stamps cut in Gold Shine card stock, coming up from behind the sentiment - which is from The Stamping Village, it’s colored with Copic markers G46, BG96, E55, E44 and B99.  It’s cut out with Stitched Rectangles from The Stamps of Life and raised with foam tape.  All of this is on my background which is from Laundry Line Paper Pad by Jen Wilson that I got at Hobby Lobby.  I used my Gemini Jr for all the die cutting.  Once my card was assembled, I added some very thin washi tape (from Hobby Lobby) as a border.


Since I cut a 12x12 sheet of Laundry Line, I went ahead and cut card bases for 3 more cards.  Used the sentiments from same stamp set to quickly make 3 similar cards minus the Quintuple slider.

Have a great day and keep on crafting!

Affiliate links used at no cost to you.  Not all links are affiliate, I just want to share what I used.  All products were purchase by my unless noted.  I don’t sell anything nor am I employed.  This is my hobby and I hope to inspire you to play :)

Thursday, June 18, 2020

Taco Birthday Card


Today I have for you a birthday card using products from many companies.  I get the Small Die of the Month kit from Spellbinders, and May’s set has these adorable stacked deco edges dies.  Unfortunately it has sold out.  

I placed the die near the edge of my base and ran it through my Gemini Jr.  Then I chose a strip of Bees Knees Paper Pad slightly wider than the die and glued it to the back of the die cut.  Using Sea Glass ink and blending brush I inked my card base.  

Next I stamped with Tuxedo Black ink the Year Nine (Taco) stamp twice.  These images were super quick to color with Copics and fussy cut.  Once the placement was decided, I stamped the sentiment, using my MISTI helped.  One of the tacos is raised with foam tape.

Have a great day and keep on crafting!

Affiliate links used at no cost to you.  Not all links are affiliate, I just want to share what I used.  All products were purchase by my unless noted.  I don’t sell anything nor am I employed.  This is my hobby and I hope to inspire you to play :)
Friday, May 29, 2020

Honey Bee House Builder Card

Hello everyone, anyone else getting annoyed with the this staying at home stuff?  Because I’m a two time Heart Transplant Recipient, I’m used to choosing my needs versus wants.  But it just about broke my heart when Golds Gym closed all the St Louis area locations.  I’m a swimmer and their pool was perfect for me.  Open all day and I could go around noon and practically have the pool to myself.  I miss my swim time - calms me and wears be out.  Enough about me…lets talk card making.

When Honey Bee Stamps introduced their Home Building Honey Cuts, I fell in love!  They have since added a Christmas, Halloween, Sweet Shop, Farm House add on, stencils and paper pads.  Oh the possibilities!  I haven’t bought it all, but I’m getting closer - lol.  While I will admit that looking at all those dies, it did seem a bit overwhelming.  But now that I’ve done a few….loving it!!!!  


You need the House Builder Honey Cut for the house base.  For this one I added the Farm House Add on Stamps and honey cuts along with the shutters from the Gingerbread HouseHome Essentials Paper Pad takes care of roof, siding, front door and chimney.  Stencils work if you don’t have the paper pad.  I will tell you that teeny tiny door handle takes some coordination to adhere, thank goodness for reverse tweezers!  This card makes me so happy - I think I giggled the whole time putting it together.


Have a great day and keep on crafting!  It’s keeping me sane now!

Affiliate links used at no cost to you.  Not all links are affiliate, I just want to share what I used.  All products were purchase by my unless noted.  I don’t sell anything nor am I employed.  This is my hobby and I hope to inspire you to play :)

Wednesday, June 5, 2019

Beautiful Bouquet of Flowers Card

Ok, so that title sounds like I'm bragging on my card...nope, I just love the Floral Mix Background Stamp.  I love flowers and more so, I love to color flower images!  If only the images could include that heavenly aroma....  

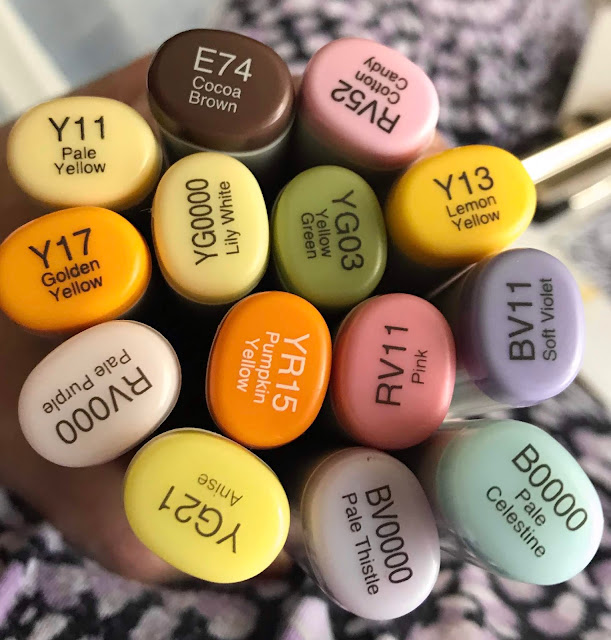
Today's card started with nocture ink on Neenah classic crest solar white card stock using Floral Mix Background Stamp.  Next is coloring with copic markers.  I wanted to keep the colors soft.  
Copic

Stitched rectangles and my Gemini Jr trims the piece.  Fun foam is attached to the back for dimension and is attached to the card base.  Three celebrate die cuts in black are stacked and attached.  Finally a shimmer pen is brushed over the flower centers.
Flowers
flowers
Have a great day and keep on crafting!


Affiliate links used at no cost to you.  Not all links are affiliate, I just want to share what I used.  All products were purchase by my unless noted.  I don’t sell anything nor am I employed.  This is my hobby and I hope to inspire you to play :)

Wednesday, May 15, 2019

Crafty Cards - May My Monthly Hero Kit

Have I told you how much I love Hero Arts?  Especially their My Monthly Hero Kit?  This month is my absolute favorite, all crafty goodness images and dies along with other goodies!  Plus there were soooo many add ons for this kit...my wish list certainly got longer - if only my budget were bigger!  Oh the trials of crafters and their money woes....lol.

At the recent Creative Keepsakes Convention I purchased some Pearl Alcohol Inks and played with them.  I grabbed the large fancy die and backed it with a small piece.  Next, some shiny silver card stock to die cut knitting needles in my Gemini Jr.   Finally, a VersaMark stamped sentiment from the kit - heat embossed with silver embossing powder.  Fun Foam backs the panel and a glitter pen adds details.
May My Monthly Hero Arts Kit

The next card is all about those markers.  Using my Misti, I stamped the marker repeatedly in a row using Tuxedo Black ink.  The sentiment is stamped with VersaFine Ink and heat embossed with clear embossing powder.  Using Copic markers, I colored them in rainbow order.  Stitched Rectangle die trims the piece and it's backed with red card stock and then mounted on my black card base.  A white piece is placed inside to sign.

I had a blast whipping out these two cards and can't wait to get back to the kit to play some more!

Have a great day and keep on crafting!

Affiliate links used at no cost to you.  Not all links are affiliate, I just want to share what I used.  All products were purchase by my unless noted.  I don’t sell anything nor am I employed.  This is my hobby and I hope to inspire you to play :)
Monday, March 18, 2019

Piece of Cake Birthday Card

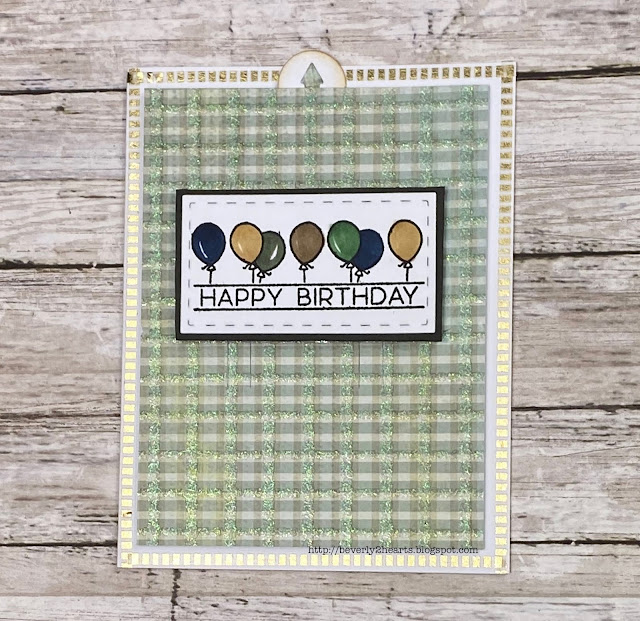
Hello there, I'm using some new products on today's card.  I knew the moment I saw it, that I had to have the Piece of Cake stamp set from Honey Bee Stamps.  Let me tell you, the two stamps I ordered came super fast and was packed with love!  The other new element I used was an embossing folder that came with my gemini jr.  Normally, I stick with my big shot for embossing folders but the included folder worked just fine.  I do like the raised area along with the textured background.  

I started by stamping with memento ink on 80 lb Neenah card stock, knowing that I would be using my Silhouette to cut these images out.  Of course, I used the MISTI so for repeated stamping, then it was time to color with Copics.  This is usually my standard practice, stamp a lot, spend time coloring and then cut them all out - so when I'm ready to make a card, it goes pretty quick.   So to pull my card together, the embossed background was trimmed, fun foam attached behind, then I positioned my cake on the pedestal, added the other elements and glued them down.  The sentiment is stamped, sprinkled with embossing powderheat embossed and die cut with coordinating die.  All of this is attached to some new card stock from Hero Arts that has been inked and glued to my card base.
beverly2hearts.blotspot.com
Have a great day and keep on crafting!

Affiliate links used at no cost to you.  Not all links are affiliate, I just want to share what I used.  All products were purchase by my unless noted.  I don’t sell anything nor am I employed.  This is my hobby and I hope to inspire you to play :)

Monday, February 11, 2019

I'm Back and Four Cards

Hello there,  I decided to take a break from blogging during the holidays.  Also, I changed up how I prioritize the month of December and I realized a few things...I finished nearly all of my Christmas Shopping first before I even decided what my Christmas Card would be ( I make 65 cards).  Normally it's just the opposite - cards first then shopping.  In fact, in previous years, I have planned and started cards in September....  I gave myself a break and realized the cards that I love making and sending would still be just as meaningful if they were received in January.  Now, I got them mailed about a week before Christmas but wow, with the pressure off, I enjoyed it so much more!  

Every January I attend a weekend crop with a group of wonderful ladies from church.  It's been 15 years, with me missing only two - The year I got my second heart and the year I got a new hip.  The cards I'm showing today were from that.  I like coloring a lot! So often times I will have stamped images ready to color so when the mood strikes I'm ready.  At this years crop, I made cards with them.

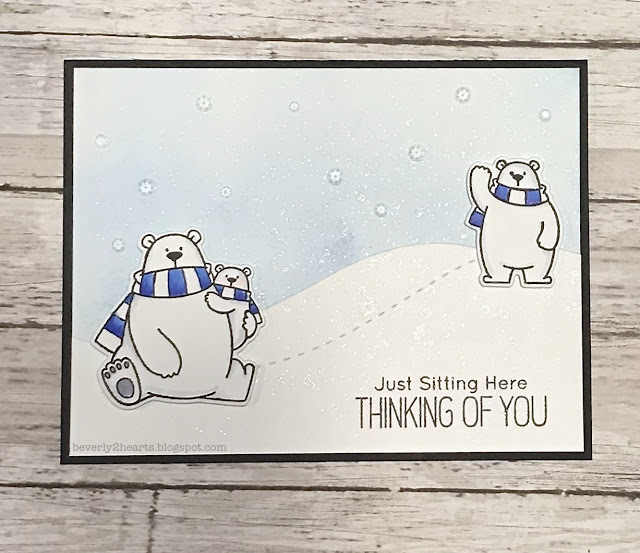
MFT Polar Bear Pals
Bearing Gifts Card uses a cloud stencil and distress ink for the background.  Next, stitched slopes and hills add my snow bank.  The bears, bucket of fish and sentiment are from polar bear pals and are stamped with mementa ink and colored with copic markers.  The background is sprayed with sheer shimmer spritz for sparkle and my images are raised with foam tape.  All of this is mounted on black cardstock and a white sheet is placed inside for easier signing.

MFT Polar Bear Pals Stamp
Thinking of you card was made exactly like the one above with different images from the same set and crystal gems were added.
MFT Polar Bear Pals
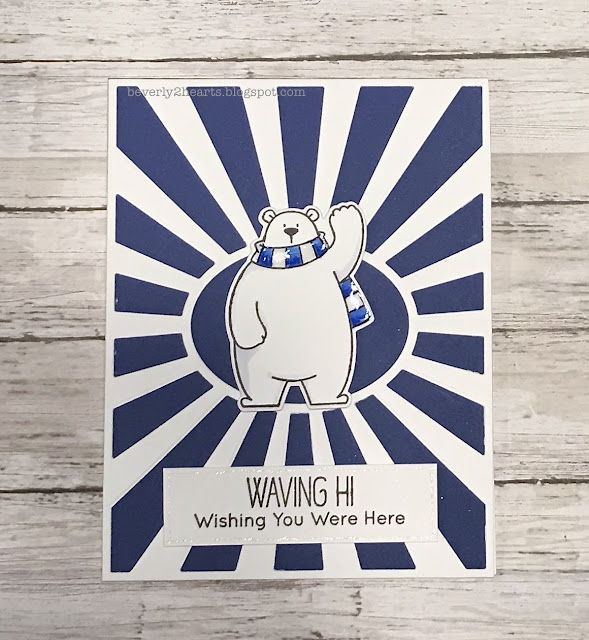
Waving Hi card uses a background die from My Monthly Hero Kit that has sold out.  The bear has glossy accents added to his scarf.  The sentiment has an outline of sparkle pen.  Both the sentiment and bear are raised with foam tape.

Beary good birthday card is just like the one above, except I used the negative space from the die to get two backgrounds from one pass through the Sizzix machine.  A silver gel pen adds glimmer to the skate.

Have a great day and keep on crafting!

Affiliate links used at no cost to you.  Not all links are affiliate, I just want to share what I used.  All products were purchase by my unless noted.  I don’t sell anything nor am I employed.  This is my hobby and I hope to inspire you to play :)

Friday, October 19, 2018

Simple card with barely any shimmer!

If you've noticed, I like shimmer, sparkle and shine on all my cards!  This one has just the tiniest bit of shimmer - feels so ...wrong!  I'm using the October 2018 Kit from Hero Arts.
Like most cards, I started with 110lb Card Stock and stamped my images with Tuxedo Black Ink and colored with Copic Markers.  Using my Big Shot, I die cut all the colored images with coordinating dies.  Next the background, starting with Distress Oxide Ink, I blended the background and die cut with Stitched Rectangles Die.  Then for the mound of snow, I used Stitched Hillside Border Die and adhered it to the background.  Using foam tape and wet glue I arranged my tree and critters.  Glossy Accents was used on the light bulbs and black pearl pen on the critters eyes.  Finally, using VersaMark Ink I stamped my sentiment, covered with silver embossing powder and set with my heat tool.  Trimmed that and used a Stardust pen around the edge.  
My Monthly Hero Kit October 2018
Have a great day and keep on crafting!

Affiliate links used at no cost to you.  Not all links are affiliate, I just want to share what I used.  All products were purchase by my unless noted.  I don’t sell anything nor am I employed.  This is my hobby and I hope to inspire you to play :)

Wednesday, October 17, 2018

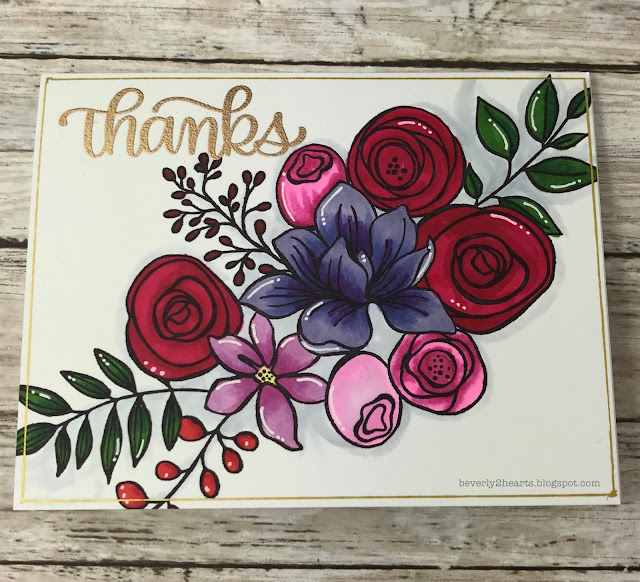
I love coloring flowers Card

This beautiful floral spray is from the October Card Kit from Simon Says Stamps.  I'm sorry to say it's sold out but take a peek at all that came in the kit by clicking on the link above.  I'm not a subscriber but I couldn't pass up this one up.

As usual, 110lb Card Stock is my base and is stamped with Tuxedo Black Ink and colored with Copic Markers.  Details were added with a White Gel Pen.  My sentiment is stamped with VersaMark Ink, sprinkled with Gold Embossing Powder and set with my Heat Tool.  To add just a bit more, I drew a frame with a Gold Gel Pen.
http://beverly2hearts.blogspot.com
Update on my skin cancer:  still sporting a 2x3 inch telfa pad on my left temple, it's been three weeks.  I'm feeling a tad like Frankenstein but hanging in there.  People, please wear Sunscreen and a Hat!

Have a great day at keep on crafting!

Affiliate links used at no cost to you.  Not all links are affiliate, I just want to share what I used.  All products were purchase by my unless noted.  I don’t sell anything nor am I employed.  This is my hobby and I hope to inspire you to play :)

Thursday, June 7, 2018

Card Making with 30 Day Coloring Challenge Work

I don't know if you've done The Daily Marker 30 Day Coloring Challenge, but you SHOULD!  Jump in anytime during the month!  Having a blast doing it and today's card uses my 1st day of coloring.  Using the same stamp from my last post - Simon Says Stamp June 2018 Card Kit.  Stamped on Neenah 110lb Card Stock with Tuxedo Black Ink and colored with Copic Markers.  Lots of shine was added with a Sparkle Pen.  The sentiment is two colors of die cuts from Celebration Script Words run through my Big Shotand then stacked, slightly offset.  Sequins were stamped with Congrats Stamp & Cut set in ink from Hero Arts.  A bit of Glossy Accents brings more shine.  

Hope you're having a great day and keep crafting!

Affiliate links used at no cost to you.  Not all links are affiliate, I just want to share what I used.  All products were purchase by my unless noted.  I don’t sell anything nor am I employed.  This is my hobby and I hope to inspire you to play :)

Monday, June 4, 2018

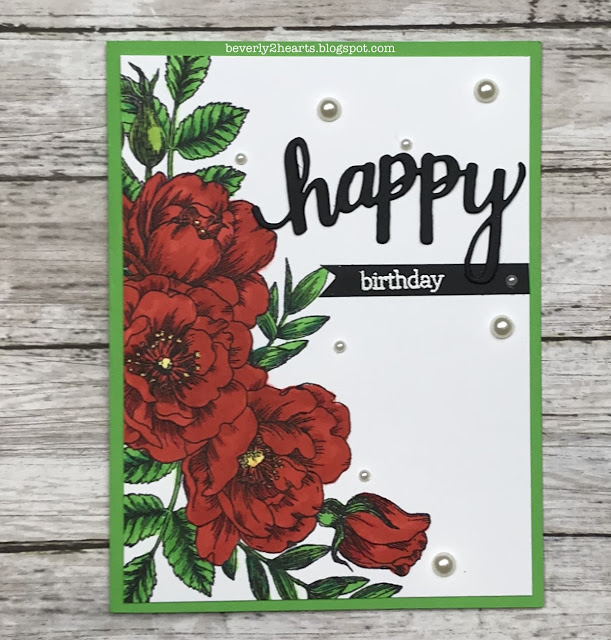
Another First - Card Kit from Simon Says Stamps

I've been a coloring fool - but it's been a fun time for this girl!  Simon Says Stamps has a June Card Kit that has already sold out and I know why - the 6x8 stamp set sells for $24.99 and the kit cost $34.99.  Just couldn't pass it up when I saw all it had in it and it did not disappoint.  First time I had my hands on their card stock and I see more of that joining my stash soon, very thick and sure beats the stuff I've been buying at my local chain store.  So, today's card uses that big gorgeous floral swag and I had a ball coloring it with Copic Markers.   My sentiment is from Hero Arts and it seems I've been grabbing those a lot lately - that Happy Stamp N Cut Set sure does make me happy.  Three of those dies went through my Big Shot and I stacked them together using Multi Matte Medium.  I stamped with VersaMark Ink and heat embossed with White Embossing Powder.  Those little pearls are from my stash.  To bring my card together, all this is attached to my card base, card stock from Michaels.


Hope you have a great day and keep crafting.

Affiliate links used at no cost to you.  Not all links are affiliate, I just want to share what I used.  All products were purchase by my unless noted.  I don’t sell anything nor am I employed.  This is my hobby and I hope to inspire you to play :)
Tuesday, May 29, 2018

Guest Designing on Power Poppy!!

Hello all,
Today is a few firsts for me!  I'm the guest designer on the Power Poppy Blog for their Hues to Use Challenge.  NOTE:  For this opportunity I received this digital image at no cost.  I found out about Power Poppy Stamps when I signed up for The Coloring Challenge Road Trip.  Kathy from The Daily Marker came to St Louis and my best friend Becky and I spent the day coloring and checking out (and purchasing) the wonderful stamps at Power Poppy.

I'm a traditional stamper and for this card, I used my first ever digital stamp Everything's Rosy.  I do love the flexibility to size these images to fit my project.  Copic Markers on Neenah Classic Crest 110lb Card Stock is my "go-to" for coloring.  I tried to print my digital stamp on Neenah - my printer wasn't having any of that!  So I changed my tactic and printed on Canson Mixed Media and whipped out my Kuretake Gansai Water Colors and went to town!  My image looked "flat" so I printed out another copy of that digital stamp and watercolored a few of the flowers.  After I fussy cut parts of flowers, I used Tim Holtz Collage Medium and very carefully placed the flower bits on top to keep it raised.  I set that aside to dry.  For more dimension, I added Glossy Accents to the polka dot cup.  Detail was added with a White Uniball gel pen and Black Micron Pen.  To bring my card together, I used Nuvo Deluxe Adhesive to attach fun foam to both my image and card base.


So pop on over to Power Poppy Blog and join in!  Have a great day and keep crafting!

Affiliate links used at no cost to you.  Not all links are affiliate, I just want to share what I used.  All products were purchase by me unless noted.  I don’t sell anything nor am I employed.  This is my hobby and I hope to inspire you to play :)

Wednesday, May 23, 2018

I just love this Birthday Cake image

Hello all,
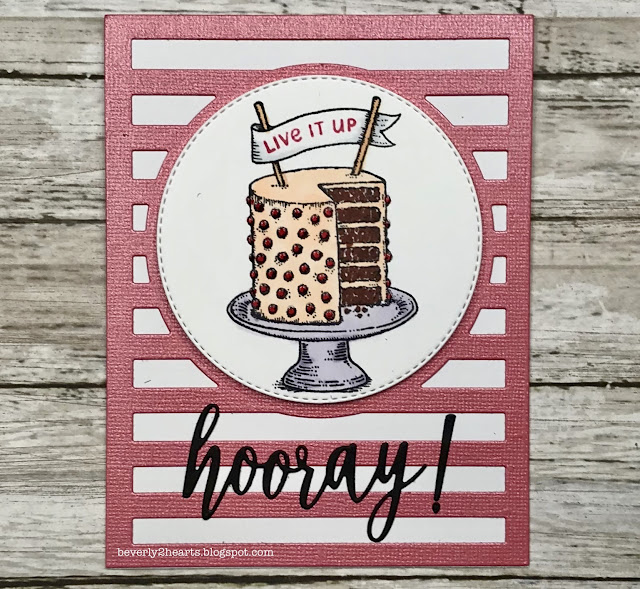
Power Poppy has this wonderful stamp set called Party Time and I love that you can change up the sentiment on the banner.  It also has a bunting and a slice of cake with a candle and a very cool stack of presents.  Today's card uses this set.  I colored my chocolate cake with Copic Markers after I stamped the image with Tuxedo Black Ink onto Neenah Classic Crest 110lb Card Stock.  To make my cherries shine I covered them with Glossy Accents.  Then I die cut my chocolate cake using Stitched Circle Dies through my Big Shot.  For the background, I used Bazzill Canvas Bling Cardstock with Horizontal Stripe Die.  To bring the card together, I attached the background to my card base with Kokuya Long Line Adhesive.  I trimmed some fun foam to fit behind my stitched circle and used Nuvo Deluxe Adhesive to attach.  Then using the included word hooray I die cut black cardstock with Sizzix Adhesive Sheets attached to the back - to make attaching easier.
Birthday

Birthday
Have a great day and keep crafting!

Affiliate links used at no cost to you.  Not all links are affiliate, I just want to share what I used.  All products were purchase by my unless noted.  I don’t sell anything nor am I employed.  This is my hobby and I hope to inspire you to play :)

Saturday, May 5, 2018

My National Scrapbooking Day Challenges for Scrapbook.com

Two cards and a layout for Scrapbook.com National Scrapbooking Day and one of those cards is for Power Poppy's Hues to Use Challenge. 
Party Time Stamp Set from Power Poppy was stamped with Tuxedo Black Ink (Memento) on Neenah Classic Crest 110lb and colored with Copic Markers.  Happy Birthday from Hero Arts Ribbon Messages Stamp & Cut was also stamped on Neenah with Versafine Ink.  It was sprinkled with Clear Embossing Powder (Ranger).  The background is a Bold Confetti Die (Hero Arts), the colored image was cut with Stitched Rectangles Die (Stamps of Life) and the sentiment was all run through my trusty Big Shot (Sizzix).  The colored image and sentiment are raised with scotch foam tape.  This for the Die Cut Challenge.

 This card was made with Written in the Stars and Die-namics Shining Stars.  The background is made with Distress Oxide Inks (Ranger). This challenge was to show your style.  Mine is sparkly and colorful!
This is for the Live Love Laugh Challenge - using lots of embellishments.  These papers are from Echo Park.  My Grandson is quite a bit younger here.  I did manage to stitch on the side with Sew Easy Tool.

Hope you are all spending time crafting today!  Happy National Scrapbooking Day!

Affiliate links used at no cost to you.  Not all links are affiliate, I just want to share what I used.  All products were purchase by my unless noted.  I don’t sell anything nor am I employed.  This is my hobby and I hope to inspire you to play :)