Showing posts with label MISTI. Show all posts

Thursday, February 20, 2025

All Kinds of Wonderful Card

 My goodness!  If you are a lover of stacking dies - Elephantastic is the way to go.  Altenew has a tiny arrow imbedded in this die, so when you layer them up, it's easy to place them perfectly.  Only the top layer doesn't have the arrow.  Meaning those dies that have a "helper" and the placement is not obvious - that arrow rocks!  When I first saw this die I was drawn to it, such perfect details.  Social Media is full of reels with baby elephants lately and I just can't look away.


All Kinds of Wonderful


This card came together with Ocean Waves Bold Back ground stamp in my MISTI using Grassy Knoll ink.  The trimmed piece is backed with black card stock.  Empress Elite makes die cutting Elephantastic on Fog Card stock easy peasy. Bearly Arts Glue is my glue of choice lately and like I said above those elephants were quick to assemble.  Finally Skinny Sentiment Strips 1 placed in my MISTI made stamping with Versafine Onyx ink fast and aligned.

Have a great day and keep on stamping!

Affiliate links used at no cost to you.  Not all links are affiliate, I just want to share what I used.  All products were purchase by me unless noted.  I don’t sell anything nor am I employed.  This is my hobby and I hope to inspire you to play :)


Wednesday, March 16, 2022

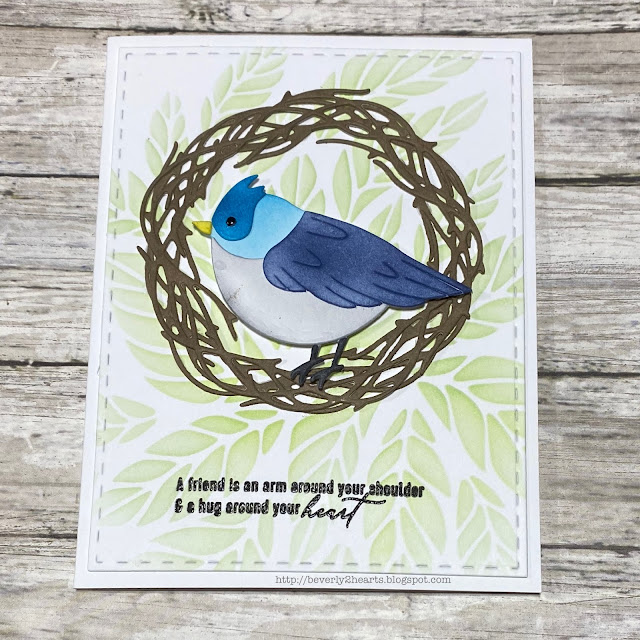
Birdie Friendship Card

 Today's card used white die cuts that I colored individually.  Heck, it's easier to die cut a bunch of white than finding the right color card stock and putting the right die on that paper.  So today, I pulled out my water media mat and some of those precut dies.  

Feathered Friends 4

Feathered Friends 4


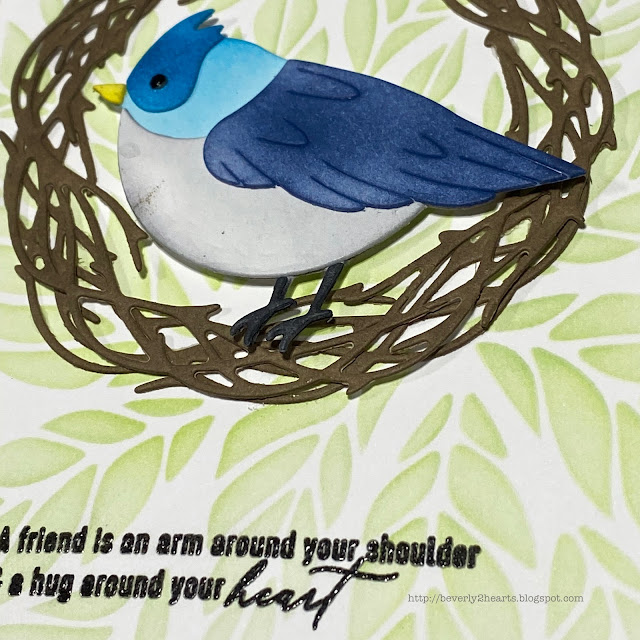
Feathered Friends 4 is the bird and I chose Blending Brushes to color Summer Sky, Deep Ocean, Navy, Lemon Drop and Tuxedo black.  Once it was dry I glued all the parts together with Bearly Arts Glue.  So my bird needs a nest and the Grapevine Wreath is perfect - and I also had that precut in white card stock, so I grabbed two.  Cup O Joe was applied with a mini blending tool and really got into all those nooks and crannies.  Now I need a background...I pulled out the Tumbling Leaves stencil with blending brushes and Fresh Pear and Grassy Knoll.  Stitched rectangles trimmed that perfectly in my Gemini Jr.  Lastly, I need a sentiment so I chose one from Friendship Blooms and I stamped in my MISTI with Amalgam ink, then Versamark and clear embossing powder was melted.  I haven't had much luck with black embossing powder and sentiments so I like to add clear over a black stamped sentiment.

Have a great day and keep on crafting!

Affiliate links used at no cost to you.  Not all links are affiliate, I just want to share what I used.  All products were purchase by me unless noted.  I don’t sell anything nor am I employed.  This is my hobby and I hope to inspire you to play :)


Wednesday, August 25, 2021

Bridal Shower Invite and Road Trip Crafting

 My beautiful niece, Maura, is getting married!  My sister and I are throwing a Bridal Shower for her and below is what I came up with for an invite.  

Spellbinders Die

Spellbinders Die
My parents are in their 80's, adventurous and love to travel, even though my Dad worked for the Airlines, my Mom no longer wants to fly - so road trip it is!  My sister and I went with them so we had 3 drivers.  Our original plan was to drive to New Hampshire to see a close family friends Grandson play baseball.  That fell through when he sustained an injury.  When that happened we opted for Colorado.  It was gonna be a 2 day drive so I brought crafty supplies to assemble the invites. 


Yep, I assembled those diamond rings on the road! Even with my shaky hands.  

I started at home, by stamping the background with Center Cut Heart Background using Soft Granite ink using my MISTI.  My Pinkfresh stitched scalloped squares had just arrived, so I tried several different combos and ended up with the smaller die set in 2 different shades of pink.  Those were super quick to cut in my Gemini Jr.  Edges were inked with pink ink and that was adhered to the front of the card. 

Using a silver card stock, I die cut the ring and setting in my Side kick.  Holographic card stock was used for the "diamond".  And just to make this a little more solid, I die cut all this again with 110 lb card stock.  Using precision glue and tweezers, the diamond ring was assembled and then adhered to the center of the card.

The inside invitation was printed with my computer, trimmed and adhered inside with score tape.  And once the invitations were addressed and stamped, we mailed them from Colorado.

Our road trip was awesome!  We stayed in Keystone and we road the gondola to the top of Vail and had lunch.  It's a perfect place to bring kids of all ages, lots of activities to do.  Glenwood Springs is my favorite place on earth!  We spent several hours there soaking up the mineral waters with over 1,000,000 gallons of water!  Another highlight was renting a pontoon boat on Lake Dillon and cruising the lake!  Shopping of course, was included and fun!  Best of all was spending this time with my Parents and Sister!

Have a great day and keep on crafting.

Affiliate links used at no cost to you.  Not all links are affiliate, I just want to share what I used.  All products were purchase by me unless noted.  I don’t sell anything nor am I employed.  This is my hobby and I hope to inspire you to play :)


Monday, August 17, 2020

Flippin Awesome Birthday Card

Had so much fun playing with new stamps and dies from Honey Bee Stamps!  Started with a slimline base and wanted it to resemble walking on the beach.  Kraft paper was die cut with slimline base and edges were inked.  Next, I stamped the flip flops on turquoise paper and again on white.  I die cut the flops and hand cut the white “straps”, they were then glued on top and crystal stickles were spread on top because this girl needs glitter.  Using my MISTI, I stamped several shells using different colors of ink.  Then they were die cut using the Gemini Jr. and colored pencils added detail.


Time to figure the layout, and once that happened I stamped the sentiment with versa mark ink and heat embossed the sea foam embossing powder.  Then…I got out my “sand” and put glue where I wanted the sand and sprinkled it on and let dry.  All the elements were attached, some with glue and some with pop dots.  Please Note:  I won the Mudd Puddles products as an attendance prize.


Have a great day and keep on crafting!


Affiliate links used at no cost to you.  Not all links are affiliate, I just want to share what I used.  All products were purchase by me unless noted.  I don’t sell anything nor am I employed.  This is my hobby and I hope to inspire you to play :)


Thursday, June 18, 2020

Taco Birthday Card


Today I have for you a birthday card using products from many companies.  I get the Small Die of the Month kit from Spellbinders, and May’s set has these adorable stacked deco edges dies.  Unfortunately it has sold out.  

I placed the die near the edge of my base and ran it through my Gemini Jr.  Then I chose a strip of Bees Knees Paper Pad slightly wider than the die and glued it to the back of the die cut.  Using Sea Glass ink and blending brush I inked my card base.  

Next I stamped with Tuxedo Black ink the Year Nine (Taco) stamp twice.  These images were super quick to color with Copics and fussy cut.  Once the placement was decided, I stamped the sentiment, using my MISTI helped.  One of the tacos is raised with foam tape.

Have a great day and keep on crafting!

Affiliate links used at no cost to you.  Not all links are affiliate, I just want to share what I used.  All products were purchase by my unless noted.  I don’t sell anything nor am I employed.  This is my hobby and I hope to inspire you to play :)

Wednesday, February 28, 2018

Camellia Build-A-Flower Birthday Card

Sometimes I pick up a product to play with and just struggle deciding how to use it.  Not the case today!  Youtube has wonderful videos and Jennifer McGuire Ink's Stamp Layering video inspired me.  Strongly suggest you check her out!!!  

Using Camellia Build-A-Flower Stamp and Die set (Altenew), on Neenah Classic Crest 110 lb card stock I stamped the flower with Tropical Raspberry (Ranger), Abandoned Coral Distress Oxide and Candied Apple Distress Oxide inks. Then stamping the leaves with Twisted Citron Distress Oxide, Green Leaf (Simon Says Stamps) and Moss (Hero Arts) ink.  Using my Mini Misti made stamping multiples super easy.  Next I die cut flowers and leaves with the corresponding dies in my Big Shot

Hobby Lobby recently had clearance dies and todays card uses one.  Decorative Curved Squares (Spellbinders) was easy to release from the die since I used a sheet of wax paper between the cardstock and die.  I then inked the edges and adhered to my base.  The flower was then raised with foam mounting tape and leaves tucked under.

Final touches include a Happy die cut and Birthday stamp from Happy Stamp and Cut (Hero Arts).  Versafine Black ink and Clear Embossing Powder helped the sentiment pop.  Multi Medium Matte adhesive works great for gluing those tiny bits down.  Finally, Sheer Creations ribbon (Michaels) is tied in a bow.  

Have a great day and keep on crafting!

Thursday, June 15, 2017

Fathers Day Card with Hero Arts

My last cards were made with Hero Arts Monthly Kit (May) and featured mermaids and other underwater goodies.  I had all that sitting out still, (yes, I'm lazy and hadn't put it all away) when I reached for another new Hero Arts Stamp that I haven't used yet called Color Layering Octopus.  These two went together perfectly and I made three cards with them.  Bonus:  Got the Octopus Stamp on sale 40% off at Joanns.

Again, I used the monthly kit stencil and Tattered Angels Glimmer Mist for the background.  One used the stencil and the next one I turned over the wet stencil onto fresh paper for the background.  The octopus was stamped with Prussian Blue Palette Ink for the base layer and then Versamark for the second layer and heat embossed with Zing Silver Embossing Powder.  Loved using my MISTI on the octopus as I was stamping over the misted background, four layers of ink was all it took to get really good coverage on the base layer.  Some coral was stamped and others were die cut along with seaweed.  The starfish was stamped with Spiced Marmalade Distress Oxide and really covered the background as well.

For the sentiment I used Justrite Stamps All In The Family and TAC (The Angel Company) All-American Blue ink.  But wasn't paying attention when I stamped the starfish and covered it partly with the sentiment strip.


Hope you have a great day and keep on crafting!

#heroarts