Showing posts with label Simon Says Stamps. Show all posts

Thursday, February 27, 2025

Love you to pieces card

 Valentines Day came and went but here's a card you could use for Heart Day or to let a special someone know how much you love them.  At our house, we celebrate February 14 and yes we got that from Tim the Tool man Taylor aka Tim Allen.  Yes, we are weird!

http://beverly2hearts.blogspot.com


This card started out with a bright pink card base stamped with Versa Mark ink using Heart to Heart Stamp.  White Satin Pearl embossing powder was sprinkled and heated - Love how it looks on that bright back ground!  While I had my Wagner Heat Tool out I put Honey Bee Stamps SWAK stamp in my MISTI and again stamped with Versa Mark ink and this time I used Pink Sparkle embossing powder.  I stamped several and used the coordinating Honey Bee Stamps SWAK die in my Empress Elite.  Next I used Simon Says Stamp Love Stamp and Die for the word die and sentiment strip - Raspberry Bliss ink was used.  To bring the card together, I trimmed the back ground, placed my lips with one Foam Strips and used Bearly Arts Glue to adhere everything down.  Sparkle accents were made with my Stardust Pen.  I wish you could see this card in person, as the sparkle lips really catch the light.

Have a great day and keep on crafting!

Affiliate links used at no cost to you.  Not all links are affiliate, I just want to share what I used.  All products were purchase by me unless noted.  I don’t sell anything nor am I employed.  This is my hobby and I hope to inspire you to play :)


Wednesday, March 9, 2022

More Pinkfresh Studio Floral - Sympathy Cards - Choose Hope

 Just like my previous post - I'm loving the whole Pinkfresh Studio stamp, stencil and die sets!  This time it's all about Choose Hope.

Unfortunately I needed to make some sympathy cards so when I created a whole bunch of the floral sprays ready to go, I had what I needed to make some quick cards.  Again, I pulled out some cover dies, embellishments and sentiment stamps and put these together pretty easily.

http://beverly2hearts.blogspot.com

  
http://beverly2hearts.blogspot.com

http://beverly2hearts.blogspot.com

http://beverly2hearts.blogspot.com
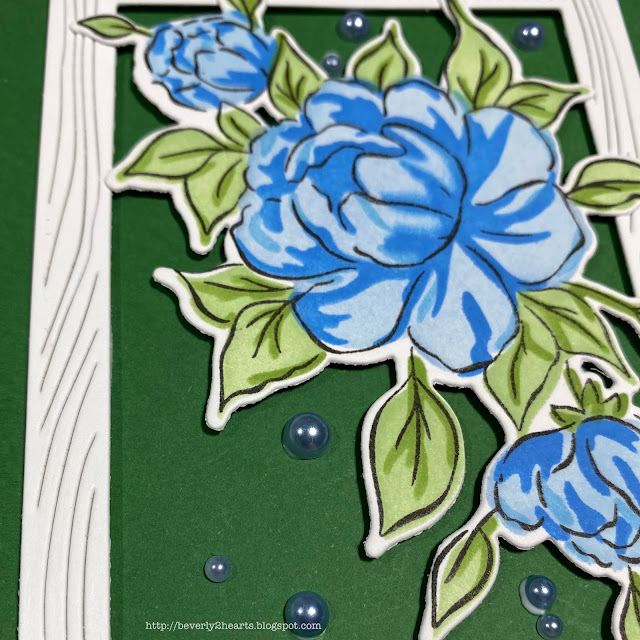
These florals were colored with Pinkfresh inks: Sky Blue, Summer Shower, Seaside, Fresh Pear and Grassy Knoll.  Blender Brushes made the coloring super quick with layering stencils.  Pixie spray helped with those stencils! MISTI helped repeated stamp Choose Hope with Amalgam Ink and of course the Gemini Jr made fast work die cutting.  For the cover dies, I chose Horizontal Stripes, Wood Frame Infinity Die and Leaves and Vines with a white 110 lb card stock.  Scotch foam tape was used with the frame die.  All the card bases were made with Recollections 110 lb card stock.

Sentiment Strips were stamped and attached with Bearly Art Glue.  Embellishments are from Trinity Stamps.  The Tiny Words stamp is from Simon Says Stamp.  Some sparkle pen was used for shimmer.

Have a great day and keep on crafting!

Affiliate links used at no cost to you.  Not all links are affiliate, I just want to share what I used.  All products were purchase by me unless noted.  I don’t sell anything nor am I employed.  This is my hobby and I hope to inspire you to play :)


Wednesday, April 29, 2020

How Awesome You Are Card

These are such strange times right now!  And, when you throw in another major life experience, like an child with an undiagnosed illness that requires a hospital stay or purchasing and closing on a new home things are bound to be more complicated!  Both have happened to family members and I'm sure it's happened to others, but isn't heart warming when you see kindness happening!  These are not my stories to tell but just a glimpse into situations that continue to arise all over.

Todays card is one to send love during these times.  

First step was stamping the background with Heart to Heart with Versamark ink and sprinkled clear embossing powder and heat set.  Picked rasberry and spun sugar ink was blended then a shimmer spray was applied.  The sentiment was stamped with charcoal ink and re-stamped with Versarmark and clear embossing powder was heat set for shine.  The piece was then die cut with stitched rectangles.  Next came the bow* made with 7/8 inch organza ribbon and attached.  Foam tape adds dimension to Razzle Berry card stock and finally Valerie ice gems were added with connect glue.

* I learned how to tie these bows from www.amazingpapergrace.com tutorial.  I could not find the same online tutorial but I recommend checking out her site!

Have a great day and keep on crafting!

Affiliate links used at no cost to you.  Not all links are affiliate, I just want to share what I used.  All products were purchase by my unless noted.  I don’t sell anything nor am I employed.  This is my hobby and I hope to inspire you to play :)

Wednesday, June 5, 2019

Beautiful Bouquet of Flowers Card

Ok, so that title sounds like I'm bragging on my card...nope, I just love the Floral Mix Background Stamp.  I love flowers and more so, I love to color flower images!  If only the images could include that heavenly aroma....  

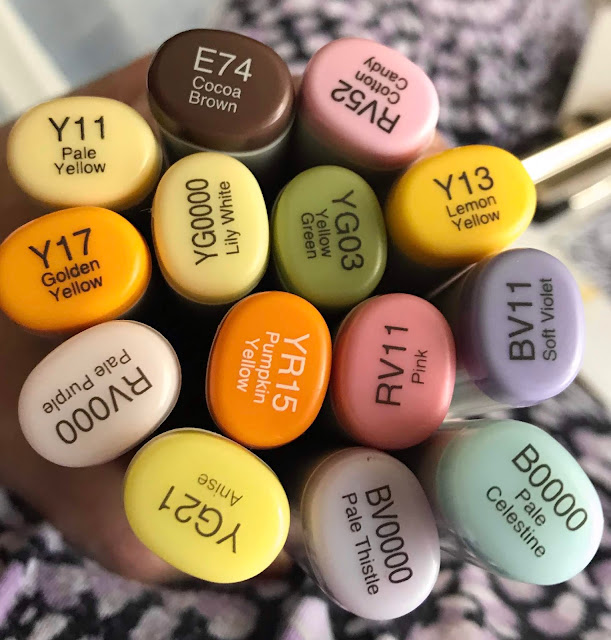
Today's card started with nocture ink on Neenah classic crest solar white card stock using Floral Mix Background Stamp.  Next is coloring with copic markers.  I wanted to keep the colors soft.  
Copic

Stitched rectangles and my Gemini Jr trims the piece.  Fun foam is attached to the back for dimension and is attached to the card base.  Three celebrate die cuts in black are stacked and attached.  Finally a shimmer pen is brushed over the flower centers.
Flowers
flowers
Have a great day and keep on crafting!


Affiliate links used at no cost to you.  Not all links are affiliate, I just want to share what I used.  All products were purchase by my unless noted.  I don’t sell anything nor am I employed.  This is my hobby and I hope to inspire you to play :)

Monday, June 4, 2018

Another First - Card Kit from Simon Says Stamps

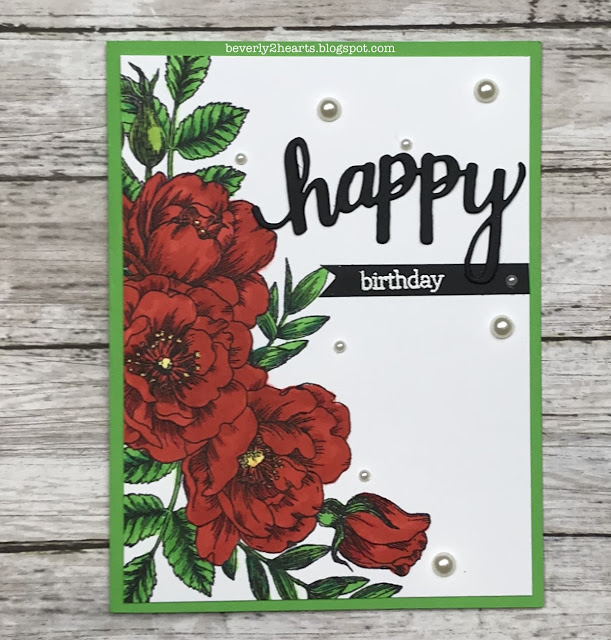
I've been a coloring fool - but it's been a fun time for this girl!  Simon Says Stamps has a June Card Kit that has already sold out and I know why - the 6x8 stamp set sells for $24.99 and the kit cost $34.99.  Just couldn't pass it up when I saw all it had in it and it did not disappoint.  First time I had my hands on their card stock and I see more of that joining my stash soon, very thick and sure beats the stuff I've been buying at my local chain store.  So, today's card uses that big gorgeous floral swag and I had a ball coloring it with Copic Markers.   My sentiment is from Hero Arts and it seems I've been grabbing those a lot lately - that Happy Stamp N Cut Set sure does make me happy.  Three of those dies went through my Big Shot and I stacked them together using Multi Matte Medium.  I stamped with VersaMark Ink and heat embossed with White Embossing Powder.  Those little pearls are from my stash.  To bring my card together, all this is attached to my card base, card stock from Michaels.


Hope you have a great day and keep crafting.

Affiliate links used at no cost to you.  Not all links are affiliate, I just want to share what I used.  All products were purchase by my unless noted.  I don’t sell anything nor am I employed.  This is my hobby and I hope to inspire you to play :)
Saturday, May 12, 2018

Using up more of those Deco Foil Backgrounds

Hello all, hope you having a great day!

This card uses the most wonderful products (in my opinion) - Deco Foil!  Love love love it for adding that beautiful shine!  Spread some Deco Foil Transfer Gel over my Large Flower Stencil (Hero Arts) and let it dry.  Then placed Silver Deco Foil over the dry gel and ran it through my Laminator.  The best part is revealing the gorgeousness when you peel up the foil sheet!

I stamped with Versafine Ink using Thankful Heart Stamp Set (Simon Says Stamps) and sprinkled Clear Embossing Powder (Ranger) and heat set.  I then used my trusty Big Shot (Sizzix) and Stitched Squares Die Set and Square Die Set (Both from The Stamps of Life) to cut the sentiment and shadow.  For a final touch I pulled a button from my stash that I made out of Filmo Clay a while ago.  It's dotted with a White Uniball Pen and tied with scrappers twine.  Both the sentiment and button are raised with foam tape.
Have a great day and keep crafting!

Affiliate links used at no cost to you.  Not all links are affiliate, I just want to share what I used.  All products were purchase by my unless noted.  I don’t sell anything nor am I employed.  This is my hobby and I hope to inspire you to play :)

Friday, May 4, 2018

Deco Foil Thankful Card

Hello All, Hope you are having a good day!  Remember those deco foil backgrounds I showed on Instagram?  Today's card makes use of one of those backgrounds called Botanical Dream along with Deco Foil Transfer GelRainbow Deco Foil and my Marigold Laminator.


The sentiment is from Thankful Heart Stamp Set (Simon Says Stamps) and stamped on Neenah Classic Crest 110lb with Versafine Ink then sprinkled with Clear Embossing Powder (Ranger) and heat set with a Marvy Heat Tool.  Using my Big Shot (Sizzix) I ran the sentiment through with Stitched Rectangles Die Set (The Stamps of Life).  Some scotch foam tape raises the sentiment and Crystal Stickles are applied for some sparkle.

Have a great day and keep crafting!

Affiliate links used at no cost to you.  Not all links are affiliate, I just want to share what I used.  All products were purchase by my unless noted.  I don’t sell anything nor am I employed.  This is my hobby and I hope to inspire you to play :)


Wednesday, April 4, 2018

You Make My Heart Smile

Today's card uses a very cool background stamp called Ornate Background from (Simon Says Stamps).  I got to be honest here, after coloring this card - I realize A. I don't get a lot of satisfaction coloring with Prisma Colored Pencils,  B. Practice makes perfect, C.  I need to watch YouTube and D. Really glad I didn't buy the 150 count set first!  Copic and Tombow Markers hold a special place in my heart so next time I color a large background stamp I'll try one of those.  So why did I try the colored pencils...I had to have a medical procedure called Moh's to remove Basel Cell Cancer from the top of my head.  I knew it was going to be a long day (Google it for the gory details) and coloring helps me with stress, and colored pencils were easier to transport.  I also took a coloring book with me.  PSA:  In the sun, Wear A Hat!

Back to the card, I did a lot of blending and used lots of colors and then I realized it looked very busy and I decided to add a large die called Heart Smile, diecut three with my Big Shot (Sizzix), stacked,  glued with Multi Matte Medium (Ranger) and covered with Spectrum Noir Sparkle Pen for some shimmer.  Then I used Mini Perfect Layers and a PenBlade to get that 1/16 inch border of pink.  I mounted this onto my Neenah Classic Crest 110lb card stock with Kokuyo Long Adhesive (This is the refill, they also sell the Tape Runner).  


Now for a pitiful pic of unhappy Beverly in between treatments.
Have a great day, Wear a hat in the sun, and keep crafting!

Affiliate links are used at no cost to you.  Not all links are affiliate, I just want to share where I found them.  All products were purchased by me.  I don't sell anything and I'm not employed, this is my hobby and hope you are inspired to play :)

Wednesday, March 28, 2018

Pineapples, Flowers and The Daily Marker Road Trip with Power Poppy

If you color ANYTHING then you will love the Daily Marker Road Trip as much as I did!!!  Marcella Hawley from Power Poppy hosted the St Louis event and she is a wonderfully talented and fantastic human!  Take a moment and check out her shop, I'm positive you will find as many pretties as I did.  Big shout out and thank you to Kathy at The Daily Marker.  My best friend and I had a great time and enjoyed Kathy's tips, our new friends (table mates) and our wonderful host Marcella!  Any excuse to spend a leisurely day coloring and crafting with my bestie is always a good one.  Picture below :)

Pineapple Perfection (Concord & 9th) is stamped on Neenah Classic Crest 110lb with Tuxedo Black Ink (Memento) and colored with Copic Markers. Copic Blending Solution and a rag adds texture while a white Gelly Roll Pen and black Micron Pen adds details.

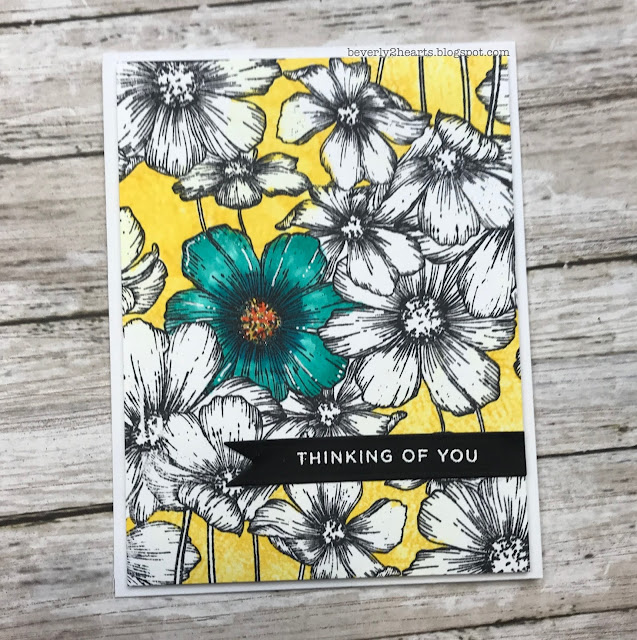
Next is cards stamped with Cosmos Background Stamp (Simon Says Stamps) on Neenah Classic Crest 110lb with Tuxedo Black Ink (Memento) and colored with Copic Markers. Copic Blending Solution and a rag adds texture while a white Gelly Roll Pen and black Micron Pen adds details.  I chose not to color the entire image.


All three cards have sentiments from CZ Designs Simple Sentiments (Simon Says Stamps) that are stamped with Versa Mark ink and heat embossed with White Embossing Powder (Ranger).  Also each card has Fun Foam behind each image to add dimension.

Here's the picture I promised, Kathy, Becky, Me and Kim.

Have a great day and keep crafting!

Affiliate links are used at no cost to you.  Not all links are affiliate, I just want to share where I found them.  All products were purchased by me.  I don't sell anything and I'm not employed, this is my hobby and hope you are inspired to play :)

Monday, March 26, 2018

Center Cut Heart Watercolor Card

When I saw this background stamp from Simon Says Stamps, I fell in love!  And then I saw Jennifer McGuire's Video and hands down, it became my new favorite, thank you for your inspiration!  Once I got my hot little hands on the Center Cut Heart Background Stamp I knew it was time to watercolor.  

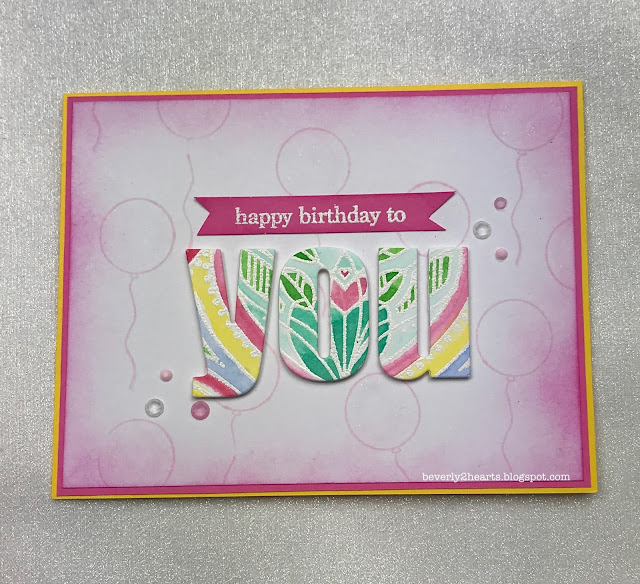
First I stamped my image with Versamark Ink on Distress Water Color Paper (Tim Holtz) and heat embossed with White Embossing Powder (Ranger).  When I'm using these large background stamps, I often do several at a time.  Next I started watercoloring with Gansai Tambi and Water Brush Pen both from (Kuretake).   First try I found I had a heavy hand with color so the next few I tried using more of a wash look.  After those dried, it was time to make cards. 

Out came my trusty Big Shot (Sizzix) and Bold Alphabet Dies (Altenew) to die cut the word You.  Using painters tape to line up the dies made it easier to repeat die cutting and keep letters properly aligned.  For the sentiments I used You Matter Stamp Set (SSS) and again stamped and heat embossed with white.  Cupids Kiss Gems (Studio Katia) add some sparkle.

Here's the negative "You" raised with foam tape.  Background is Neenah Classic Crest 110lb, inked with Picked Raspberry Distress Oxide Ink and then stamped with the balloons from Pure Innocence Cupcake Day Stamp Set (My Favorite Things) using Angel Pink Ink (Memento). 


 This card has three layers of Die Cuts stacked and glued with Multi Matte Medium (Ranger)


Hope you have a great day and keep on crafting!

Affiliate links are used at no cost to you.  Not all links are affiliate, I just want to share where I found them.  All products were purchased by me.  I don't sell anything and I'm not employed, this is my hobby and hope you are inspired to play :)

Wednesday, March 21, 2018

You Make Me Hoppy Bunny Cards

Today I have bunnies....from the Showers and Flowers (SSS) stamp set.  Love it when a stamp set has several images to challenge me.  These bunnies were too much fun coloring with Copics.  I decided to add grass with green copics but then chose to fussy cut one and use Grass Die (Stamps Of Life) along with Puffy Cloud Border (Lawn Fawn) for a different look.   Here's my two cards:

First is done mostly with die cuts - I'm telling you, I do love my Sizzix Big Shot.  The frame is made with Stitched Rectangles, and the Grass Border and Eggs (Spring Birds) all from The Stamps of Life.  To add dimension, two layers of grass and three cloud layers were added.  Summer Sky (Memento) ink was added to clouds and frame.  Foam tape raises the frame, bunny and stamped sentiment that's heat embossed with White Embossing Powder (Ranger).  The bunny has Glossy Accents on his nose and Spectrum Noir Sparkle pen on his fluffy tail.  Jewels are from Cupids Kiss (Studio Katia).

Second Card is has a Tumbled Glass distress ink (ranger) sky.  This sentiment was stamped with VersaFine Ink and heat embossed with Clear Embossing Powder (Ranger).  The edges were torn and inked with Cloud Ink (SOL) and green Offray ribbon is tied in a bow.  Again used those Stitched Rectangles from Stamps of Life.

Wednesday, March 14, 2018

Masking Simple Images Into A Cluster Bouquet

The images are from Choose Joy (Simon Says Stamps).  I actually bought it because of the small plaid background and when I started to play I decided to use the small flowers and leaves to make a bouquet. 

First I used my Mini Misti to help line up the edges and used Cloud ink (Stamps of Life) to make my background.  Then using a roll of masking paper, I stamped the flowers and leaves, cut them out and began stamping using Tuxedo Black Ink (Memento).  Next, Copic coloring, I used RV02, RV04, RV06, YG07, G07, Y11, Y15 and Y17.  After the images were colored I used my favorite White Uniball Pen (Signo) for accents and a black metallic pen (Gelly Roll) for centers of flowers.  Here's where I messed up....I used a Tombow N95 for shadow and I didn't check it out on scrap paper first, that's why my shadow looks a little wonky.

To pull the card together, Stitched Rectangles (Stamps of Life) were used with my Big Shot (Sizzix) and I stamped the sentiment with Versafine and heat embossed Clear Embossing Powder (Ranger).  I love the look of a very close layer of paper and I've been using Mini Perfect Layers rulers to get a 1/16" border, however, I can't find them for sale anywhere, otherwise I would link them here.  Finally I added a swish of Clear Sparkle Pen (Spectrum Noir) on the pink flowers and leaves.

Hope you have a great day and keep crafting!

Sunday, March 11, 2018

Alcohol Ink Art Into Card Making

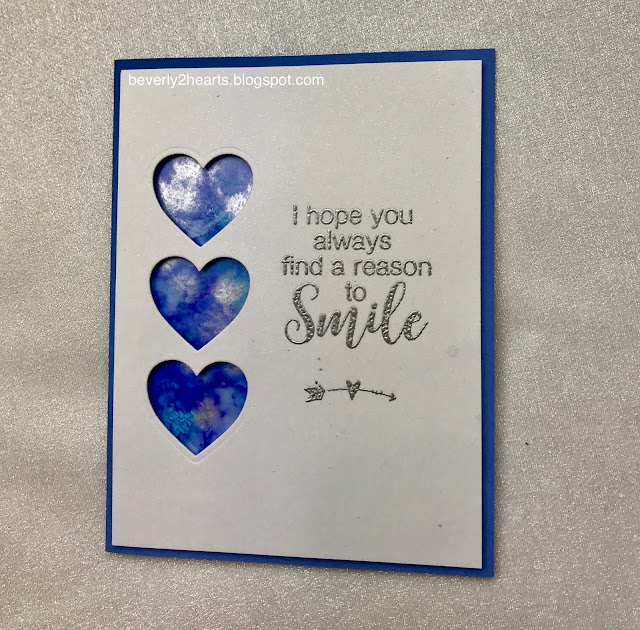
There are so many wonderful videos explaining techniques on youtube.  How can you resist such fun?  I couldn't, so I grabbed a the few alcohol Inks that I had, some Blending Solution and Yupo Paper to play.  It helps to have a Alcohol Ink Applicator and a bonus if you have Mixatives, I used silver on these.  Four sheets of alcohol ink happiness dried really quick.  

I trimmed one sheet sized to fit behind Hearts in a Row Vertical Die-namics (My Favorite Things).  I made several cards with just one sheet of inked Yupo paper.  For this first card I added the Celebration Words (Tim Holtz) with Glossy Accents.  A touch of Stardust Pen (Gelly Roll) added some sparkle.
 For the next two cards, I added a sentiment from Choose Happy (Simon Says Stamps) and heat embossed with silver embossing powder.  One has fun foam beneath the white cardstock and one is glued directly to the base.


 I absolutely love the word strips that come with the Hearts In a Row Vertical Die-namic - they are perfectly sized for many sentiments.  That alone, was reason enough to purchase them, but I'm a sucker for anything with hearts!  A few of these cards have some sequins from my stash that are adhered with Multi Matte Medium (Ranger) - it sure makes them secure.

Hope you have great day and keep on crafting!

Sunday, March 4, 2018

When In Doubt, Add More Flowers!

I love flowers!  Even more, I love crafting with flowers and flower images!  During the winter months, it makes me happy. Today I'm playing with the Hydrangea Blooms Stamp and Die Set from Simon Says Stamps.  Something about this group of flowers just spoke to me. After stamping several blooms and die cutting them, I started on my card.  One just seemed lacking - so I added two more blooms and wa-laaaa!

The flowers are stamped with Tide Pool and Aqua Inks from Hero Arts.  Leaves have rock and roll inking on them.  When I started to pull the card together, I reached for the Ornate Background stamp, VersaMark ink, Neenah Classic Crest 110 lb cardstock and silver embossing powder (Stampin Up).  Chipped Sapphire and Faded Jeans Distress Ink was blended over the embossed areas and ran through my Big Shot with Stitched Rectangle Dies (The Stamps of Life).   Hero arts has a Stamp and Cut called Ribbon Message that I love.  That's what I used for the sentiment and stamped with Tuxedo Black ink from Memento.   One Bloom and the sentiment ribbon are both raised with foam mounting tape, Crystal Stickles were added to flower centers and finally a Shimmer Pen (Spectrum Noir) added sparkle to the leaves.

Have a great day and keep on crafting!

Wednesday, February 28, 2018

Camellia Build-A-Flower Birthday Card

Sometimes I pick up a product to play with and just struggle deciding how to use it.  Not the case today!  Youtube has wonderful videos and Jennifer McGuire Ink's Stamp Layering video inspired me.  Strongly suggest you check her out!!!  

Using Camellia Build-A-Flower Stamp and Die set (Altenew), on Neenah Classic Crest 110 lb card stock I stamped the flower with Tropical Raspberry (Ranger), Abandoned Coral Distress Oxide and Candied Apple Distress Oxide inks. Then stamping the leaves with Twisted Citron Distress Oxide, Green Leaf (Simon Says Stamps) and Moss (Hero Arts) ink.  Using my Mini Misti made stamping multiples super easy.  Next I die cut flowers and leaves with the corresponding dies in my Big Shot

Hobby Lobby recently had clearance dies and todays card uses one.  Decorative Curved Squares (Spellbinders) was easy to release from the die since I used a sheet of wax paper between the cardstock and die.  I then inked the edges and adhered to my base.  The flower was then raised with foam mounting tape and leaves tucked under.

Final touches include a Happy die cut and Birthday stamp from Happy Stamp and Cut (Hero Arts).  Versafine Black ink and Clear Embossing Powder helped the sentiment pop.  Multi Medium Matte adhesive works great for gluing those tiny bits down.  Finally, Sheer Creations ribbon (Michaels) is tied in a bow.  

Have a great day and keep on crafting!

Sunday, February 4, 2018

January My Monthly Hero Kit - 2 More Cards

So I'm back with two more cards to share with you from the January My Monthly Hero Kit.  Amazingly, it is still available!  The first card is made with the dies included in the kit.
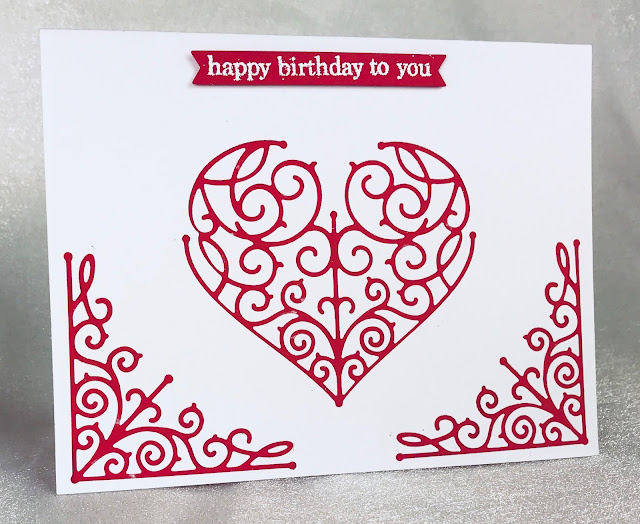
The dies were cut out of the white and backed with red card stock.  I popped the die back in and added all the bits back using the die cut for a guide.   I just love the look of red and white - so clean!  The sentiment is from Simon Says Stamps You Matter with white embossing powder on My Favorite Things Die-namics Hearts in a Row - Vertical banner.  Those tiny lines require a very steady hand when gluing - Mine have tremors so if you look closely you can see my oops.

The next card uses the same kit, same sentiment stamp set, same banner die set along with a few other items from the kit.  Like the Love sentiment that's stamped in versa mark on the back ground.  Along with the pink ribbon that was wrapped around the kit (always such a nice touch in packaging!).  I used the Hero Arts Nesting Heart Infinity Dies in red to back the white heart die.  A tiny pearl and Lawn Fawn's Just For You teeny heart to stamp in the background.  A Gelly Roll Stardust Pen added sparkle to those teeny hearts.
Let me know what you think below.  Have a great day and keep crafting!

Wednesday, May 24, 2017

Multi-Purpose Card

I'm making more cards that can be used for many purposes, (not occasions per se) like today's card.  I sent it to my Aunt who suffered a severe fall, yes, I want her to get well, but what I really want her to know, is that I love her!  This could also be sent instead of a condolence card as well as just I love you.

The background was stamped and embossed with clear embossing powder.  Picked up this stamp at a CKC convention called Branch Shadow from www.rubbernecker.com.  The Flower is from Stampendous called Floral Bloom and the Love die cut and sending you stamp is from a Simon Says Stamp set called Kristina's Love.

The flower is colored on Bristol Smooth card stock with Tombow Markers.  A touch of sparkle and white dots with gel pens accent the image.  I hand cut the image and used pop dots to raise it up.  The Love is cut with both black card stock and vellum, and the sending you is stamped with versa mark and heat embossed with white embossing powder.
 Here's to Aunt Linda, hope you heal quickly!

Have a wonderful day and keep crafting!

Thursday, April 20, 2017

Mixing Old & New!

About a million years ago, you know, when I first started paper crafting, I bought my first Stampin Up Stamp Set.  It was a Birthday set that had all the pieces of a cupcake.  Thought I would be using it often, yeah, not so much...  Then there's the butterfly stamp I bought at a stamp store in Branson, MO at least 12 years ago from Holly Berry House.  

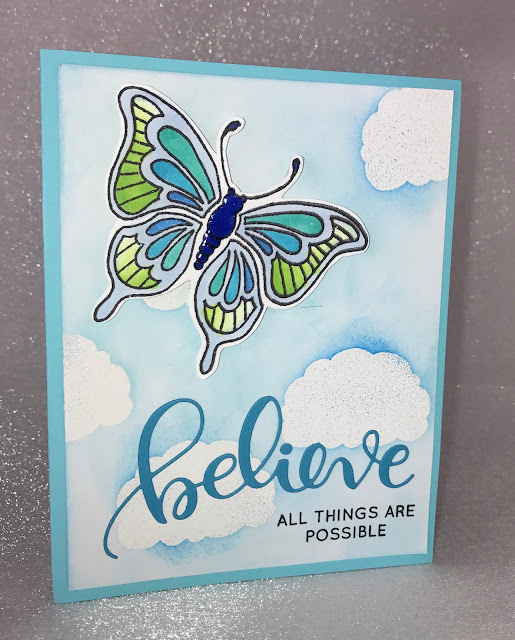
I finally bought the necessary paper to color with Copic markers, and stamped a bunch of images to practice with.  It also helped having just acquired a Stamp and Storage container to hold my Copies.  Just the push I needed to color!  Loved this little butterfly and needed a background.  I pulled out the "frosting" stamp from the Stamping Up Birthday Set and used Versamark and Zing White Embossing Powder to make resist clouds on white yardstick.  Then used two colors of blue ink to color the sky.

Hello 2017 and I'm looking for uses for the Simon Says Stamps Believe Dies and Stamps.  The cloudy sky made a pretty background for the popped up butterfly and Believe sentiment.  A bit of sparkle and shine (Crystal Stickles and Glossy Accents).  Note to self:  get the air bubbles out of stickles before it drys.

Here's two of the cards I made, one with stickles and one with glossy accents.  Enjoy!


Have a great day and keep crafting!