Showing posts with label Sizzix Big Shot. Show all posts

Tuesday, September 24, 2019

Eek A Boo Halloween Card

I recently joined the Spellbinders Small Die of the Month kit club and was really excited to get this months kit.  I thought my little Halloween guys would look good on the Box Card Kit.  


Guys, these dies are tiny!  Grab your jewel picker when assembling to make it easier.  Once all the die cutting was completed, time to glue these together.  

For the Box Die I used the Big Shot with the magnetic extended platform and cut purple paper for my base.  Black glitter paper really stands out on the purple.  The orange squares are stamped with this months My Monthly Hero Kit.  A Stardust pen adds sparkle and the sticker is from my stash.

Have a great day and keep on crafting!

Affiliate links used at no cost to you.  Not all links are affiliate, I just want to share what I used.  All products were purchase by my unless noted.  I don’t sell anything nor am I employed.  This is my hobby and I hope to inspire you to play :)


Sunday, March 10, 2019

Gamer Birthday Card

Hello there, got a card today that I made for my Grandson Dominic.  He's really into video games and happened on one of those great clearance section at Hobby Lobby and snagged this beauty on sale with him in mind.  A personalized card is going to mean a lot to him, so I pulled out my luggage tag alphabet dies.  Here's a hint - I didn't clip each letter out, I clipped each row and kept them together when I first removed them from the package (I'm talking about the little tabs that hold all the dies together).  This way there is less to lose and I'll keep the extra letters in a plastic sleeve.  I die cut his name and the game dies out of black card stock.  The screen piece has lots of white pigment ink rubbed on.  The sentiment was cut from mirror shiny card stock.  My background is done with a stencil, stencil brush and two colors of ink.  The borders of the stencil and backing piece are cut with stitched rectangles dies.  Glue brought this all together - easy peasy.
http://beverly2hearts.blogspot.com
Have a great day and keep on crafting!

Affiliate links used at no cost to you.  Not all links are affiliate, I just want to share what I used.  All products were purchase by my unless noted.  I don’t sell anything nor am I employed.  This is my hobby and I hope to inspire you to play :)

Wednesday, March 6, 2019

Hugs Card


Hello there, todays card is a fast fast fast card.  The heart background has an inner and outer die so you can cut just the hearts without a border, I wanted the border.  I also cut a white rectangle to go behind the hearts.  For the sentiment, I used my Silhouette and the Samantha Font to cut Hugs with the swirly.  I stacked and glued together 2 of these before adhering to my card.  It's on grey card stock from Michaels that has inking around the edge.  A stardust pen adds shimmer and a ribbon completes the card.

Have a great day and keep on crafting!

Affiliate links used at no cost to you.  Not all links are affiliate, I just want to share what I used.  All products were purchase by my unless noted.  I don’t sell anything nor am I employed.  This is my hobby and I hope to inspire you to play :)

Tuesday, February 19, 2019

Cards Full of Fairies

Hello all,  Have I told you how much I love the Hero Arts My Monthly Hero Kit?  Todays cards uses the December My Monthly Hero.  I did pull some items from other past kits.  What can I say, they are flexible that way!
This is pretty simple, I colored the image with Tombow markers and a water brush, actually all four cards have images produced this way.  A sparkle pen adds shimmer to her wings and wand.  The background has distress oxide inks blended and then water sprinkled to active the inks.  The sentiment is stamped with Versamark and heat embossed with silver embossing powder.  I tied a sheer ribbon around the card before adhering to my base.

 This card uses both the December and January MMH Kits.  The easel sign is from January.  The pink background is cut with stitched rectangles. The "chalkboard" part of the easel is brushed with white pigment ink and the sentiment is stamped with VersaMark and heat embossed with white embossing powder.  The "frame" has detail added with a fine pen.  
 Changing this one up a bit by using Cute As A Bug Step Up card base.  This sleeping fairy is resting on a mushroom colored with Tombows and sparkle pens in clear, moonlight and pink champagne.  The sentiment is stamped with Versamark ink and heat embossed with white satin pearl embossing powder.  The background is stamped with amethyst ink.
 This little guy is on the gift card flip-it base.  The background is stamped with sea breeze ink with broken china distress oxide around the edges.  Stitched rectangles is used to die cut the white sections.  The sentiment is from a thank you set from Hero Arts HA CL125, it's stamped with memento ink and finally details were added with a stardust pen.
Here's the card opened.

Have a great day and keep on crafting!

Affiliate links used at no cost to you.  Not all links are affiliate, I just want to share what I used.  All products were purchase by my unless noted.  I don’t sell anything nor am I employed.  This is my hobby and I hope to inspire you to play :)

Friday, October 26, 2018

Autumn Blessings Card

I actually bought this stamp set Ornate Leaves quite a while ago from Simon Says Stamps and I had fun playing with it.  I decided to play with the pumpkin and chose to stamp several times with inks from Hero Arts.  I used Orange Soda, Tangerine and Caramel for the pumpkin, for the green swirls, Moss was used.  After I got the look I wanted, I stamped again with VersaMark Ink and sprinkled with Clear Embossing Powder, and set with the heat tool. I knew I wanted a specific color to back my stamped image so out comes the Distress Oxide Inks and Distress Blender Brushes.  Ripe Persommon, Wild Honey and Spiced Marmalade achieved that color.  Next comes die cutting with my Big Shot.  Majestic Label Die Set and Stitched Rectangles cut both the stamped image, backing and base.  Some bakers twine and sequins from my stash helped to bring my card together.  The sentiment is stamped and heat embossed.

Have a great day and keep on crafting!

Affiliate links used at no cost to you.  Not all links are affiliate, I just want to share what I used.  All products were purchase by my unless noted.  I don’t sell anything nor am I employed.  This is my hobby and I hope to inspire you to play :)

Friday, October 19, 2018

Simple card with barely any shimmer!

If you've noticed, I like shimmer, sparkle and shine on all my cards!  This one has just the tiniest bit of shimmer - feels so ...wrong!  I'm using the October 2018 Kit from Hero Arts.
Like most cards, I started with 110lb Card Stock and stamped my images with Tuxedo Black Ink and colored with Copic Markers.  Using my Big Shot, I die cut all the colored images with coordinating dies.  Next the background, starting with Distress Oxide Ink, I blended the background and die cut with Stitched Rectangles Die.  Then for the mound of snow, I used Stitched Hillside Border Die and adhered it to the background.  Using foam tape and wet glue I arranged my tree and critters.  Glossy Accents was used on the light bulbs and black pearl pen on the critters eyes.  Finally, using VersaMark Ink I stamped my sentiment, covered with silver embossing powder and set with my heat tool.  Trimmed that and used a Stardust pen around the edge.  
My Monthly Hero Kit October 2018
Have a great day and keep on crafting!

Affiliate links used at no cost to you.  Not all links are affiliate, I just want to share what I used.  All products were purchase by my unless noted.  I don’t sell anything nor am I employed.  This is my hobby and I hope to inspire you to play :)

Friday, October 5, 2018

Altering a Die Cut to Fit Your Needs

Hello there!  Today I'm using stamps and dies from Neat and Tangled.  Succulent Journaling Card Stamp Set and Die Set is one of my favorites!  It's easy to color and has several perfect sentiments.  But for today's cards I wanted a lighter look to them so I chose to alter the die cut a bit.  Let me back up, first I stamped using Tuxedo Black Ink on to 110lb card stock and colored the flowers with Copic Markers.  Next, I used my trusty Big Shot to cut the overlay die out of black card stock.  When I placed it over the colored image, I decided I wanted the sentiment black stamping on white instead of reverse.  So I pulled out a Pen Blade and cut away the area where the sentiment goes, following the indents made by the die.  (See picture below)  Next, I stamped the sentiment with Black Onyx Ink and heat set Clear Embossing Powder with my heat tool.
Succulent Journaling Card Stamp

To pull the cards together, one is mounted on grey card stock and tied with a sheer ribbon and added Glossy Accents dots.

The next card is a gatefold card.  The front is stamped using Cloud Ink and Center Cut Heart Stamp.
http://beverly2hearts.blogspot.com


 Here's a picture showing the die cut and the part I cut away.
Hope you have a great day and keep on crafting!

Affiliate links used at no cost to you.  Not all links are affiliate, I just want to share what I used.  All products were purchase by my unless noted.  I don’t sell anything nor am I employed.  This is my hobby and I hope to inspire you to play :)

Thursday, September 27, 2018

Feeling a little Pineappley

Hello there, I'm back today after an absolutely awful day yesterday.  Spent 9 hours at the Dermatologist having a wretched skin cancer removed.  Moh's procedure is when they take some skin off and then freeze, slice and examine slide.  They keep doing this until they get all the cancer cells gone.  For me this was 7 times.   So right now my left temple is sporting a 1 1/2 x 2 inch patch missing skin - "Gnarly" was the term the nurse used - she wasn't lying!  Sorry, feeling a bit pitiful right now.  I watched a few recorded shows while I sipped on my coffee.  Now I'm ready to share a card I made.

A recent visit to Hobby Lobby landed me with several clearance items, including this adorable Pineapple D-Lite Die.  Some gold foil paper added shine to my card when I used my Big Shot to cut the shape.  Using 110lb Card Stock I blended Mowed Lawn, Wild Honey and Mustard Seed Distress Ink, using the negative die cut for placement.  I held it in place with low tack tape.  The first try, I didn't cover the entire piece with tape and smeared so the second try, I covered the entire stitched rectangle that wasn't to be colored - lesson learned.  After blending, I attached the gold foil paper pineapple with strong glue.  I backed this piece with 1/16 inch black card stock.  Next I flipped through a The Paper Studio 4 1/2 x 6 1/2 pad called The Shop On the Square and found some foiled pineapple paper - score!  For those who don't know - The Paper Studio is Hobby Lobby's house brand.  This became my card base and I chose a a 1 1/4 inch black strip along with some teeny tiny gold and clear washi tape (also from The Paper Studio) to break up the background.  Man that's a mouthful!  Finally, I attached the pineapple piece with fun foam behind it for dimension.  The entire piece was then adhered to a top folding note card.  I chose not to add a sentiment on this one.
Have a great day and keep on crafting - I for one, am headed to my craft space!

Affiliate links used at no cost to you.  Not all links are affiliate, I just want to share what I used.  All products were purchase by my unless noted.  I don’t sell anything nor am I employed.  This is my hobby and I hope to inspire you to play :)

Monday, September 24, 2018

Love Card

Today's card is made using one of those extra backgrounds I had laying around.  You know, when you're playing with techniques and make several.  I save EVERYTHING!  So when I pulled out this new Heart Love Die by Momenta that I purchased at Hobby Lobby, this card came together quickly!  

The background has lots of distress inks blended on watercolor paper.  I then took a stencil and spritzed the back with a fine mist of water and applied it to the inked background.  Taking paper towels to soak up extra water and then set it aside to air dry.  Sorry, the stencil is older and I don't know the name.

Using 110lb Card Stock I ran the die and card stock through my Big Shot and then sprayed Sheer Shimmer Spritz over the die cut for some sparkle.  To bring my card together, I matted my background piece and adhered it to my card base.  Using Multi Matte Medium I attached the sparkly die cut.
Have a great day and keep on crafting!

Affiliate links used at no cost to you.  Not all links are affiliate, I just want to share what I used.  All products were purchase by my unless noted.  I don’t sell anything nor am I employed.  This is my hobby and I hope to inspire you to play :)

Monday, August 27, 2018

Big Deal Birthday Card

I'm calling this "Big Deal" card because of the sentiment but it is kind of a big deal because I used lots of My Favorite Things Products!  Many that I just got with their most recent sale - got to love a sale!  Started with my go to - Neenah 110lb Card StockTuxedo Black Ink and Copic Markers.  I added Happy Hippo Stamp and started coloring.  Such cute little critters that are really easy to color and loved being able to change it up and add a sweet chick on top of the balloons.  After coloring was done, it was time to pull out the Itsy Bitsy Polka Dot Background Stamp and Light Teal Ink from Hero Arts.  For the sentiment I stamped with Black Onyx Ink, sprinkled Clear Embossing Powder and heat set with my Heat Tool.  Then I whipped out Blueprint Sketch #24 Die-Namic and my Big Shot to die cut all my pieces.  Foam Tape raises the image and sentiment.  Final details were Glossy Accents on the balloons and a few sequins with Stickles on them AND a bakers twine bow at the top.
http://beverly2hearts.blogspot.com
Hope you have a great day and keep on crafting!

Affiliate links used at no cost to you.  Not all links are affiliate, I just want to share what I used.  All products were purchase by my unless noted.  I don’t sell anything nor am I employed.  This is my hobby and I hope to inspire you to play :)

Thursday, August 23, 2018

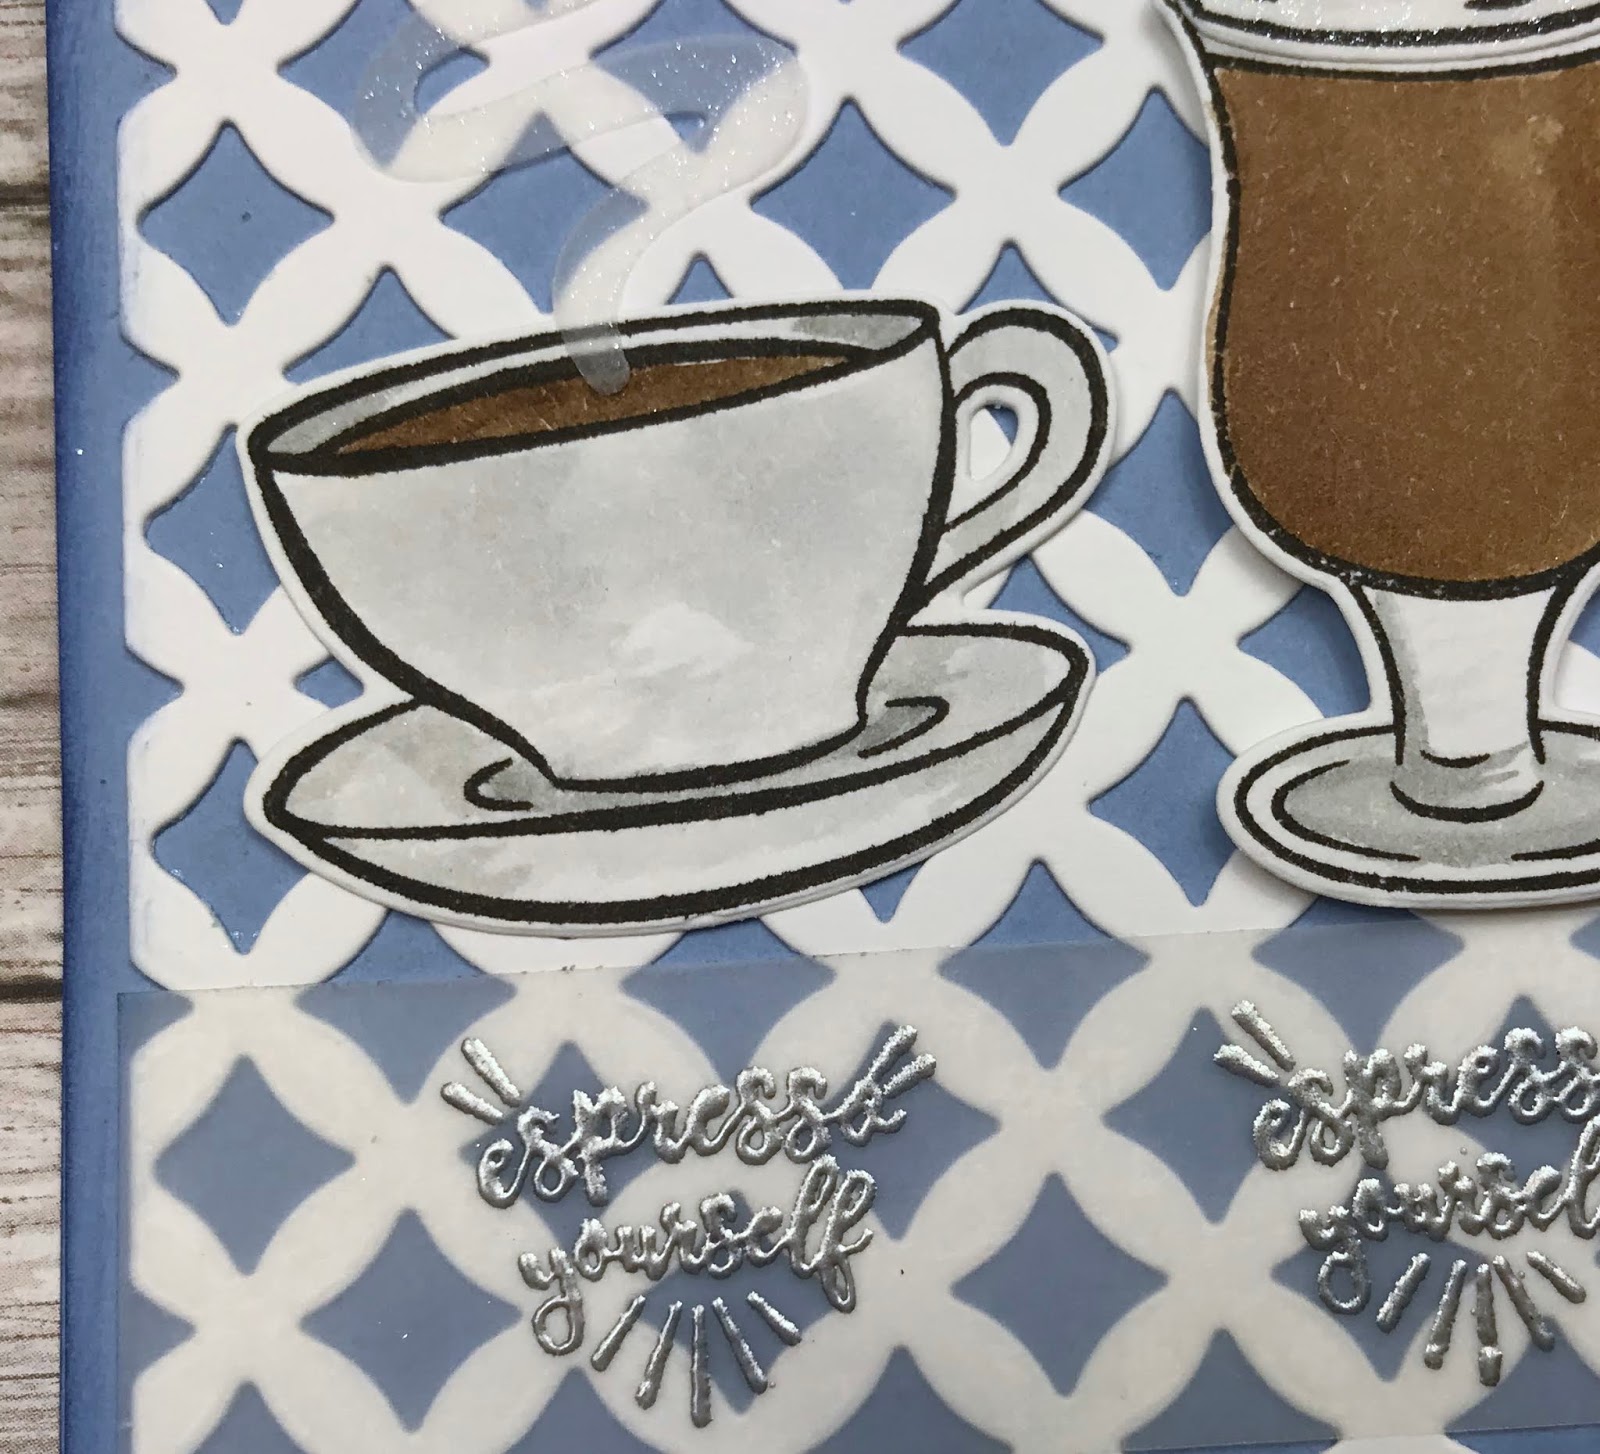
Expresso Yourself - More August My Monthly Hero

Here's another card using the August My Monthly Hero Kit.  Just like my last post, I watercolored the images using distress ink after I stamped with Versafine Black Ink on Canson Mixed Media paper. Using the included dies, I used my Big Shot to die cut the watercolored images along with the swirl of steam out of vellum.
Also die cut the Bold Graphic Confetti Die out of White Neenah 110lb card stock.  The sentiment is stamped with Versamark ink and heat embossed with Silver Stampin Up Embossing Powder three times.  To hide the adhesive on the vellum, I ran the whole strip through a Create a Sticker Dispenser covering the entire back.  This is an excellent way to attach vellum!  

To bring my card together the white die cut background was adhered to the card base.  The center coffee cup is raised with foam tape and the other two are adhered to the die.  Those vellum steam dies were covered with Clear Sparkle Pen for shine and also covered the back with adhesive with the Create A Sticker Dispenser.  Finally the embossed sentiment is attached.
http://beverly2hearts.blogspot.com

Have a great day and keep of crafting!

Affiliate links used at no cost to you.  Not all links are affiliate, I just want to share what I used.  All products were purchase by my unless noted.  I don’t sell anything nor am I employed.  This is my hobby and I hope to inspire you to play :)

#mymonthlyhero


Sunday, June 24, 2018

All Die Cutting Card

I have a lot of stamps but sometimes you need a quick card.  If you have done some "extra" die cutting, a card can come together very fast!  It's rare that I make a card without using my trusty Big Shot.  Today's card came together really fast because I like die cutting and do a lot of it.  If there is a die that I may use frequently, I just cut extras and store them with the die.  When I purchased the Delighted Mickey Mouse Die, I had to play right away and set it aside for a special little boy.  Today I pulled out that completed die and others to make a card for Three Year Old Landon!
The Happy BirthdayStitched Squares and Square Die Set are all from The Stamps of Life.  The large 3 is adorned with a Stardust Pen and popped up with foam tape.  The border has a quick doodle with my Micron Pen.

Happy Birthday Landon!

Have a great day and keep crafting!

Affiliate links used at no cost to you.  Not all links are affiliate, I just want to share what I used.  All products were purchase by my unless noted.  I don’t sell anything nor am I employed.  This is my hobby and I hope to inspire you to play :)

Wednesday, June 13, 2018

Birthday Balloon Card

Hello all,
My world has returned to "normal", cars have been repaired, water returned about 2:30pm the same day and God is Good!

Now to fun stuff!  Hubby's birthday was yesterday and this is the card I made him.  He's a year older than me, except June to September, then he is two years older.  lol!


I just love those happy balloon dies, so much so, that I decided to make a shaker box.  There are 5 layers of the balloon with one layer of acetate and they are all glued with Multi Matt Medium.  The sequins are from my stash.  My background is done with three colors of ink stamped with Plaid Background Stamp Set.  Actually, I made several of these so I can grab one for a quick card.  The Bold Numeral Dies personalizes this card, 4 layers of them, to be exact.  To add a bit more, a Sparkle Pen adds shine to the numbers.

We celebrated with a German Chocolate Cake.  What's your favorite cake?

Have a great day and keep crafting!

Affiliate links used at no cost to you.  Not all links are affiliate, I just want to share what I used.  All products were purchase by my unless noted.  I don’t sell anything nor am I employed.  This is my hobby and I hope to inspire you to play :)

Monday, June 11, 2018

Whole Lotta Color Die Card

Hello, hope you are all doing well!  It's been a day of crazy - I have an older (2004) SUV and it gave a dinging concert, turns out the battery is dying.  Daughters car air conditioning was blowing hot air on a 93* day.  Hubby and crew finished siding house - Yay and last night a water main broke and we have no water today.  Now I could call this bad luck, but I prefer to look for the good.  A battery is an easy fix for my car - I love it and they don't make this model anymore.  After a month of weekends spent siding, the guys are free!  While I don't have water at the moment, we have plenty to drink, my home is air conditioned and there are worse things in life.

Ok, enough about me...here's the card I put together with some of my coloring challenge hummingbirds.  It went together quickly as I used Altenew Floral Cover Die A and B with three colors of card stock.  I die cut the Hummingbirds Thanks Stamp Set with the coordinating Dies with my Big Shot.  I really do like the Ribbon Messages Stamp and Cut Set for quick cards.  I wanted to add some dimension to those hummingbirds so I used Collage Medium dots and carefully placed them without pressing hard so they are lifted a bit.
http://beverly2hearts.blogspot.com
You really cannot have too many birthday cards in your arsenal.  This one came together quickly!

Have a great day and keep crafting!

Affiliate links used at no cost to you.  Not all links are affiliate, I just want to share what I used.  All products were purchase by my unless noted.  I don’t sell anything nor am I employed.  This is my hobby and I hope to inspire you to play :)


SaveSave

Thursday, June 7, 2018

Card Making with 30 Day Coloring Challenge Work

I don't know if you've done The Daily Marker 30 Day Coloring Challenge, but you SHOULD!  Jump in anytime during the month!  Having a blast doing it and today's card uses my 1st day of coloring.  Using the same stamp from my last post - Simon Says Stamp June 2018 Card Kit.  Stamped on Neenah 110lb Card Stock with Tuxedo Black Ink and colored with Copic Markers.  Lots of shine was added with a Sparkle Pen.  The sentiment is two colors of die cuts from Celebration Script Words run through my Big Shotand then stacked, slightly offset.  Sequins were stamped with Congrats Stamp & Cut set in ink from Hero Arts.  A bit of Glossy Accents brings more shine.  

Hope you're having a great day and keep crafting!

Affiliate links used at no cost to you.  Not all links are affiliate, I just want to share what I used.  All products were purchase by my unless noted.  I don’t sell anything nor am I employed.  This is my hobby and I hope to inspire you to play :)

Friday, May 25, 2018

Graduation Card with Shine!

Hello all,
Today I have a quick Graduation Card.  Well, quick if you have done several deco foil backgrounds prior!  The background is done with Deco Foil Transfer GelGold FoilRadiating Rays Stencil and a Laminator.  Hero Arts makes several Stamp and Cut Sets and the Congrats Stamp and Cut is definitely one you should have in your stash!  It's versatile to handle several occasions and even has tiny sequin stamps.  I cute a piece of Neenah Classic Crest 110lb card stock and ran it through my Sizzix Big Shot with Stitched Circle Dies.  Then using Tuxedo Black Ink I stamped the sentiment.  Using black cardstock with Sizzix Adhesive Sheets, I die cut the word congrats three times and stacked them.  To bring the card together, I trimmed a piece of fun foam to raise my die cut circle and used Nuvo Deluxe Adhesive to attach to foiled piece.  Using those Sizzix Adhesive Sheets really saves some time stacking up thin dies.  I did use my Powder Tool on the adhesive die that overhangs the circle to deactivate the stickiness.  Since my card base is black, I did line the inside with a 4x51/4 piece of white card stock.  This what I won't have to search for my favorite White Uniball Gel Pen.
Hero Arts Stamp and Cut
Have a great day and keep on crafting!


Affiliate links used at no cost to you.  Not all links are affiliate, I just want to share what I used.  All products were purchase by my unless noted.  I don’t sell anything nor am I employed.  This is my hobby and I hope to inspire you to play :)

Wednesday, May 23, 2018

I just love this Birthday Cake image

Hello all,
Power Poppy has this wonderful stamp set called Party Time and I love that you can change up the sentiment on the banner.  It also has a bunting and a slice of cake with a candle and a very cool stack of presents.  Today's card uses this set.  I colored my chocolate cake with Copic Markers after I stamped the image with Tuxedo Black Ink onto Neenah Classic Crest 110lb Card Stock.  To make my cherries shine I covered them with Glossy Accents.  Then I die cut my chocolate cake using Stitched Circle Dies through my Big Shot.  For the background, I used Bazzill Canvas Bling Cardstock with Horizontal Stripe Die.  To bring the card together, I attached the background to my card base with Kokuya Long Line Adhesive.  I trimmed some fun foam to fit behind my stitched circle and used Nuvo Deluxe Adhesive to attach.  Then using the included word hooray I die cut black cardstock with Sizzix Adhesive Sheets attached to the back - to make attaching easier.
Birthday

Birthday
Have a great day and keep crafting!

Affiliate links used at no cost to you.  Not all links are affiliate, I just want to share what I used.  All products were purchase by my unless noted.  I don’t sell anything nor am I employed.  This is my hobby and I hope to inspire you to play :)

Monday, May 14, 2018

May My Monthly Hero Kit Arrived

My kit came on Saturday but since we had 2 Grandson's Baseball games and Sunday was Mothers Day - I had to wait until today to play!  Boy did I have fun!  This month's kit is awesome and I really love the bigger dies they have been including!  
For this card, I used the tissue paper that the kit was wrapped in.  First I spread Mod Podge on Neenah Classic Crest 110lb card stock and crinkled up the tissue paper and smoothed in the glue.  Let it dry and trim up the edges.  For the clouds I ran Puffy Cloud Border Die (Lawn Fawn) through my Big Shot (Sizzix) and brushed Glitter Brush (Spectrum Noir) for some sparkle.  Then I stamped in Tuxedo Black Ink (Memento) images from the kit.  I did have to go in with a black pen to color over the texture.  The sentiment is also stamped in Tuxedo Black and die cut with Stitched Rectangle Dies (The Stamps of Life).
 I bought the add on Family Word Bold Print Stamp and a used the same Neenah paper.  Stamped with VersaMark Ink and sprinkled Clear Embossing Powder (Ranger) and heat set.  Blended Picked Raspberry Distress Oxide and Wilted Violet Distress Oxide Ink over the embossed area.  Then I used a sentiment from the March My Monthly Hero Kit and Bold Alphabet Dies on Glitter paper.  Tied it with a pink ribbon and mounted it on my black card base.
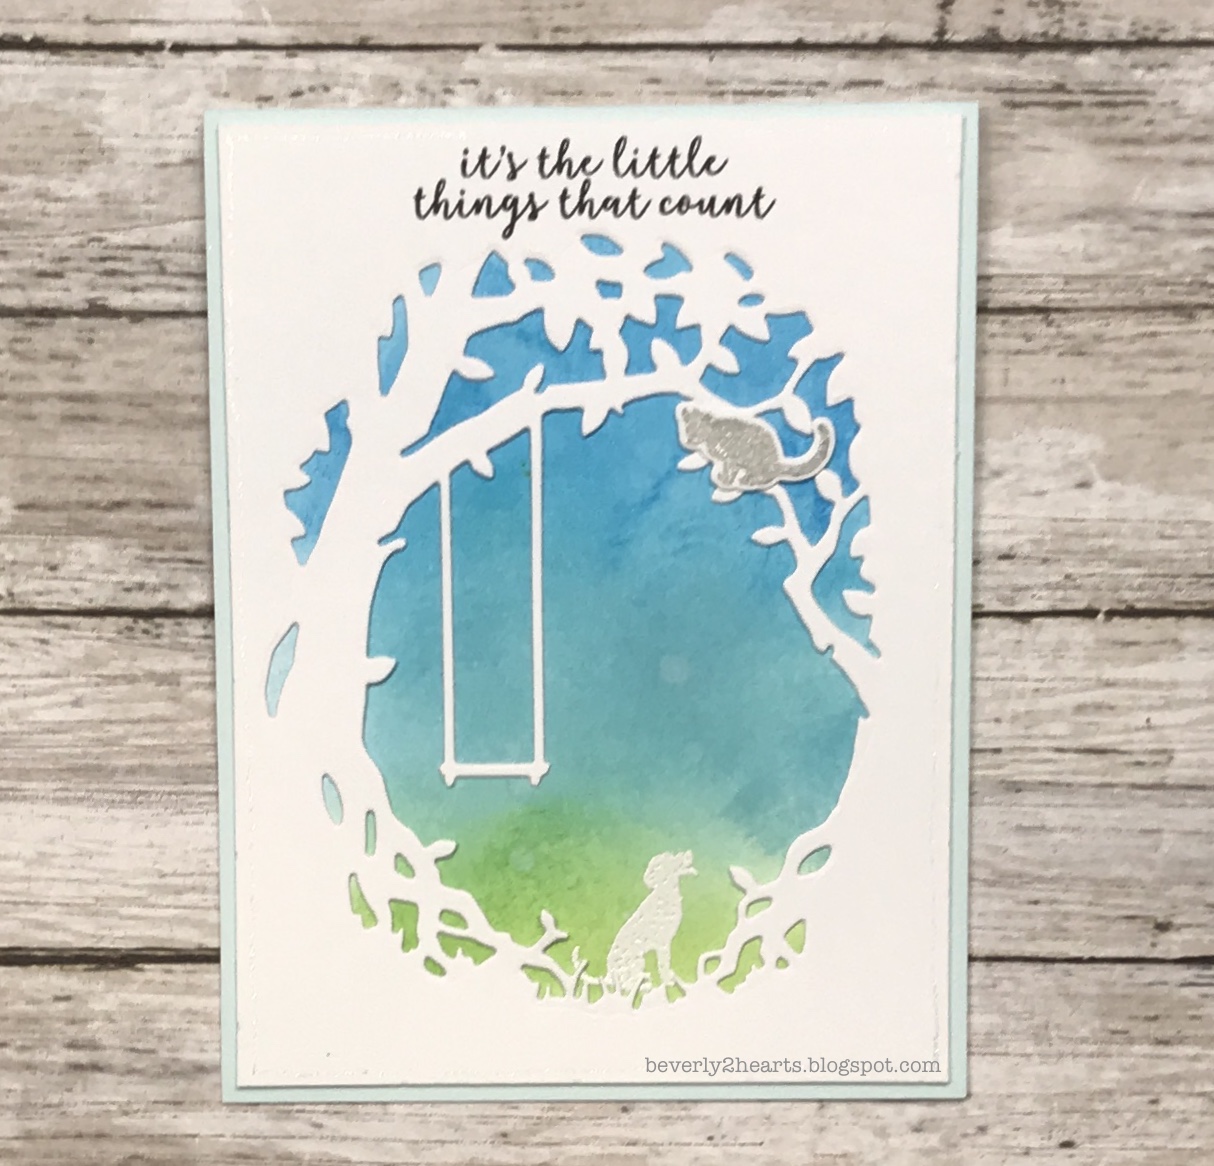
For this last one, I used that beautiful big die.  For fun, I stamped and embossed a dog and cat - thought it went well with the sentiment.  I also used some distress inks to blend the background.

Hope you have fun playing with your kit from Hero Arts!  Have a great day and keep crafting!

Affiliate links used at no cost to you.  Not all links are affiliate, I just want to share what I used.  All products were purchase by my unless noted.  I don’t sell anything nor am I employed.  This is my hobby and I hope to inspire you to play :)

Saturday, May 12, 2018

Using up more of those Deco Foil Backgrounds

Hello all, hope you having a great day!

This card uses the most wonderful products (in my opinion) - Deco Foil!  Love love love it for adding that beautiful shine!  Spread some Deco Foil Transfer Gel over my Large Flower Stencil (Hero Arts) and let it dry.  Then placed Silver Deco Foil over the dry gel and ran it through my Laminator.  The best part is revealing the gorgeousness when you peel up the foil sheet!

I stamped with Versafine Ink using Thankful Heart Stamp Set (Simon Says Stamps) and sprinkled Clear Embossing Powder (Ranger) and heat set.  I then used my trusty Big Shot (Sizzix) and Stitched Squares Die Set and Square Die Set (Both from The Stamps of Life) to cut the sentiment and shadow.  For a final touch I pulled a button from my stash that I made out of Filmo Clay a while ago.  It's dotted with a White Uniball Pen and tied with scrappers twine.  Both the sentiment and button are raised with foam tape.
Have a great day and keep crafting!

Affiliate links used at no cost to you.  Not all links are affiliate, I just want to share what I used.  All products were purchase by my unless noted.  I don’t sell anything nor am I employed.  This is my hobby and I hope to inspire you to play :)

Wednesday, May 9, 2018

Thank You with a Heart Wave

Hello all,
Today's card is made with a die from Memory Box.  It's called Heart Wave and I bought it at a Creative Keepsake Convention.  The booth that I found it does not have an online store....

After I ran the die through my Sizzix Big Shot twice, I used Sizzix Adhesive Sheets to apply the die cut and Ultrafine Glitter back into another cardstock of a different color.  You can see one white inlaid heart, that's because I like it there!  Yep!

The sentiment is from March 2018 My Monthly Hero from Hero Arts.  I die cut the sentiment from Deco Foil Toner Sheet and placed a piece of Rose Gold Deco Foil over it and ran it through my Laminator.  I'm just loving that Rose Gold!  I used Multi Matte Medium to adhere the sentiment.  A few drops of Glossy Accents finishes my card.
I hope you have a great day and keep crafting!

Affiliate links used at no cost to you.  Not all links are affiliate, I just want to share what I used.  All products were purchase by my unless noted.  I don’t sell anything nor am I employed.  This is my hobby and I hope to inspire you to play :)