Showing posts with label My Favorite Things. Show all posts

Monday, August 30, 2021

Birthday Card with a Sundae

Have you heard about The Stamps of Life?  They have several really reasonably priced monthly subscription clubs. Actually, it was my first stamping subscription club I ever joined.  Todays card is made with the sundae2stamp set.

http://beverly2hearts.blogspot.com

 Who doesn't like ice cream?  Not anyone I know!  My Gemini Jr made quick work of the sundae2stamp dies and to make them stand out, I inked all the edges with coordinating colors.  Instead of centering the image on my A2 card, shifting it to the left made room for my daughters name along side with Olivers ABC Letters.  The perfect background paper is an older set from My Favorite Things that they no longer sell. Glossy accents add shine to the cherry on top and a sparkle pen adds interest to the letters.  Silver baubles from my stash are adhered for more shine.

Have a great day and keep on crafting!

Affiliate links used at no cost to you.  Not all links are affiliate, I just want to share what I used.  All products were purchase by me unless noted.  I don’t sell anything nor am I employed.  This is my hobby and I hope to inspire you to play :)


Wednesday, January 27, 2021

Fun Family Card

 Honey Bee Stamps has some of the cutest stamps ever!  I actually laughed out loud when I read the sentiments on this stamp set.  


I put this card together using Woodland Winter Animals along with Nuts About You.  As usual, I stamped with Amalgam Ink and colored with Copics, the squirrels, however are done with Colored Pencils.  All colored and non colored (Aspen trees) are then die cut using my Gemini Jr..

For my base, I used Sky Blue with Cloud Stencil and Key Lime with Grass Stencil using blender brushes.  Time to assemble my card by attaching all pieces with Precision Tip Glue.

Using my MISTI, I added that funny sentiment with amalgam ink.  The card front is attached to brown card stock from my stash and then attached to a white card base.  White gel pen adds details.

Have a great day and keep on crafting!

Affiliate links used at no cost to you.  Not all links are affiliate, I just want to share what I used.  All products were purchase by me unless noted.  I don’t sell anything nor am I employed.  This is my hobby and I hope to inspire you to play :)

Wednesday, September 16, 2020

Birthday Slimline Underwater Card

I love anything that is water related!  My Favorite Things has a stencil that when used once and then rotate 3 times, looks amazingly like water!  Mine arrived over the weekend and I had to play today!

http://beverly2hearts.blogspot.com

http://beverly2hearts.blogspot.com


I chose to make a slimline card, underwater birthday card.  First I started with a sheet of Neenah 110lb card stock trimmed it to 4 1/4 x 8 1/2.  


Now, time to work with the stencil.  The stencil is approximately 6x6 so I did one section then flipped my card stock around to do the other side.  First I placed purple tape onto my glass media mat to place my card stock.  Then I prayed Pixie Spray onto the back of the stencil to keep in place.  Then I taped my card stock to the mat.  Tumbled Glass Oxide ink was used with a blender brush then I rotated the stencil and repeated inking until stencil has rotated 4 times.  To finish the other side, my card stock is flipped.  Finally, with a light touch, I blended Peacock Feathers all over to hide the seam of ink.


The second piece of card stock is inked with Vintage Photo and a blender brush.  Using my Gemini Jr I die cut the  “sand” piece with Slimline Stitched Hillside Borders and layered them for an ocean bottom.  Then adhered it to the “ocean” piece with connect glue.  Using the Large Slimline with sliders die I ran it through my Gemini Jr.  Finally I used the Small Slimline with Lift the Flaps Die on top and ran that through the Gemini Jr.


Now time to decorate!  Using some older My Monthly Hero Kit stamps I added seaweed with Hero Arts Ink.  Then I stamped with Versamark ink (in my MISTI) two coral pieces and applied Pink Puff Embossing powder and heat set.   Then using You are Sublime I stamped the sentiment with amalgam ink using my MISTI for easy placement.


I pulled out some previously stamped, colored and die cut fishes from You are Sublime and Gill Friends and played with arranging them before adhering with connect glue.  This was soooo fun to do!


Paradise card stock is trimmed to 8 1/2 x 7 and folded in half.  I then opened the flaps and make tick marks with a pencil for placement guide.  A sentiment is stamped with amalgam ink and previously colored images are attached.  I erased the tick marks with the couture creation tool.  Finally, the card top is adhered to the card base.


Have a great day and keep on crafting!


Affiliate links used at no cost to you.  Not all links are affiliate, I just want to share what I used.  All products were purchase by me unless noted.  I don’t sell anything nor am I employed.  This is my hobby and I hope to inspire you to play :)

Thursday, July 16, 2020

Butterfly Kisses Card

I just adore Birdie Brown images!  This one, from My Favorite Things is called Butterfly Kisses and was so fun and quick to color.  Unfortunately it is sold out. 

I stamped with Tuxedo black ink in my MISTI and colored with Copic markers. A gold pen added earrings, shoe buckle and bracelet while a white gel pen added details. 

Gemini Jr made die cutting the image, stitched rectangles and hexagon stipple plate background a breeze. 

Fun foam raises the rectangle. The sentiment is stamped with sea glass ink. And a stardust pen adds interest to the sentiment strip. Connect glue attaches all the components to the card base 


Have a great day and keep on crafting.

Affiliate links used at no cost to you.  Not all links are affiliate, I just want to share what I used.  All products were purchase by me unless noted.  I don’t sell anything nor am I employed.  This is my hobby and I hope to inspire you to play :)

Thursday, April 2, 2020

Hey There Cupcake Card

Hi there, today’s card is a cupcake birthday card. In my opinion you can never have too many birthday cards! This card, is made with the April My Favorite Things card kit, (which is no longer available, but the individual items are linked), two My Favorite Things paper pads and an additional die-namic that was a gift with purchase.  These are usually available for purchase in the following month.
Cupcake and Sprinkles Die-namics


This card kit came with dies and special pouches to make shaker cards. The center panel is from Party Patterns paper pad and the plaid is from Sweet Celebrations paper pad. I die cut the cupcake bottom in the included kit card stock land inked with purple ink.  After I Decided which pattern papers I was going to use I placed the cupcake shaker pouch where I wanted it to be on the card and then die cut that out of Party Patterns paper.  I assembled the shaker by adding sequins and gems that I had on in my stash, I then attached the die cut pink cupcake topper with tape. When it came time to attach the shaker pouch firmly to the card back, I added two one inch strips using Sweet Celebrations pattern paper and decided it needed just a little bit more. So I cut two very thin strips of shiny silver paper to add as accents.

Then using the Hey There Cupcake die-namic, I cut out of the included bright pink card stock from the kit. Cupcake has two additional layers of white card stock that are then glued together and topped with the pink for dimension. I did something a little different with the hey there die-namic, after running through the die cut machine the letters were still in place. I turned the scrap with letters still in place over and used a dot runner over the letters.. I then flipped it over and placed it on the card front and using a craft pick I pressed the letters down while removing the excess. This way I got perfect alignment with the letters.


Have a great day and keep on crafting!  It’s keeping me sane now!

Affiliate links used at no cost to you.  Not all links are affiliate, I just want to share what I used.  All products were purchase by my unless noted.  I don’t sell anything nor am I employed.  This is my hobby and I hope to inspire you to play :)

Saturday, September 21, 2019

MFT Superstar Contest Entries

Do you ever get overwhelmed when submitting items for contests, etc?  I usually don't but for some reason, this year I did.  I make it a point to not look at the already submitted items until my cards are completed.  But these year I saw on social media people posting their submissions and boy were they amazing!  Kind of took the wind out of my sail.  Then I remembered, art is subjective and I like my art and trying to compare it is not a wise thing.  But then I pulled up my big girl panties and soldiered on.  

Clean & Simple Genius
Starting with Puddle Jumper, I stamped with Momenta ink, colored my image with copic markers and fussy cut him out.  Using Radiating Rays and Grassy Edges Stencils I added the sun and grass.  There are puddles in grass, right?  The sentiment is stamped with Charcoal Ink and heat embossed with clear embossing powder.

Coloring Virtuoso


I bought the Holiday Cheer stamp a while ago and finally decided how I wanted to show my shopper - walking home in the snow carrying all her packages.  I imagined a peaceful enjoyable walk instead of the rush and noise of the mall.  I started by stamping with Momenta Ink and masking my image.  Then using the Cloud stencil, light blue ink gave a soft look.  Using Copic markers I added a tall tree on one side and finally a sidewalk for her to walk on.  Then using various Copics I brought my colorful girl to life.  Prismacolor pencils added more shading and a Sparkle Pen added highlights to her coat.  Using Blueprint Sketch 24 I die cut my image  The snow was created using a Snow Marker and a heat tool.  Finally, the sentiment was stamped on a strip with Soft Granite Ink, outlined with a Stardust Pen and attached to the card.  The whole thing was raised with fun foam onto my card base.

Inovation Master

For this one, I had a vision....and something in the universe did not want it to happen!  I think I redid this card at least three times and that didn't include ripping things apart to try again.  I persevered and finally had my entry.

Starting with Mixed Media paper and applied Wilted Violet, Blueprint Sketch and Picked Raspberry Distress Inks direct to paper and sprayed the whole thing down with water.  My heat tool helped it dry and then put Black Soot down on glass and mixed with water and brushed it over the whole paper - again using the heat tool to speed drying.  White acrylic paint watered down was then splattered over for the look of stars.  Using Blueprint Sketch 24 Die, I die cut my background.  Then placing the Shining Stars Die-namics I die cut the word, saving the inside bits.  Using a separate piece of card stock I placed behind the diecut then glued the bits in place.  Next I backed the top piece with acetate and on the reverse side I arranged two layers of foam tape around the word and edges.  Sparkling crystals were added to make a shaker card and carefully adhered the backing piece.  The sentiment from Written in the Stars was stamped with Versamark ink and heat embossed with silver embossing powder.  This was cut into a strip and glued to the card.  The card is backed with grey cardstock and mounted on to the card base.

So there you have it, my entries!

Affiliate links used at no cost to you.  Not all links are affiliate, I just want to share what I used.  All products were purchase by my unless noted.  I don’t sell anything nor am I employed.  This is my hobby and I hope to inspire you to play :)

Wednesday, June 5, 2019

Beautiful Bouquet of Flowers Card

Ok, so that title sounds like I'm bragging on my card...nope, I just love the Floral Mix Background Stamp.  I love flowers and more so, I love to color flower images!  If only the images could include that heavenly aroma....  

Today's card started with nocture ink on Neenah classic crest solar white card stock using Floral Mix Background Stamp.  Next is coloring with copic markers.  I wanted to keep the colors soft.  
Copic

Stitched rectangles and my Gemini Jr trims the piece.  Fun foam is attached to the back for dimension and is attached to the card base.  Three celebrate die cuts in black are stacked and attached.  Finally a shimmer pen is brushed over the flower centers.
Flowers
flowers
Have a great day and keep on crafting!


Affiliate links used at no cost to you.  Not all links are affiliate, I just want to share what I used.  All products were purchase by my unless noted.  I don’t sell anything nor am I employed.  This is my hobby and I hope to inspire you to play :)

Sunday, March 3, 2019

More Fast and Easy Cards Using Dies

Hello there, I've got more card using stacking dies.  Four of them actually, and it's really easy to get into a rhythm of die cutting a bunch and then taking time to stack and glue them together.  Just choose the colors of card stock you would like and get going!  This set of dies have an inner and outer circle making lots of possibilities for changing them up.  

Putting the dies alone on a card is pretty but a bit plain, so I encourage you to use either stamping or embossing folders for added interest.  I used two embossing folders from Park Lane, one with herringbone and the other with diagonal stripes.  For sentiments I stuck with large word dies (congrats and celebrate) and one stamped embossed sentiment strip. (The sentiment is from a My Favorite Things Set that is no longer available for purchase)  Fast and easy, I'm telling you!
Viva Stacking Die Set


Have a great day and keep on crafting!

Affiliate links used at no cost to you.  Not all links are affiliate, I just want to share what I used.  All products were purchase by my unless noted.  I don’t sell anything nor am I employed.  This is my hobby and I hope to inspire you to play :)

Friday, February 15, 2019

Birthday Fishes Flip It Card

Hello there!  Today's card is made with something I've had in my stash for almost a year.  Creative Keepsakes Convention comes to town and entry into the Vendor Fair includes an Attendance Prize bucket.  I won a prize from Mud Puddles and it included sand, sand glue along with other goodies from their booth.  Since I was using Gill Friends from My Favorite Things, I pulled out the Mud Puddles for the bottom of my ocean.

My base is the Circle Flip-it from The Stamps of Life.  Two colors of blue card stock ran through my Sizzix Big Shot and I inked the edges with Faded Jeans.  Also used that same ink for the air bubbles from You Are Sublime.  All of my fishes were colored with Copic Markers and cut with coordinating dies.  A white signo pen adds details.  Now for the ocean floor, I spread the sand and shell glue along the bottom and sprinkled on Tahiti sand and lightly patted into the glue.  After it dried, I arranged my fishes and plants, being careful to hide some fishes behind the circle.  Then I stamped air bubbles and filled them with glossy accents.  The sentiment was stamped with faded jeans and then heat embossed with clear embossing powder.  A stardust pen lines the edge of the strip.

Have a great day and keep on crafting!

Affiliate links used at no cost to you.  Not all links are affiliate, I just want to share what I used.  All products were purchase by my unless noted.  I don’t sell anything nor am I employed.  This is my hobby and I hope to inspire you to play :)

Monday, February 11, 2019

I'm Back and Four Cards

Hello there,  I decided to take a break from blogging during the holidays.  Also, I changed up how I prioritize the month of December and I realized a few things...I finished nearly all of my Christmas Shopping first before I even decided what my Christmas Card would be ( I make 65 cards).  Normally it's just the opposite - cards first then shopping.  In fact, in previous years, I have planned and started cards in September....  I gave myself a break and realized the cards that I love making and sending would still be just as meaningful if they were received in January.  Now, I got them mailed about a week before Christmas but wow, with the pressure off, I enjoyed it so much more!  

Every January I attend a weekend crop with a group of wonderful ladies from church.  It's been 15 years, with me missing only two - The year I got my second heart and the year I got a new hip.  The cards I'm showing today were from that.  I like coloring a lot! So often times I will have stamped images ready to color so when the mood strikes I'm ready.  At this years crop, I made cards with them.

MFT Polar Bear Pals
Bearing Gifts Card uses a cloud stencil and distress ink for the background.  Next, stitched slopes and hills add my snow bank.  The bears, bucket of fish and sentiment are from polar bear pals and are stamped with mementa ink and colored with copic markers.  The background is sprayed with sheer shimmer spritz for sparkle and my images are raised with foam tape.  All of this is mounted on black cardstock and a white sheet is placed inside for easier signing.

MFT Polar Bear Pals Stamp
Thinking of you card was made exactly like the one above with different images from the same set and crystal gems were added.
MFT Polar Bear Pals
Waving Hi card uses a background die from My Monthly Hero Kit that has sold out.  The bear has glossy accents added to his scarf.  The sentiment has an outline of sparkle pen.  Both the sentiment and bear are raised with foam tape.

Beary good birthday card is just like the one above, except I used the negative space from the die to get two backgrounds from one pass through the Sizzix machine.  A silver gel pen adds glimmer to the skate.

Have a great day and keep on crafting!

Affiliate links used at no cost to you.  Not all links are affiliate, I just want to share what I used.  All products were purchase by my unless noted.  I don’t sell anything nor am I employed.  This is my hobby and I hope to inspire you to play :)

Monday, August 27, 2018

Big Deal Birthday Card

I'm calling this "Big Deal" card because of the sentiment but it is kind of a big deal because I used lots of My Favorite Things Products!  Many that I just got with their most recent sale - got to love a sale!  Started with my go to - Neenah 110lb Card StockTuxedo Black Ink and Copic Markers.  I added Happy Hippo Stamp and started coloring.  Such cute little critters that are really easy to color and loved being able to change it up and add a sweet chick on top of the balloons.  After coloring was done, it was time to pull out the Itsy Bitsy Polka Dot Background Stamp and Light Teal Ink from Hero Arts.  For the sentiment I stamped with Black Onyx Ink, sprinkled Clear Embossing Powder and heat set with my Heat Tool.  Then I whipped out Blueprint Sketch #24 Die-Namic and my Big Shot to die cut all my pieces.  Foam Tape raises the image and sentiment.  Final details were Glossy Accents on the balloons and a few sequins with Stickles on them AND a bakers twine bow at the top.
http://beverly2hearts.blogspot.com
Hope you have a great day and keep on crafting!

Affiliate links used at no cost to you.  Not all links are affiliate, I just want to share what I used.  All products were purchase by my unless noted.  I don’t sell anything nor am I employed.  This is my hobby and I hope to inspire you to play :)

Monday, March 26, 2018

Center Cut Heart Watercolor Card

When I saw this background stamp from Simon Says Stamps, I fell in love!  And then I saw Jennifer McGuire's Video and hands down, it became my new favorite, thank you for your inspiration!  Once I got my hot little hands on the Center Cut Heart Background Stamp I knew it was time to watercolor.  

First I stamped my image with Versamark Ink on Distress Water Color Paper (Tim Holtz) and heat embossed with White Embossing Powder (Ranger).  When I'm using these large background stamps, I often do several at a time.  Next I started watercoloring with Gansai Tambi and Water Brush Pen both from (Kuretake).   First try I found I had a heavy hand with color so the next few I tried using more of a wash look.  After those dried, it was time to make cards. 

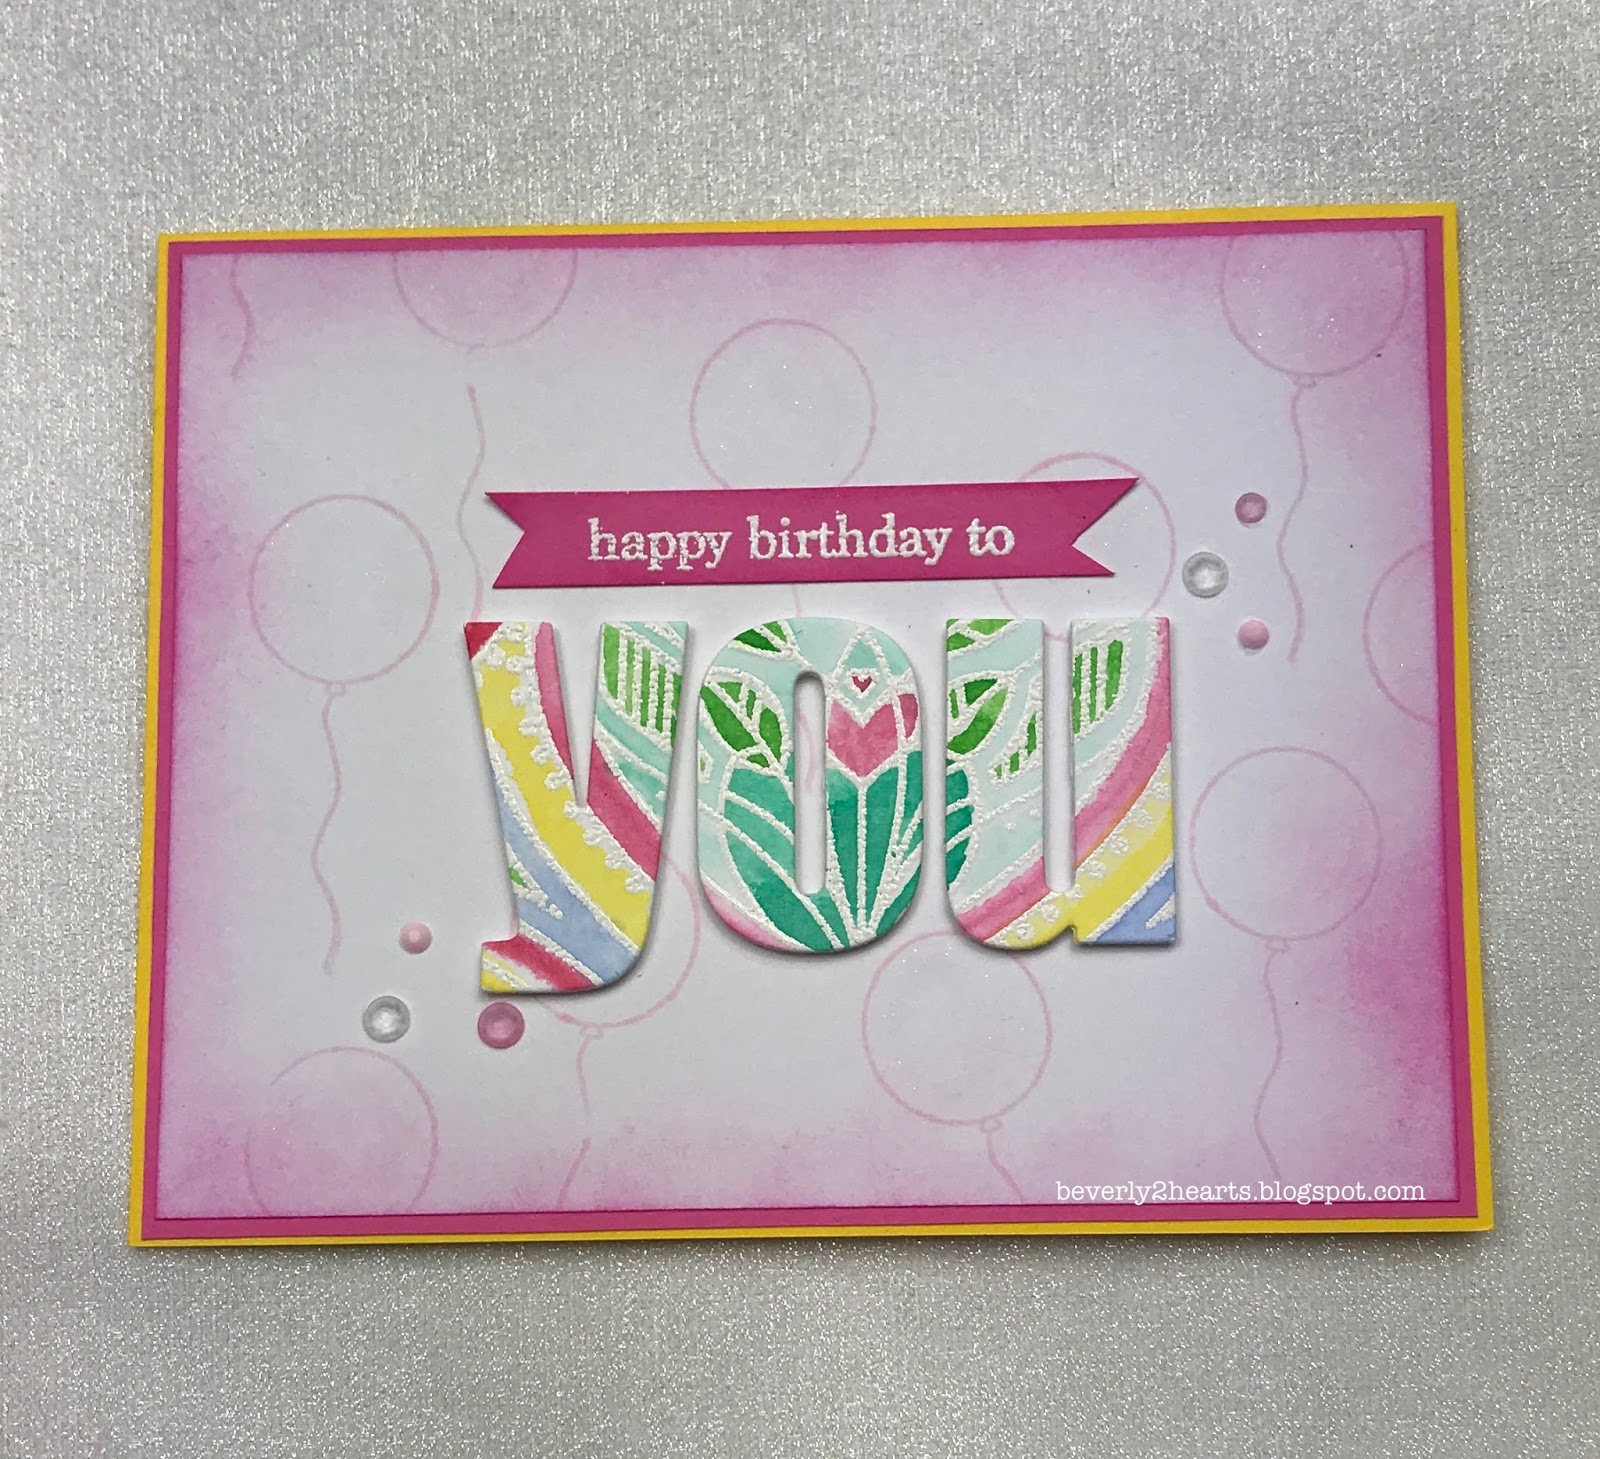
Out came my trusty Big Shot (Sizzix) and Bold Alphabet Dies (Altenew) to die cut the word You.  Using painters tape to line up the dies made it easier to repeat die cutting and keep letters properly aligned.  For the sentiments I used You Matter Stamp Set (SSS) and again stamped and heat embossed with white.  Cupids Kiss Gems (Studio Katia) add some sparkle.

Here's the negative "You" raised with foam tape.  Background is Neenah Classic Crest 110lb, inked with Picked Raspberry Distress Oxide Ink and then stamped with the balloons from Pure Innocence Cupcake Day Stamp Set (My Favorite Things) using Angel Pink Ink (Memento). 


 This card has three layers of Die Cuts stacked and glued with Multi Matte Medium (Ranger)


Hope you have a great day and keep on crafting!

Affiliate links are used at no cost to you.  Not all links are affiliate, I just want to share where I found them.  All products were purchased by me.  I don't sell anything and I'm not employed, this is my hobby and hope you are inspired to play :)

Sunday, March 11, 2018

Alcohol Ink Art Into Card Making

There are so many wonderful videos explaining techniques on youtube.  How can you resist such fun?  I couldn't, so I grabbed a the few alcohol Inks that I had, some Blending Solution and Yupo Paper to play.  It helps to have a Alcohol Ink Applicator and a bonus if you have Mixatives, I used silver on these.  Four sheets of alcohol ink happiness dried really quick.  

I trimmed one sheet sized to fit behind Hearts in a Row Vertical Die-namics (My Favorite Things).  I made several cards with just one sheet of inked Yupo paper.  For this first card I added the Celebration Words (Tim Holtz) with Glossy Accents.  A touch of Stardust Pen (Gelly Roll) added some sparkle.
 For the next two cards, I added a sentiment from Choose Happy (Simon Says Stamps) and heat embossed with silver embossing powder.  One has fun foam beneath the white cardstock and one is glued directly to the base.


 I absolutely love the word strips that come with the Hearts In a Row Vertical Die-namic - they are perfectly sized for many sentiments.  That alone, was reason enough to purchase them, but I'm a sucker for anything with hearts!  A few of these cards have some sequins from my stash that are adhered with Multi Matte Medium (Ranger) - it sure makes them secure.

Hope you have great day and keep on crafting!

Wednesday, February 21, 2018

Shake Shake Shake that Shaker Box

I'm really enjoying mixing up my stamps and dies from my stash!  Today's card uses products from many brands.
First comes the coloring - I stamped with donuts from Lawn Fawn Donut Worry Stamp Set using Versafine ink on to Bristol Smooth cardstock.  Then I used Tombow Markers to color my donuts adding a wet brush to smooth.  Since I didn't purchase the coordinating dies, I used what I had to cut them out.  EK Success 1 1/4 inch Punch cuts the donut perfectly, for the inside I used my Crop-A-Dile II and set the hole punch to 3/16.  Then I stamped the sprinkles with Hero Arts Passion flower Ink.  Setting those aside, I started stamping on Neenah Solar White 110lb cardstock, my background with Sprinkles Turnabout from Concord & 9th.  Ink colors are:  Hero Arts Bubble Gum, Memento Lulu Lavender, The Stamps of Life Pixie and Ranger Sea Shell Pink all in the Tim Holtz Stamp Platform.  Next I created a donut box by using my Sizzix Big Shot to die cut a "frame" by using Squares and Stitched Square dies from The Stamps of Life.  One look at the "donut box" and I thought - shaker box!  So I grabbed some transparencies and cut a 2 3/4 x 2 3/4 square and used Scor-Tape to adhere.  For lift, I used two layers of foam tape all along the edges.  I placed my donuts on a scrap piece of cardstock, glued them down and placed some sequins in my "box" and secured them with the donuts piece. Next I wrapped my donut box with bakers twine from my stash.  

To pull my card together I used Recollection from Michaels Cardstock for my base.  For my sentiment, I stamped with Versamark Ink and sprinkled Hero Arts Pink Prisma Embossing Powder (that came in My Monthly Hero kit) and heat embossed.  Using Hearts in a Row Vertical Die Set from My Favorite Things I die cut the sentiments and adhered them down.  Used Scor-Tape to really hold my Donut Box down and my Stardust Gelly Roll Pen to embellish the edges.

Have a great day and keep on crafting!

#heroarts #thestampsoflife #memento #cardmaking #mftstamps #concord&9 #sizzix

Wednesday, February 14, 2018

Cupcake Day Card 4 Ways

My Favorite Things has the most adorable little girl stamps called Pure Innocence and they are easy to color and personalize.  Todays cards are made with PI Cupcake Day Stamp and Die set.  


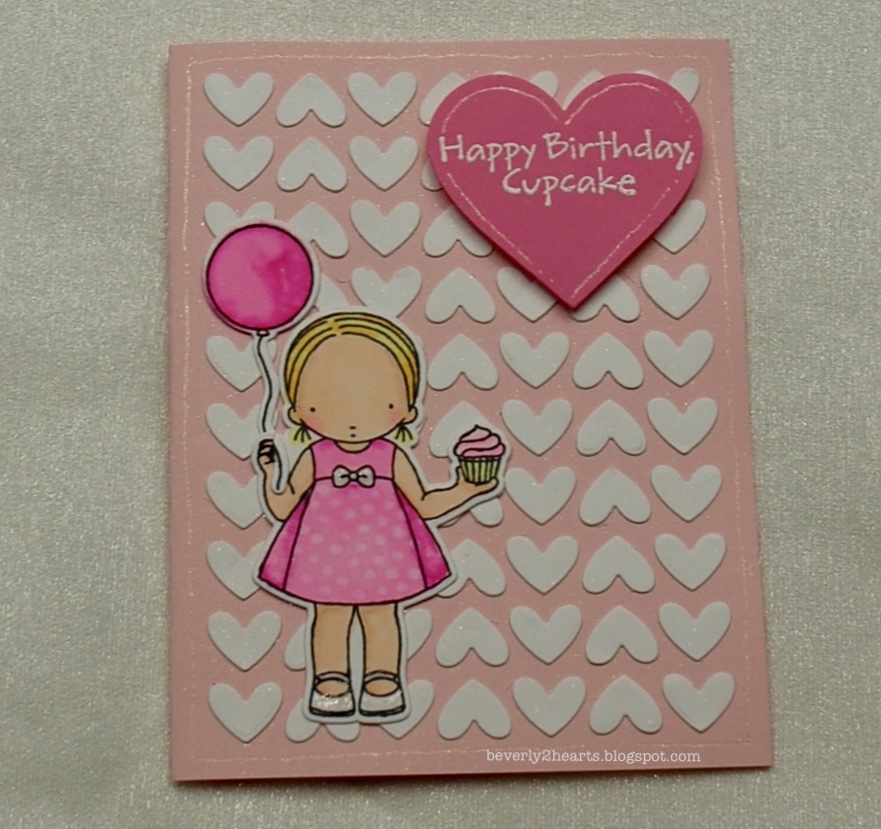
Both of these cards use Full of Heart Die from MFT.  Both the negative and positive were used.  First I laid the positive piece down and taped down.  Then I put Multi Medium Matte Glue in the heart holes and topped with negative hearts - this really didn't take long at all.  Carefully pulled up the positive piece and adhered it with Scor-Tape to my second card base.  Tadaaa - two card bases with one pass thru my Sizzix Big Shot.

Our little PI Cupcake Day girl was stamped with Memento Tuxedo Black ink on Neenah Solar White 110 lb card stock and colored with Copic Markers.  To get the polka-dot effect, the copic colorless blender was pressed on to the dress.  She's got Glossy Accents on her bow and shoes.  Her hand has slit cut with an xacto blade, additionally, the balloon string has a notch cut so it appears her hand is wrapped around the string when put together.  Her cupcake has Sparkle pen on the icing.

Both cards have the sentiment stamped with Versa Mark and heat embossed with Ranger White Embossing Powder, then cut out using Heart Infinity Dies from Hero Arts.   One card has Sheer Shimmer Spritz over the background - so much sparkle!


Here's our girl in blue.  I used the same background die only this time I used a cushion mat from Spellbinders and the correct platform for making an impression in my Big Shot.  She's got Celebrations Sheer Creations Ribbon and sequins.

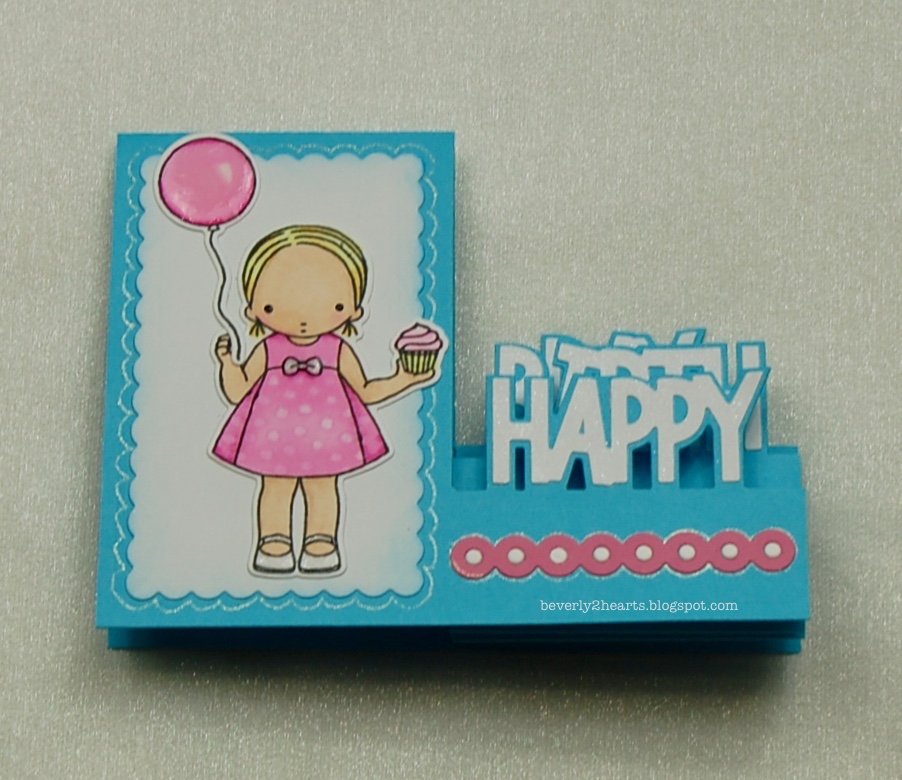
This card base is from Sizzix Happy Birthday Step Up die set.  Our poor girl looks like she has alien eyes...I tried using a Black Pearl Pen and used a pencil tip dipped into a bit and dotted her eyes - waaaaay to big.  Next time I'll try a smaller tool, but really - I had to laugh at her.

All products were purchased by me.  Affiliate links used at no cost to you.

Have a great day and keep crafting!
#heroarts #mftstamps #sizzix