Showing posts with label Lawn Fawn. Show all posts

Friday, September 10, 2021

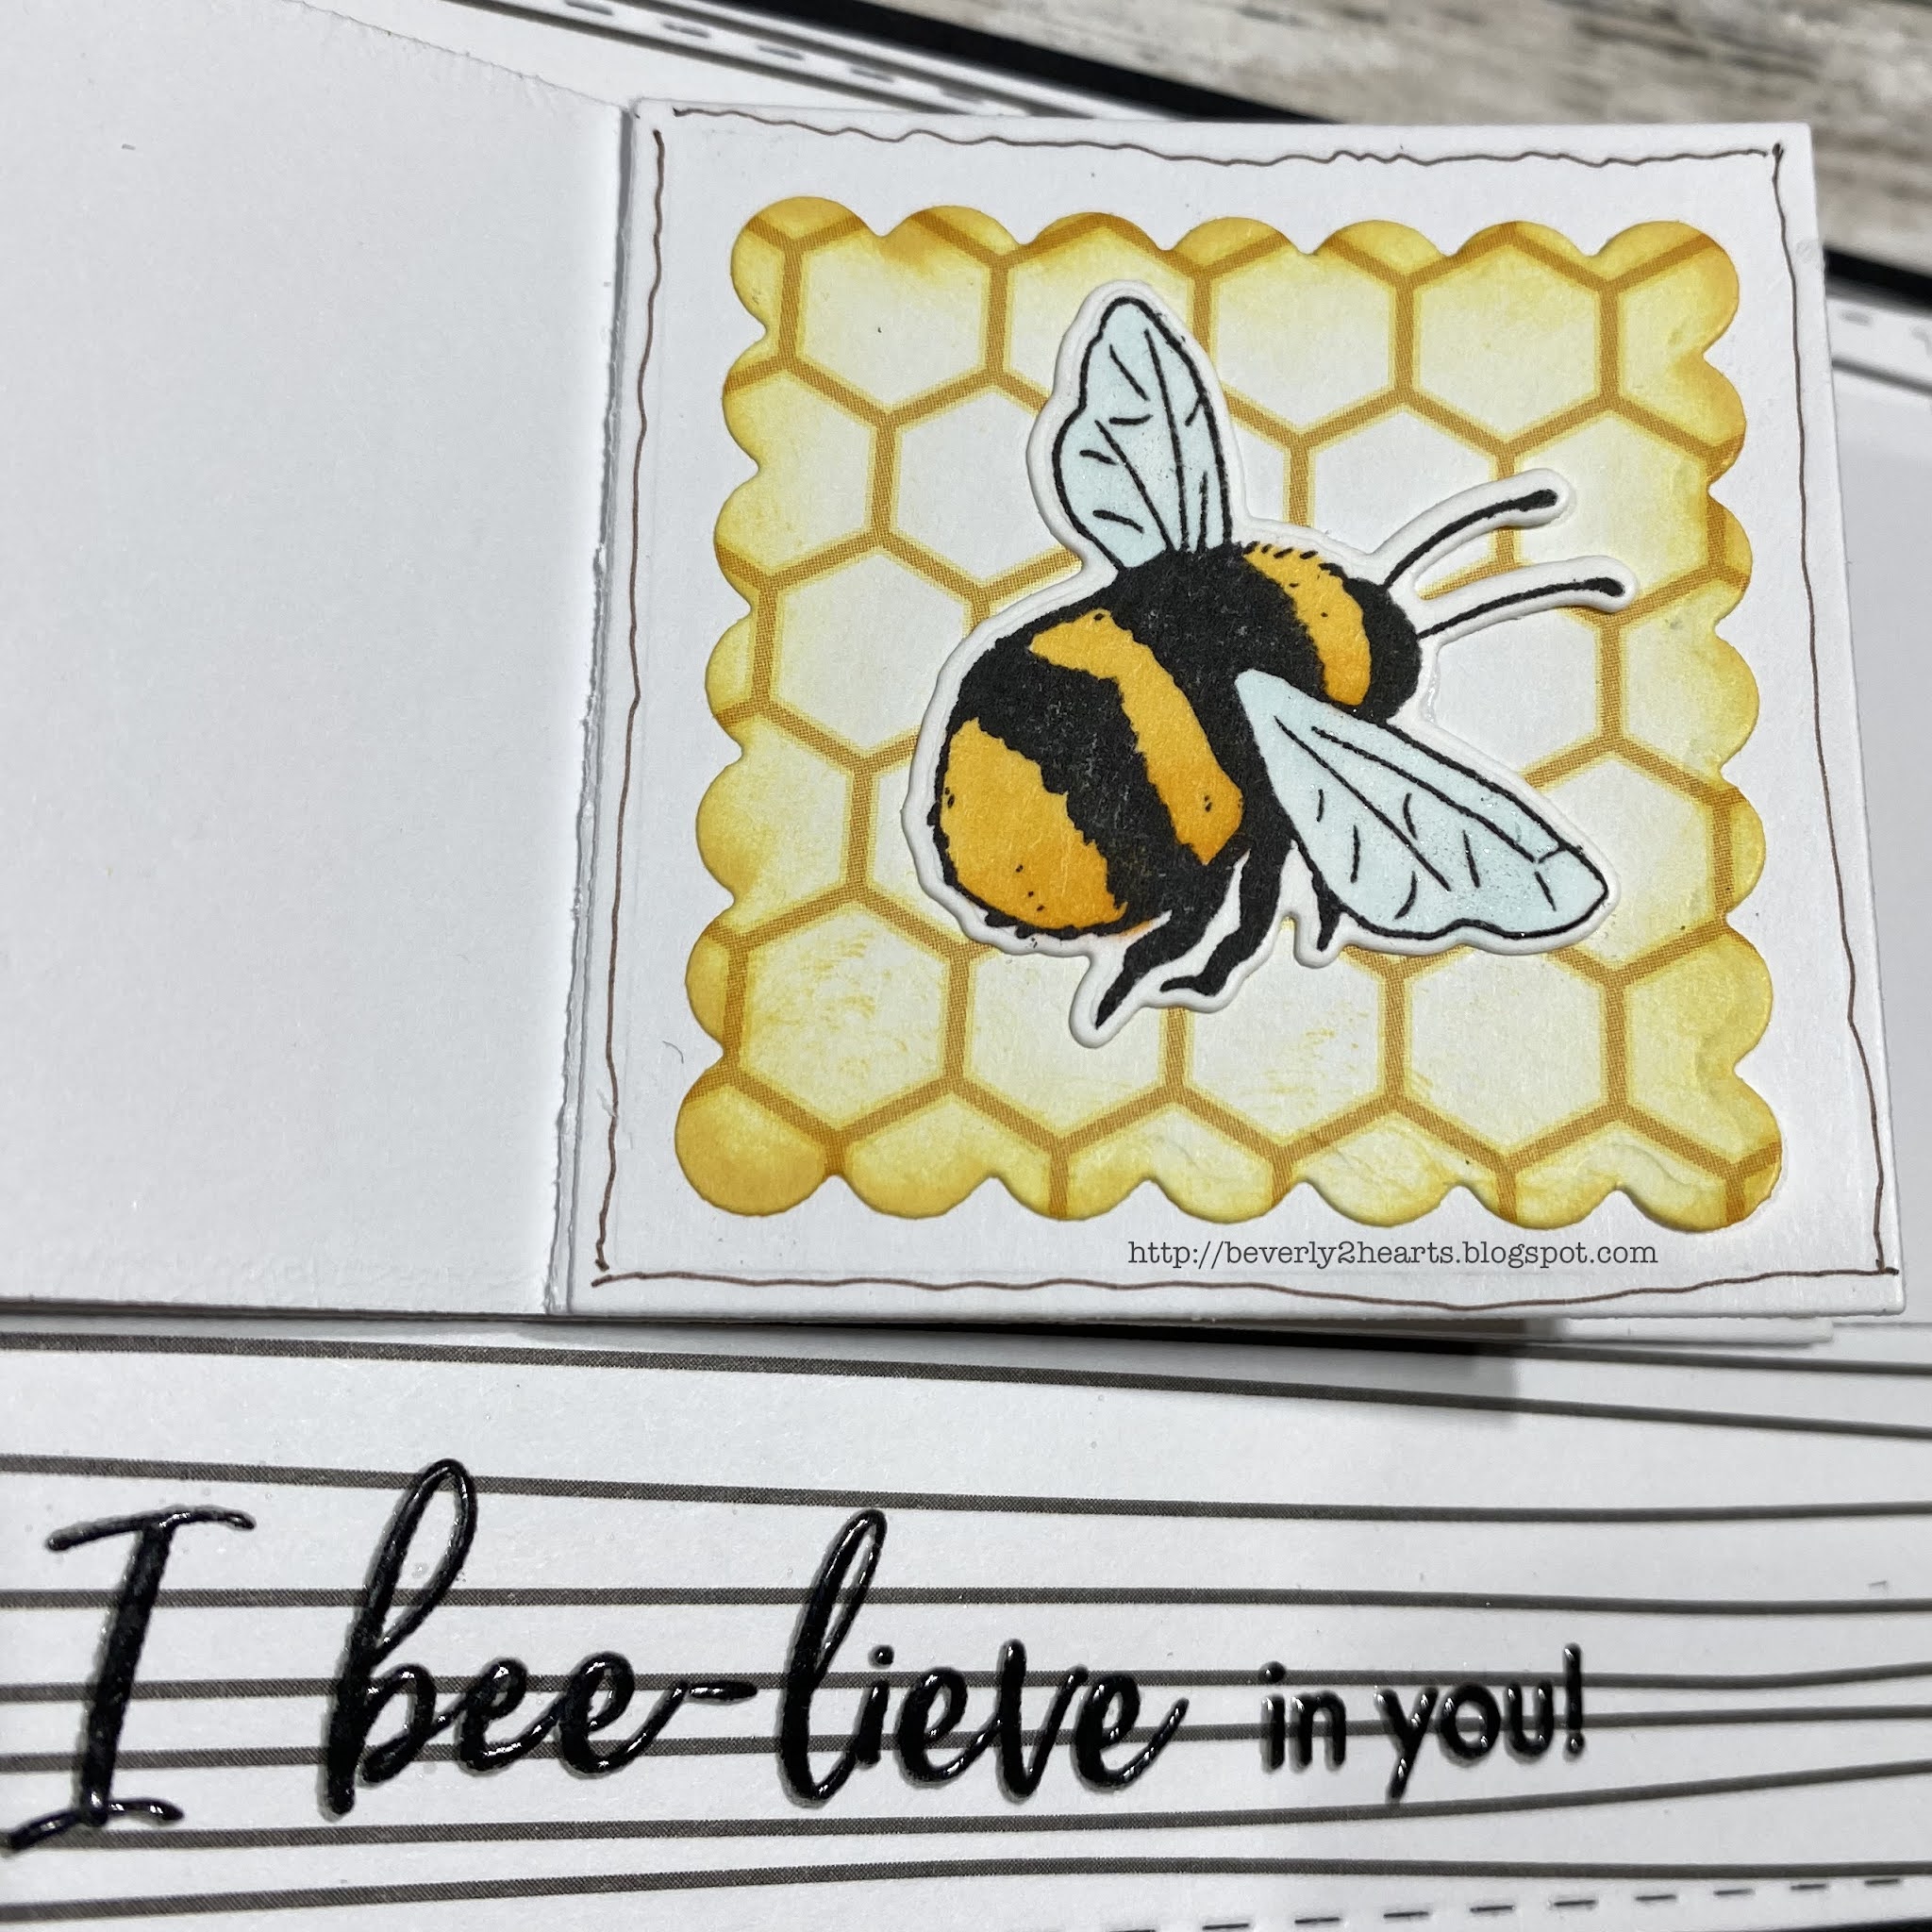
I Bee-lieve in You Card

 Often, I will stamp some images to color - with no intention of how I'm going to use it.  Today's card is using some colored bees from the My Monthly Hero January 21 kit.  The bees were colored with Tombow Markers.  A sparkle pen was added to the wings for shimmer.  

Starting with The Bees Knees paper pad, I selected a few sheets and used Stitched Rectangles for the background.  Flippin Awesome die gave me a place for all three bees.  The honeycomb paper was die cut and inked with Butter Bar ink.  My sentiment was stamped with Amalgam ink using the MISTI and then restamped with Versamark ink and heat embossed with clear embossing powder twice for extra dimension.  The card was assembled and adhered on black card stock.

Flippin Awesome


Have a great day and keep on crafting!

Affiliate links used at no cost to you.  Not all links are affiliate, I just want to share what I used.  All products were purchase by me unless noted.  I don’t sell anything nor am I employed.  This is my hobby and I hope to inspire you to play :)

Wednesday, September 16, 2020

Birthday Slimline Underwater Card

I love anything that is water related!  My Favorite Things has a stencil that when used once and then rotate 3 times, looks amazingly like water!  Mine arrived over the weekend and I had to play today!

http://beverly2hearts.blogspot.com

http://beverly2hearts.blogspot.com


I chose to make a slimline card, underwater birthday card.  First I started with a sheet of Neenah 110lb card stock trimmed it to 4 1/4 x 8 1/2.  


Now, time to work with the stencil.  The stencil is approximately 6x6 so I did one section then flipped my card stock around to do the other side.  First I placed purple tape onto my glass media mat to place my card stock.  Then I prayed Pixie Spray onto the back of the stencil to keep in place.  Then I taped my card stock to the mat.  Tumbled Glass Oxide ink was used with a blender brush then I rotated the stencil and repeated inking until stencil has rotated 4 times.  To finish the other side, my card stock is flipped.  Finally, with a light touch, I blended Peacock Feathers all over to hide the seam of ink.


The second piece of card stock is inked with Vintage Photo and a blender brush.  Using my Gemini Jr I die cut the  “sand” piece with Slimline Stitched Hillside Borders and layered them for an ocean bottom.  Then adhered it to the “ocean” piece with connect glue.  Using the Large Slimline with sliders die I ran it through my Gemini Jr.  Finally I used the Small Slimline with Lift the Flaps Die on top and ran that through the Gemini Jr.


Now time to decorate!  Using some older My Monthly Hero Kit stamps I added seaweed with Hero Arts Ink.  Then I stamped with Versamark ink (in my MISTI) two coral pieces and applied Pink Puff Embossing powder and heat set.   Then using You are Sublime I stamped the sentiment with amalgam ink using my MISTI for easy placement.


I pulled out some previously stamped, colored and die cut fishes from You are Sublime and Gill Friends and played with arranging them before adhering with connect glue.  This was soooo fun to do!


Paradise card stock is trimmed to 8 1/2 x 7 and folded in half.  I then opened the flaps and make tick marks with a pencil for placement guide.  A sentiment is stamped with amalgam ink and previously colored images are attached.  I erased the tick marks with the couture creation tool.  Finally, the card top is adhered to the card base.


Have a great day and keep on crafting!


Affiliate links used at no cost to you.  Not all links are affiliate, I just want to share what I used.  All products were purchase by me unless noted.  I don’t sell anything nor am I employed.  This is my hobby and I hope to inspire you to play :)

Sunday, September 6, 2020

Graduation Celebrate with Pop Up Card

I needed a graduation card but wanted something non-traditional.  So I chose celebrate rather than congratulations.  I’m very proud of this graduate and she has big plans!

http://beverly2heaarts.blogspot.com

http://beverly2hearts.blogspot.com


Starting with a top folding base I chose Grapesicle.  Next I used the quilted background die with white card stock.  Ran that through my Gemini Jr..  Next I used the Celebrate die and cut two white and one from silver mirror card stock.  Once that was done, the layers are attached.  I had some colored wired ribbon in my stash that looked perfect.  I wrapped it around the white background piece and attached on the reverse side.  Next I glued that to the background and applied the sentiment with enough glue to soak through the ribbon.  That pretty light purple peeks through the “quilting”.


For the inside, I chose Pivot Pop Up and again chose that same silver mirror card stock for the Bold Numerals 2020.  A very close color match of ink is brushed around the edges.


The sentiment and signature was inked when I realized I hadn’t taken a photo, so I layed a piece of card stock over for the pic.


Have a great day and keep on crafting!


Affiliate links used at no cost to you.  Not all links are affiliate, I just want to share what I used.  All products were purchase by me unless noted.  I don’t sell anything nor am I employed.  This is my hobby and I hope to inspire you to play :)


Saturday, July 11, 2020

Congratulations Slimline Card

Todays card is quick and easy and is part of #thedailymarker30day challenge.  The coloring part is is the second layer.  I didn’t have the right color blue card stock, so I used ink and made it.

Using the Large Slimline die and the Small Slimline with flaps dies, I used my Gemini Jr to cut all three layers, the royal blue and two white panels.  Summer Sky ink is the perfect color, so I used a blender brush to color the edges.  The top panel covers the middle.

Congratulations was die cut with Bold Alphabet from glitter card stock.  It was a glittery afternoon!  I attached the lined up letters with Connect glue and adhered all three layers onto my card base.

This card is for a High School Graduate during this pandemic.  I chose his school colors and I’m sure he will appreciate the inside ($$$) more than the card itself, lol!

Have a great day and keep on crafting.

Affiliate links used at no cost to you.  Not all links are affiliate, I just want to share what I used.  All products were purchase by me unless noted.  I don’t sell anything nor am I employed.  This is my hobby and I hope to inspire you to play :)

Thursday, June 18, 2020

Taco Birthday Card


Today I have for you a birthday card using products from many companies.  I get the Small Die of the Month kit from Spellbinders, and May’s set has these adorable stacked deco edges dies.  Unfortunately it has sold out.  

I placed the die near the edge of my base and ran it through my Gemini Jr.  Then I chose a strip of Bees Knees Paper Pad slightly wider than the die and glued it to the back of the die cut.  Using Sea Glass ink and blending brush I inked my card base.  

Next I stamped with Tuxedo Black ink the Year Nine (Taco) stamp twice.  These images were super quick to color with Copics and fussy cut.  Once the placement was decided, I stamped the sentiment, using my MISTI helped.  One of the tacos is raised with foam tape.

Have a great day and keep on crafting!

Affiliate links used at no cost to you.  Not all links are affiliate, I just want to share what I used.  All products were purchase by my unless noted.  I don’t sell anything nor am I employed.  This is my hobby and I hope to inspire you to play :)
Saturday, March 28, 2020

Magic Iris Easter Card and Sheltering In

Every year, my best friend and I plan a wonderful weekend attending the CK Convention.  In fact, we drove to Nashville before it started coming to St Louis.  We sign up for several classes and I designate a healthy budget for shopping.  This year Becky had a golf trip scheduled and would not be able to attend. (her trip was planned before we knew the CKC dates)  So my sister and decided to purchase a ticket to the vendor fare.  It was going to be shopping in the AM, hubby and I had tickets to see “Fluffy” the comedian, and a family wedding the next day.  Big weekend plans for us. 

Then the “Corona Virus” happened…. My immune system is compromised - two heart transplants require a drug regimen to keep me alive.  When I received these precious gifts I agreed to be a good steward, so careless risky decisions are a no no!  No CK Convention, Fluffy was postponed and we made the decision to miss the wedding.  Missing the wedding was a hard one!

What to do, what to do….support online small business is in order.  After all, I still had my budgeted money.  My dear sweet man, offered to later travel out of town to another CK Convention.  Since a “sheltering order” was now in effect, I shopped online.   Several companies were still shipping and having sales, so I shopped.  Scrapbook N Memories, Concord & 9th, My Favorite Things and Echo Park was where my $$ went.  This past week was delivery week, four shipments arrived and I started playing with new goodies!
Magic Iris
Magic Iris


I was totally smitten with Lawn Fawn’s Magic Iris dies and  I bought them all.  Today’s card uses the Add On die, Easter Before N After stamps, cloud dies from Yay Kites and Plane and Simple.  Cotton tale cutie, grass die and a die strip from a Hero Arts kit were used.  Images were colored with copic markers and cut with Gemini Jr machine.  The mechanism goes together quickly and was fun to assemble.  Arranging the scene was the best part.  A shimmer pen gave my clouds sparkle!  


Have a great day and keep on crafting!  It’s keeping me sane now!

Affiliate links used at no cost to you.  Not all links are affiliate, I just want to share what I used.  All products were purchase by my unless noted.  I don’t sell anything nor am I employed.  This is my hobby and I hope to inspire you to play :)

Saturday, April 21, 2018

Resist the Urge to Add More!

Sometimes a card comes together so quickly....you think, what else could I add to make it better?  Maybe you should ask, why should I add more?  That's what I'm thinking about this card.  Of course, I could continue to add more and more layers and texture but I really love this simple look.  So just stop! :)

When I saw this Quilted Back Drop from Lawn Fawn, I just fell in love!  When I had it in my hot little hands, I was giddy!  Running with through my Big Shot (Sizzix) was oh so satisfying!  I placed the die cut on a piece of deep gold colored card stock (Michaels) and loved the way it toned down that bold color.  I grabbed some Smooth Gold Metallic paper and cut three Happy Stamp & Cut (Hero Arts) happy's.  Multi Matt Medium was used to adhere them down securely.  Here's the card..
Have a great day and keep crafting!

Affiliate links are used at no cost to you.  Not all links are affiliate, I just want to share where I found them.  All products were purchased by me.  I don't sell anything and I'm not employed, this is my hobby and hope you are inspired to play :)

#lawnfawn, #quiltedbackdrop, #stampncut,  #heroarts, #sizzixbigshot

Wednesday, March 21, 2018

You Make Me Hoppy Bunny Cards

Today I have bunnies....from the Showers and Flowers (SSS) stamp set.  Love it when a stamp set has several images to challenge me.  These bunnies were too much fun coloring with Copics.  I decided to add grass with green copics but then chose to fussy cut one and use Grass Die (Stamps Of Life) along with Puffy Cloud Border (Lawn Fawn) for a different look.   Here's my two cards:

First is done mostly with die cuts - I'm telling you, I do love my Sizzix Big Shot.  The frame is made with Stitched Rectangles, and the Grass Border and Eggs (Spring Birds) all from The Stamps of Life.  To add dimension, two layers of grass and three cloud layers were added.  Summer Sky (Memento) ink was added to clouds and frame.  Foam tape raises the frame, bunny and stamped sentiment that's heat embossed with White Embossing Powder (Ranger).  The bunny has Glossy Accents on his nose and Spectrum Noir Sparkle pen on his fluffy tail.  Jewels are from Cupids Kiss (Studio Katia).

Second Card is has a Tumbled Glass distress ink (ranger) sky.  This sentiment was stamped with VersaFine Ink and heat embossed with Clear Embossing Powder (Ranger).  The edges were torn and inked with Cloud Ink (SOL) and green Offray ribbon is tied in a bow.  Again used those Stitched Rectangles from Stamps of Life.

Wednesday, February 21, 2018

Shake Shake Shake that Shaker Box

I'm really enjoying mixing up my stamps and dies from my stash!  Today's card uses products from many brands.
First comes the coloring - I stamped with donuts from Lawn Fawn Donut Worry Stamp Set using Versafine ink on to Bristol Smooth cardstock.  Then I used Tombow Markers to color my donuts adding a wet brush to smooth.  Since I didn't purchase the coordinating dies, I used what I had to cut them out.  EK Success 1 1/4 inch Punch cuts the donut perfectly, for the inside I used my Crop-A-Dile II and set the hole punch to 3/16.  Then I stamped the sprinkles with Hero Arts Passion flower Ink.  Setting those aside, I started stamping on Neenah Solar White 110lb cardstock, my background with Sprinkles Turnabout from Concord & 9th.  Ink colors are:  Hero Arts Bubble Gum, Memento Lulu Lavender, The Stamps of Life Pixie and Ranger Sea Shell Pink all in the Tim Holtz Stamp Platform.  Next I created a donut box by using my Sizzix Big Shot to die cut a "frame" by using Squares and Stitched Square dies from The Stamps of Life.  One look at the "donut box" and I thought - shaker box!  So I grabbed some transparencies and cut a 2 3/4 x 2 3/4 square and used Scor-Tape to adhere.  For lift, I used two layers of foam tape all along the edges.  I placed my donuts on a scrap piece of cardstock, glued them down and placed some sequins in my "box" and secured them with the donuts piece. Next I wrapped my donut box with bakers twine from my stash.  

To pull my card together I used Recollection from Michaels Cardstock for my base.  For my sentiment, I stamped with Versamark Ink and sprinkled Hero Arts Pink Prisma Embossing Powder (that came in My Monthly Hero kit) and heat embossed.  Using Hearts in a Row Vertical Die Set from My Favorite Things I die cut the sentiments and adhered them down.  Used Scor-Tape to really hold my Donut Box down and my Stardust Gelly Roll Pen to embellish the edges.

Have a great day and keep on crafting!

#heroarts #thestampsoflife #memento #cardmaking #mftstamps #concord&9 #sizzix

Sunday, February 4, 2018

January My Monthly Hero Kit - 2 More Cards

So I'm back with two more cards to share with you from the January My Monthly Hero Kit.  Amazingly, it is still available!  The first card is made with the dies included in the kit.
The dies were cut out of the white and backed with red card stock.  I popped the die back in and added all the bits back using the die cut for a guide.   I just love the look of red and white - so clean!  The sentiment is from Simon Says Stamps You Matter with white embossing powder on My Favorite Things Die-namics Hearts in a Row - Vertical banner.  Those tiny lines require a very steady hand when gluing - Mine have tremors so if you look closely you can see my oops.

The next card uses the same kit, same sentiment stamp set, same banner die set along with a few other items from the kit.  Like the Love sentiment that's stamped in versa mark on the back ground.  Along with the pink ribbon that was wrapped around the kit (always such a nice touch in packaging!).  I used the Hero Arts Nesting Heart Infinity Dies in red to back the white heart die.  A tiny pearl and Lawn Fawn's Just For You teeny heart to stamp in the background.  A Gelly Roll Stardust Pen added sparkle to those teeny hearts.
Let me know what you think below.  Have a great day and keep crafting!

Wednesday, April 20, 2016

My First Lawn Fawn Stamp Set - Loads of Love


I've been checking out pinterest a lot lately and fell in love with this set.  The base is actually from Sizzix and is called Cute As A Bug Step UpI purchased both of these at CKC (including a whole lot more).  The images were colored with Copics and the sentiment was highlighted with a Quickie Glue pen and ultrafine crystal glitter.  I also added Glossy Accents to the knobs on the machine.The pattern paper is from Nana's Nursery Stack from Hobby Lobby.

I was surprised by the cost of this stamp set.  I don't buy anything without a coupon!  Only one booth at the CKC had Lawn Fawn products 20% off, believe me, I looked!  Once I played with them, I realized why.  They are very similar to Technique Tuesday stamps, very substantial, thick in depth and makes a detailed impression.  My selection of stamps is based purely on design but it's nice to appreciate the quality of different manufacturers.

Have a great day!