Showing posts with label The Stamps of Life. Show all posts

Thursday, February 13, 2025

Birthday Card Using My Stash

When I started card making there were a several favorite companies and one was The Stamps of Life.  Pulling out an oldie Die Set called Framelits Drop-Ins.  I searched for a link but alas, no luck.  I highly recommend The Stamps of Life Dies, especially the Flip-its, Step-Ups and other card bases, they are very versatile for many occasions, a true bang for your buck!

Birthday Card


Hero Arts Star Confetti Fancy Die was a quick answer for the many stars I wanted.  I used a silver, teal and holographic paper for stars.  The blue paper is from My Favorite Things Sweet Celebrations and the Coral is from DCWV Cardstock Stack.

My go to supplies for assembly include the Best die cutting machine I've ever used Anna Griffin Empress Elite, Bearly Arts Glue and Foam Tape.  American Crafts Premium Ribbon that I bought forever ago at Michaels with a 40% off coupon.  Gosh, I miss those 40% coupons!  Nearly everything I bought in those early days came from Michaels, Hobby Lobby and JoAnns with a coupon.

Affiliate links used at no cost to you.  Not all links are affiliate, I just want to share what I used.  All products were purchase by me unless noted.  I don’t sell anything nor am I employed.  This is my hobby and I hope to inspire you to play :)

Monday, January 31, 2022

Mini Slimline "Money Cards"

 Sorry, I've been away so long!  But I'm back now with some cards I gave at Christmas for those that chose $$$.  Even decided to leave them blank inside so they could reuse them.  The gift bag had the to/from information on it.

Slim Line Money Cards

When I saw the Paper Bag Die, I knew who would get a card with that!  I chose three colors of pink card stock from Michaels and some gold foil to use for the die cuts.  Once the "handles" were attached with glue, it was time to arrange them on a mini slimline die cut on vellum.  Glue dots were placed behind the bags to attach to hide the adhesive.  This was attached to two stacking die cuts and adhered to a mini slimline card base.

Money Card


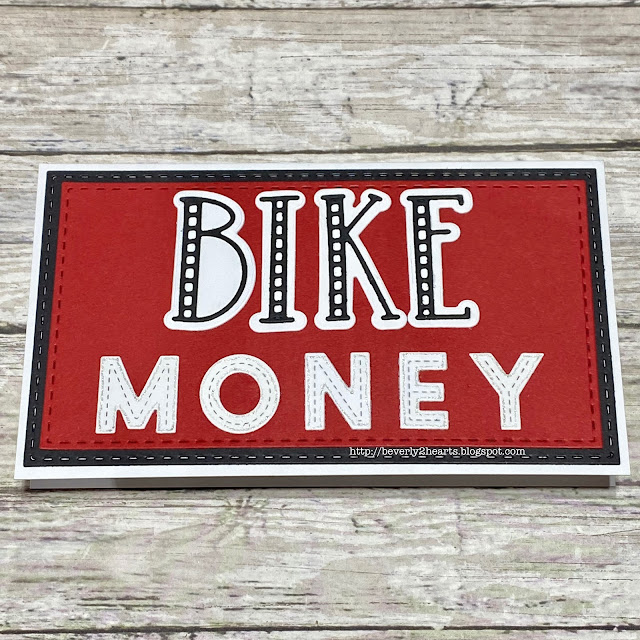
My second recipient is big into off road biking and thought the direct approach was best.  Choosing Red, White and Black the card was similarly made like the first.  Only using the Striped Alphas and the Oliver Dies.  A stardust pen adds interest to the alphas.

Have a great day and keep on crafting!

Affiliate links used at no cost to you.  Not all links are affiliate, I just want to share what I used.  All products were purchase by me unless noted.  I don’t sell anything nor am I employed.  This is my hobby and I hope to inspire you to play :)


Friday, September 10, 2021

I Bee-lieve in You Card

 Often, I will stamp some images to color - with no intention of how I'm going to use it.  Today's card is using some colored bees from the My Monthly Hero January 21 kit.  The bees were colored with Tombow Markers.  A sparkle pen was added to the wings for shimmer.  

Starting with The Bees Knees paper pad, I selected a few sheets and used Stitched Rectangles for the background.  Flippin Awesome die gave me a place for all three bees.  The honeycomb paper was die cut and inked with Butter Bar ink.  My sentiment was stamped with Amalgam ink using the MISTI and then restamped with Versamark ink and heat embossed with clear embossing powder twice for extra dimension.  The card was assembled and adhered on black card stock.

Flippin Awesome


Have a great day and keep on crafting!

Affiliate links used at no cost to you.  Not all links are affiliate, I just want to share what I used.  All products were purchase by me unless noted.  I don’t sell anything nor am I employed.  This is my hobby and I hope to inspire you to play :)

Monday, August 30, 2021

Birthday Card with a Sundae

Have you heard about The Stamps of Life?  They have several really reasonably priced monthly subscription clubs. Actually, it was my first stamping subscription club I ever joined.  Todays card is made with the sundae2stamp set.

http://beverly2hearts.blogspot.com

 Who doesn't like ice cream?  Not anyone I know!  My Gemini Jr made quick work of the sundae2stamp dies and to make them stand out, I inked all the edges with coordinating colors.  Instead of centering the image on my A2 card, shifting it to the left made room for my daughters name along side with Olivers ABC Letters.  The perfect background paper is an older set from My Favorite Things that they no longer sell. Glossy accents add shine to the cherry on top and a sparkle pen adds interest to the letters.  Silver baubles from my stash are adhered for more shine.

Have a great day and keep on crafting!

Affiliate links used at no cost to you.  Not all links are affiliate, I just want to share what I used.  All products were purchase by me unless noted.  I don’t sell anything nor am I employed.  This is my hobby and I hope to inspire you to play :)


Sunday, February 7, 2021

All About The Heart Cards

 Hoping your staying warm today, it's 7 degrees here, in St Louis. Actually it's Super Bowl Day - I never watched football until after my second heart transplant.  Still in the hospital with nothing to do.  

Hospital tv doesn't have a lot of variety so I starting watching the pre game shows and was thoroughly entertained.  2013 game was played in New Orleans and they featured lots of local information.  It was also the year that the power went out and changed pace of the game for an upset.  Now, I plan to watch the whole day of Super Bowl coverage.  I'll be watching while I spend the day die cutting - hurray for multi-tasking!

Hearts have always been a favorite of mine, even before the heart transplants.  When The Greetery came out with this line of heart dies and stamps I did my happy dance!  The "add to cart" button was hit several times!  Here are two of the cards I made.

Boxwood Heart Detail Die

Boxwood Heart Detail Die


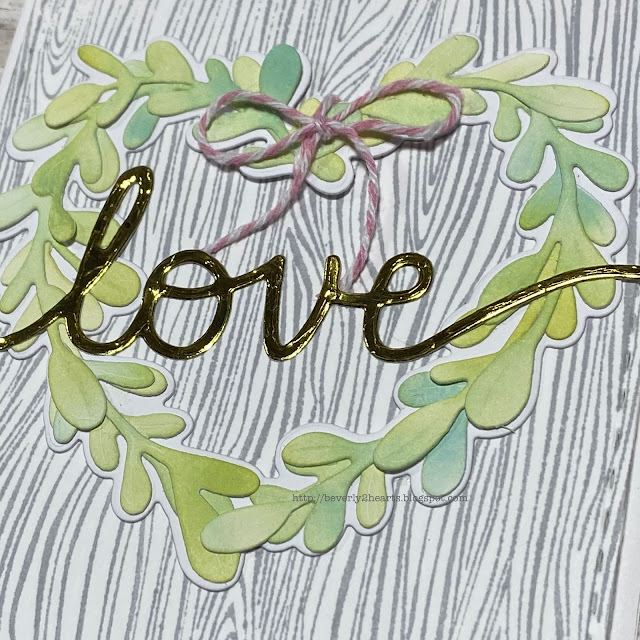
The first card is made using Designer Woodgrain by Hero Arts stamped with Soft Granite Ink,  Then die cut with Stitched Rectangles in my Gemini Jr.  This is added to my card base.  Boxwood Heart Detail Die was run through the Gemini Jr,   I taped the die cut pieces back into the negative place and colored the piece with blender brushes and Twisted Citron, Tumbled Glass and Peeled Paint Oxide Inks.  I also die cut Boxwood Heart Base out of white card stock.  Using the attached directions, I assembled the leaves and attached with Precision Glue.  Using gold foil paper, I die cut the word love from The Stamps of Life and adhered to the heart.  Love is, is stamped with amalgam ink for the sentiment.  Finally, a bow, made with string, is attached.

Love Is Stamp

Love Is Stamp


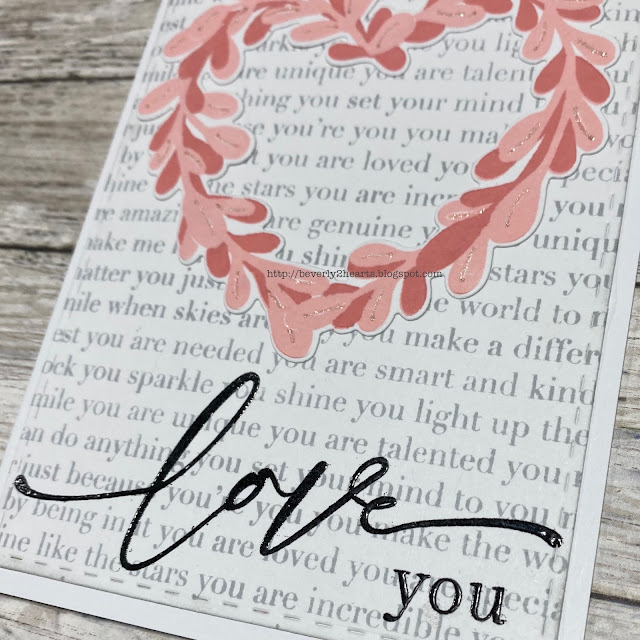
The second card is made similarly but the background stamp is Simon Says Stamp You Are.  Love Is stamp is stamped with Coral Reef and Passion Fruit.  Boxwood Heart Base is used to die cut.  After adhering to base a Stardust pen add sparkle to leaf veins.  Using my MISTI, Amalgam ink and then VersaMark Ink I stamped Love You and heat embossed with clear embossing powder.

Have a great day and keep on crafting!

Affiliate links used at no cost to you.  Not all links are affiliate, I just want to share what I used.  All products were purchase by me unless noted.  I don’t sell anything nor am I employed.  This is my hobby and I hope to inspire you to play :)
Friday, January 15, 2021

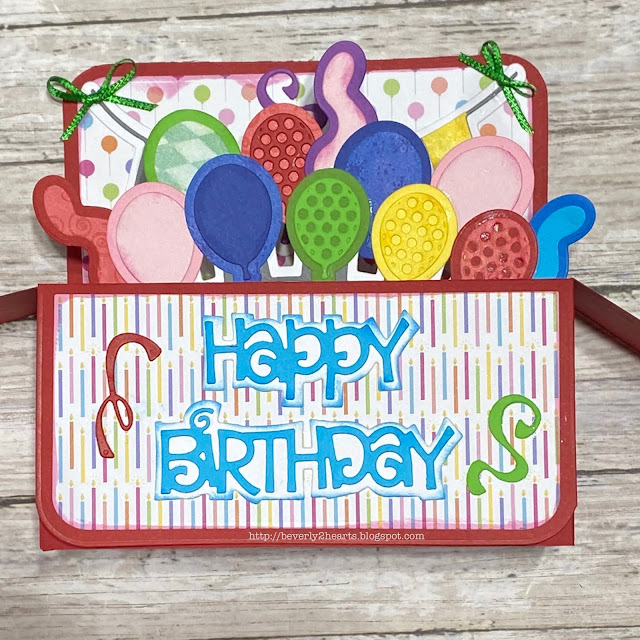
Birthday Box Card

 I hope you all had a good holiday!  I know it was a bit strange but at our house we made lemonade with this big pile of lemons.

My best friend gave me a bag full of The Stamps of Life goodies and today's card uses one of those - Thanks Becky!

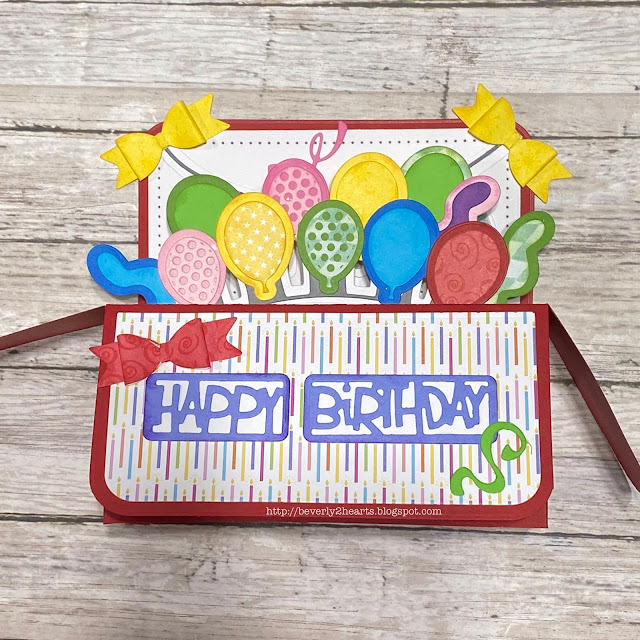
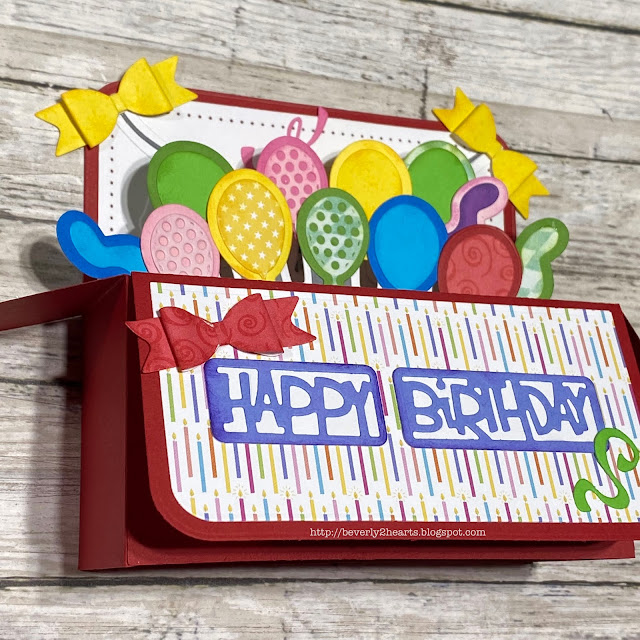
So this is a bigger box card - 5x7 but it all went through my regular size Gemini Jr just fine.  Included with this set was a booklet with instructions and examples and I pretty much scrap lifted from that.  

5x7 Box Card Set

5x7 box card set

5x7 box card set

5x7 box card set


The card went together quickly but there was lots of die cutting.  To combat this, I cut scraps to fit the smaller dies and filled the die cut plate to make fewer passes, purple tape helped corral all those bits.  I did use a few 6x6 paper pad scraps.  Then I added ink around the edges to define each color.  

Often, I will make two cards at once as I did today.  The difference is the sentiment and bows.  The framed rounded sentiment came with the die set,  while the stacked die, I already owned.  Just changing things up a bit.

Have a great day and keep on crafting!

Affiliate links used at no cost to you.  Not all links are affiliate, I just want to share what I used.  All products were purchase by me unless noted.  I don’t sell anything nor am I employed.  This is my hobby and I hope to inspire you to play :)


Wednesday, April 29, 2020

How Awesome You Are Card

These are such strange times right now!  And, when you throw in another major life experience, like an child with an undiagnosed illness that requires a hospital stay or purchasing and closing on a new home things are bound to be more complicated!  Both have happened to family members and I'm sure it's happened to others, but isn't heart warming when you see kindness happening!  These are not my stories to tell but just a glimpse into situations that continue to arise all over.

Todays card is one to send love during these times.  

First step was stamping the background with Heart to Heart with Versamark ink and sprinkled clear embossing powder and heat set.  Picked rasberry and spun sugar ink was blended then a shimmer spray was applied.  The sentiment was stamped with charcoal ink and re-stamped with Versarmark and clear embossing powder was heat set for shine.  The piece was then die cut with stitched rectangles.  Next came the bow* made with 7/8 inch organza ribbon and attached.  Foam tape adds dimension to Razzle Berry card stock and finally Valerie ice gems were added with connect glue.

* I learned how to tie these bows from www.amazingpapergrace.com tutorial.  I could not find the same online tutorial but I recommend checking out her site!

Have a great day and keep on crafting!

Affiliate links used at no cost to you.  Not all links are affiliate, I just want to share what I used.  All products were purchase by my unless noted.  I don’t sell anything nor am I employed.  This is my hobby and I hope to inspire you to play :)

Wednesday, September 18, 2019

Same Card, Two Colors, One is "black, like my soul"

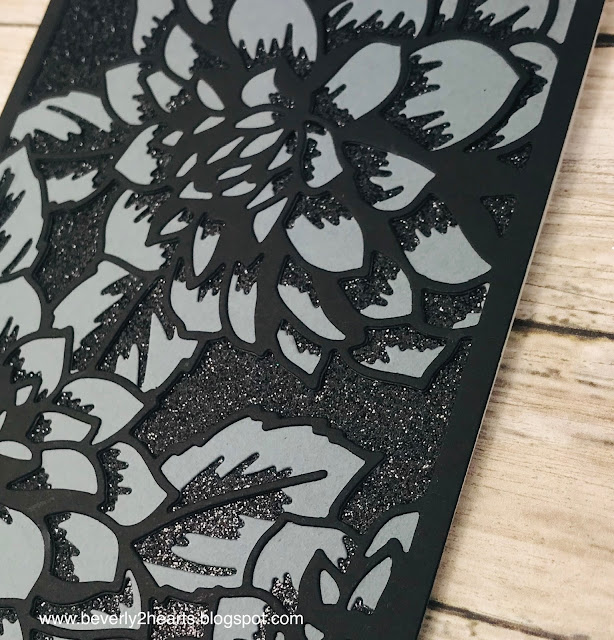
Now I know that title sounds a bit weird.  Backstory is that I was making a card for someone specific.  I chose two colors of pink and gray.  Turned out really cute but then I remembered something she said recently.  She saw the new Starbucks reusable cup - it was textured and black - she "needed it because it was black, like my soul".  So I remade the same card with gray, black and black glitter and it looked pretty cool too.  I don't know if I'll give her just the black one or both.  Here they are:
Altenew Floral Cover Die


Altenew Floral Cover Die

Both cards are made the same way, using my Gemini Jr to die cut the Floral Cover A & B dies.  These dies make cards come together really quickly.  Just glue the die cuts together and then to a card base.  

The pink card has a sentiment from Sketched Flowers and was stamped with Soft Granite Ink and then again with Versamark Ink in my Mini Misti.  Clear Embossing powder was heat set with my Heat Tool.  This was die cut with Majestic Labels and backed with fun foam before adhering to the card.   Cupids Kiss gems were added to finish the card.

The black card has black glitter card stock behind the die cuts.

Have a great day and keep on crating!

Affiliate links used at no cost to you.  Not all links are affiliate, I just want to share what I used.  All products were purchase by my unless noted.  I don’t sell anything nor am I employed.  This is my hobby and I hope to inspire you to play :)

Monday, September 9, 2019

Mr & Mrs Shower Card

We have a wedding coming up!  My daughter Katie is marrying the love of her life and I wanted to make a special card for her bridal shower.  Here it is:

I started with the Mr & Mrs Die from Momenta.  I bought this on clearance at Hobby Lobby and unfortunately is not available at the sites I shop at.  Using my Gemini Jr I die cut three times with white card stock and one with a smooth glitter card stock.  The glitter card stock came with a My Monthly Hero Kit (www.heroarts.com).  I stacked and glued the die cuts adding the glitter on top.

Then, using a gray wood grain specialty paper (also from My Monthly Hero Kit) I die cut my background using Stitched Rectangles.  This was attached to fun foam (for dimension) and glued to my card base.  Mr & Mrs was then adhered and Crystal Gems were added.

I was really pleased with the how the card turned out.  Excuse the wet glue under the gems.

The shower was perfect!  It was at a restaurant and was beautifully decorated by a cousin!  Here is a picture of my three daughters and youngest grandson.
Have a great day and keep on crafting!

Affiliate links used at no cost to you.  Not all links are affiliate, I just want to share what I used.  All products were purchase by my unless noted.  I don’t sell anything nor am I employed.  This is my hobby and I hope to inspire you to play :)

Tuesday, May 21, 2019

Dad Nap Card

How many of you have a man in your house who falls asleep while watching tv?  Does this card look familiar...I know it is in my house.  That's why I bought this stamp set - it made me giggle when I saw it.  I'm all about the happy moments!

This card with the Lazy Boy stamp, stamped with onyx ink on watercolor paper.  Altenew watercolor paints were used to color and after it was dry, glossy accents were added to the chip bag and remote.  Stitched rectangles with the gemini jr die cut the image and a pen knife cut the black matting piece, this was backed with fun foam for dimension.  Shoppe on the Square by Paper Studio is the patterned paper I used.  Some gems, inking and pen work finishes this card.
http://beverly2hearts.blogspot.com

This card was made the same way, only the pattern paper is Garment District by Paper Studio.


Have a great day and keep on crafting.

Affiliate links used at no cost to you.  Not all links are affiliate, I just want to share what I used.  All products were purchase by my unless noted.  I don’t sell anything nor am I employed.  This is my hobby and I hope to inspire you to play :)

Saturday, May 4, 2019

Cards made with Giveaway Goodies

On Instagram I enter quite a few Giveaways.  If I like what the creator posts, I am happy to follow them and share with like minded buddies.  Much to my surprise, I won a Giveaway and it had an item that I've had on my wish list.  Actually, I've put it I'm my cart many times, only to remove it because I couldn't justify another watercolor set on my budget.  Loraleeferguson offered this fabulous giveaway and I won!  Lora makes beautiful cards, click on the link above and check her out!  Here's a picture of what I won.  Check out her homemade card!


With this great giveaway, I made four cards and had a blast playing with the Altenew Water Color Set.  It's small and oh so fun to use!  The Floral Spring Stamp and Die Bundle was used with Onyx ink on Tim Holtz Water color paper.  After the image was painted and dried, I used stitched rectangles to die cut with my Gemini Jr.  Finally, I used that same ink and sprinkled clear embossing powder and heat set the sentiment.  Fun Foam is added to the back for dimension before adhering to my top folding card base.  Some of the cards have different ribbons and sequin embellishments.
Floral Sprig

Floral Sprig

Floral Sprig

Floral Sprig

Have a great day and keep on crafting!

Affiliate links used at no cost to you.  Not all links are affiliate, I just want to share what I used.  All products were purchase by my unless noted.  I don’t sell anything nor am I employed.  This is my hobby and I hope to inspire you to play :)

Monday, March 25, 2019

Pretty Fly for a Little Guy Card

Hello there, today's card is all about my newest Grandson, Benjamin!  He'll be 3 weeks old tomorrow and we are all totally smitten.  No pictures of Ben, my daughter is taking the safe route and keeping photos off social media (smart move).  Ben was the reason I bought Spork, a stamp set that has awesome sayings.  If you like to quote shows or movies, The Ink Road Stamps are for you.  My cart had several items before I checked out!

Here's the card:


I started with the baby image and stamped all over with soft sky ink.  Then with baby blue pigment ink I stamped the sentiment, sprinkled with clear embossing powder and heat set.  Next, I got out my stitched rectangle and stitched squares dies with my gemini jr.  Fun foam was added to the baby image piece and attached to the base.  Ribbon (celebration from Michaels) was added with a button and floss on top. (A reverse tweezer held it all in place while the glue dried).  The blue card stock was from a random piece from my stash and the sentiment with backing also got some fun foam behind it.  And there you have it - pretty quick card.

Have a great day and keep on crafting!

Affiliate links used at no cost to you.  Not all links are affiliate, I just want to share what I used.  All products were purchase by my unless noted.  I don’t sell anything nor am I employed.  This is my hobby and I hope to inspire you to play :)

Wednesday, March 6, 2019

Hugs Card


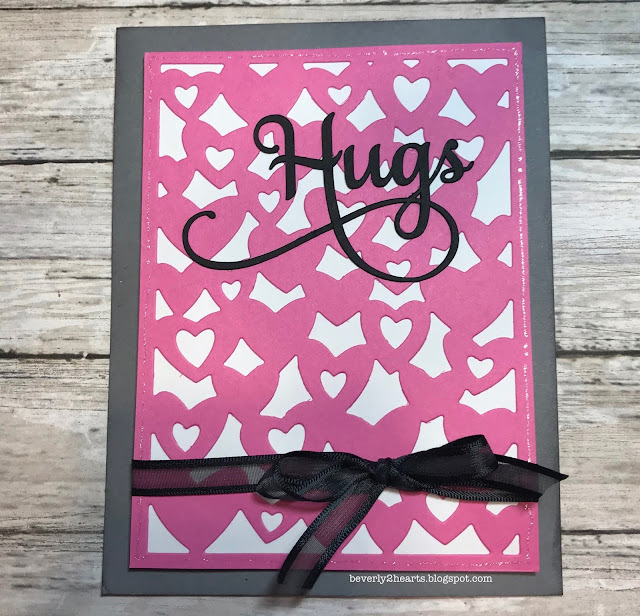
Hello there, todays card is a fast fast fast card.  The heart background has an inner and outer die so you can cut just the hearts without a border, I wanted the border.  I also cut a white rectangle to go behind the hearts.  For the sentiment, I used my Silhouette and the Samantha Font to cut Hugs with the swirly.  I stacked and glued together 2 of these before adhering to my card.  It's on grey card stock from Michaels that has inking around the edge.  A stardust pen adds shimmer and a ribbon completes the card.

Have a great day and keep on crafting!

Affiliate links used at no cost to you.  Not all links are affiliate, I just want to share what I used.  All products were purchase by my unless noted.  I don’t sell anything nor am I employed.  This is my hobby and I hope to inspire you to play :)

Wednesday, April 18, 2018

Just Because Card

Sometimes a card with no purpose is perfect!  You can choose to make it for any occasion - and that's what we have here.  Today's card is made with a stamp set called Loving Tulips from Power Poppy.

First the image is stamped on Neenah Classic Crest 110lb with Tuxedo Black Ink (Memento) and colored with Copic Markers.  Finishing details were added with a Signo White Gell Pen and Micron pen.  Next my trusty Big Shot (Sizzix), Square Die Set and Stitched Square Dies both from The Stamps of Life, frame out my stamped and colored image.  For a final 1/16 in frame, I used my Perfect Mini Layer Rulers and a PenBlade.  I added this to a grey card base with Fun Foam for dimension.  Some Glossy Accents were added for interest and sheer ribbon from Michaels was tied.
Have a great day and keep crafting!

Affiliate links are used at no cost to you.  Not all links are affiliate, I just want to share where I found them.  All products were purchased by me.  I don't sell anything and I'm not employed, this is my hobby and hope you are inspired to play :)

#powerpoppy, #sizzixbigshot, #thestampsoflife, #copicmarkers

Monday, April 9, 2018

Succulent Journaling Card-Cards, Yep, 2 Cards in that Title

Today's cards uses the Succulent Journaling Card Stamp Set and Matching Die Set from Neat & Tangled.  Both cards uses the same supplies only in different colors.  First I stamped on Neenah Classic Crest 110lb card stock with Tuxedo Black Ink (Memento) and colored with Copic Markers.  Also used the Copic Markers to color the background and then used Copic Blending Solution with a rag to create the texture.  

Next I got my trusty Big Shot (Sizzix) and Stitched Rectangle Die (The Stamps Of Life).  Then I used two colors of card stock and die cut with the Succulent Journaling Card Die.  What isn't shown is the center of this die outlines the flower and ribbon.  I used my PenBlade and a ruler to trim the insides off, I only wanted to use both frames.  I adhered the frames with Multi Matte Medium (Ranger) and placed a large acrylic block on it till dry.  Finally finished with attaching to a card base with Kokuyo Adhesive and brushed some Clear Spectrum Noir Sparkle Pen over the flowers.


I hope you have a great day & keep crafting!

Affiliate links are used at no cost to you.  Not all links are affiliate, I just want to share where I found them.  All products were purchased by me.  I don't sell anything and I'm not employed, this is my hobby and hope you are inspired to play :)

Monday, February 26, 2018

Cup of Cozy - Four Ways

Todays cards challenged me a bit.  I stepped outside my comfort zone to try something new.  We all fall into that "do what I do best" or "I've got a formula that I like".  This stamp set from Concord & 9th was a gift with purchase.  

First I stamped the mug from Cup of Cozy with versafine ink on to  Bristol Smooth cardstock.  Some time ago, I bit the bullet and bought the whole 96 set of Tombow Markers-time to color!  I watered those down by using a palette and water brush.  

This one has a background stamped with the coffee beans in AI's Hot Java Momma in Vintage Photo Distress Oxide ink.  Then I used Stitched Rectangles from Stamps of Life for the dark brown and stamped the sentiment with Versa Mark ink and covered with Ranger Seafoam White embossing powder and heated.  Then I stamped the steam with Memento Tuxedo Black ink and swiped Spectrum Noir Sparkle Pen for shine.  Finally I wrapped some crochet thread around the side and attached a button and tied a bow and added Glossy Accents to the liquid in the mug.

For this card I ran my Kraft paper through the Sizzix Big Shot in an Alterations embossing folder.  This time I inked the edges with the vintage photo distress oxide ink.  Stamped and heat embossed the sentiment on the cup with Ranger Gold Embossing Powder and added the tea bag.


The next two cards is when my comfort zone was challenged.  I used Kuretake Gansai Tambi watercolors on Strathmore Mixed Media, for the background.  I only used one color but I did add several coats after drying.  The steam was stamped with Fog ink from Stamps of Life and swiped with sparkle pen.  One has ribbon from Recollections Sheer Creations.

Have a great day and keep on crafting!

Wednesday, February 14, 2018

Cupcake Day Card 4 Ways

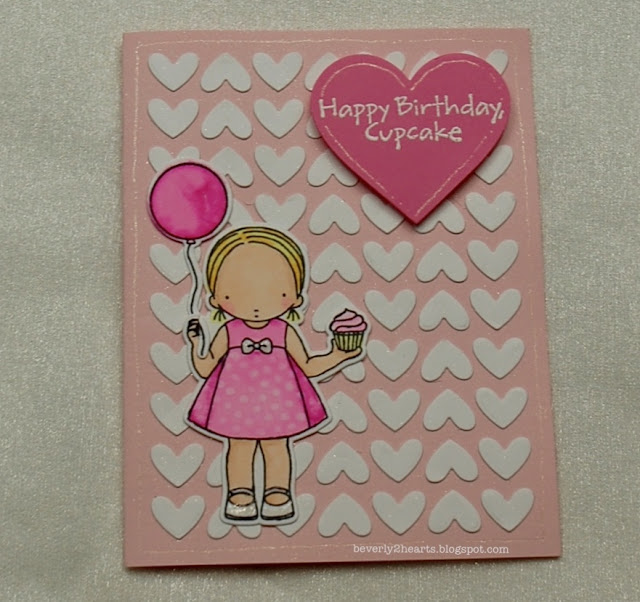
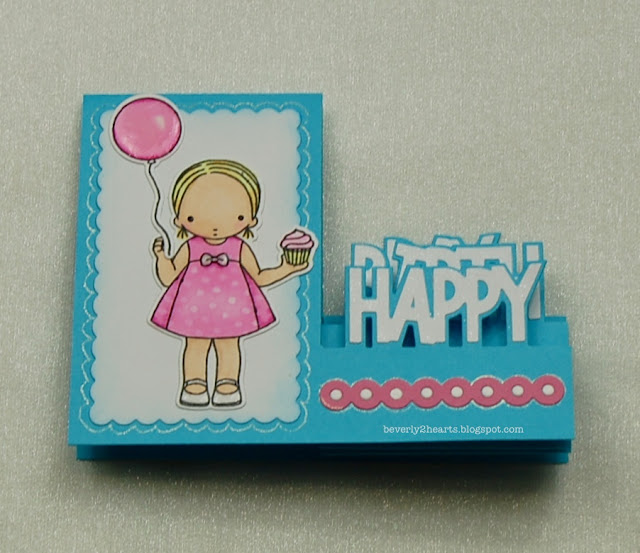
My Favorite Things has the most adorable little girl stamps called Pure Innocence and they are easy to color and personalize.  Todays cards are made with PI Cupcake Day Stamp and Die set.  


Both of these cards use Full of Heart Die from MFT.  Both the negative and positive were used.  First I laid the positive piece down and taped down.  Then I put Multi Medium Matte Glue in the heart holes and topped with negative hearts - this really didn't take long at all.  Carefully pulled up the positive piece and adhered it with Scor-Tape to my second card base.  Tadaaa - two card bases with one pass thru my Sizzix Big Shot.

Our little PI Cupcake Day girl was stamped with Memento Tuxedo Black ink on Neenah Solar White 110 lb card stock and colored with Copic Markers.  To get the polka-dot effect, the copic colorless blender was pressed on to the dress.  She's got Glossy Accents on her bow and shoes.  Her hand has slit cut with an xacto blade, additionally, the balloon string has a notch cut so it appears her hand is wrapped around the string when put together.  Her cupcake has Sparkle pen on the icing.

Both cards have the sentiment stamped with Versa Mark and heat embossed with Ranger White Embossing Powder, then cut out using Heart Infinity Dies from Hero Arts.   One card has Sheer Shimmer Spritz over the background - so much sparkle!


Here's our girl in blue.  I used the same background die only this time I used a cushion mat from Spellbinders and the correct platform for making an impression in my Big Shot.  She's got Celebrations Sheer Creations Ribbon and sequins.

This card base is from Sizzix Happy Birthday Step Up die set.  Our poor girl looks like she has alien eyes...I tried using a Black Pearl Pen and used a pencil tip dipped into a bit and dotted her eyes - waaaaay to big.  Next time I'll try a smaller tool, but really - I had to laugh at her.

All products were purchased by me.  Affiliate links used at no cost to you.

Have a great day and keep crafting!
#heroarts #mftstamps #sizzix