Showing posts with label Die Cutting. Show all posts

Sunday, June 1, 2025

Pattern Play Makes A Great Masculine Card

 When I saw Concord & 9ths Pattern Play, I knew it had possibilities.  I purposely chose different colors than my usual go to and once finished I had a card that could go for several sentiments.  My Son-In-Law had a birthday coming up and I used Honey Bee's Big Bold Birthday Stamps and Honey cuts.

http://beverly2hearts.blogspot.com
I tell you now, if you do a lot of die cutting the Anna Griffin Empress Elite is the way to go.   Splurge on it and you won't be disappointed!  It's the machine I reach for most.

I grabbed several scraps to fill this card front with two metallics and was pleased with my choices.  Got to love Bearly Arts Glue for adhering all these shapes down.  For my sentiment, I stamped with Versafine Onyx Ink in my MISTI and then added clear embossing powder.  After I melted the embossing powder, I ran it through the Empress Elite.  Foam Strips raise the sentiment. 

Affiliate links used at no cost to you.  Not all links are affiliate, I just want to share what I used.  All products were purchase by me unless noted.  I don’t sell anything nor am I employed.  This is my hobby and I hope to inspire you to play :)


Wednesday, March 9, 2022

More Pinkfresh Studio Floral - Sympathy Cards - Choose Hope

 Just like my previous post - I'm loving the whole Pinkfresh Studio stamp, stencil and die sets!  This time it's all about Choose Hope.

Unfortunately I needed to make some sympathy cards so when I created a whole bunch of the floral sprays ready to go, I had what I needed to make some quick cards.  Again, I pulled out some cover dies, embellishments and sentiment stamps and put these together pretty easily.

http://beverly2hearts.blogspot.com

  
http://beverly2hearts.blogspot.com

http://beverly2hearts.blogspot.com

http://beverly2hearts.blogspot.com
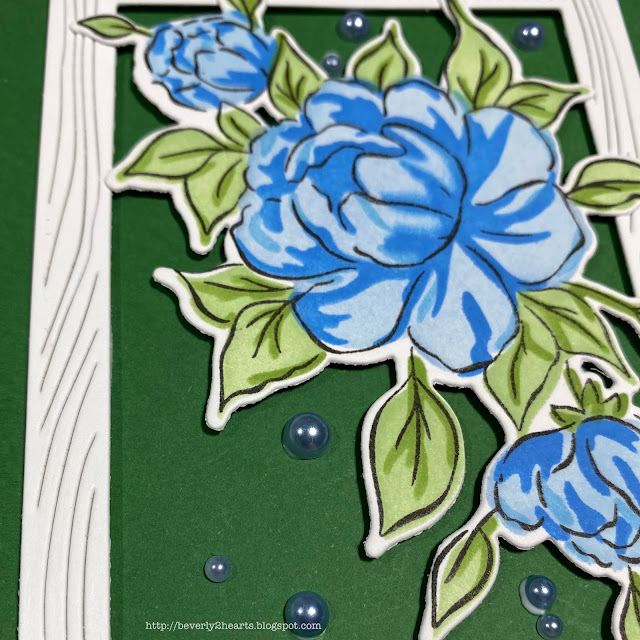
These florals were colored with Pinkfresh inks: Sky Blue, Summer Shower, Seaside, Fresh Pear and Grassy Knoll.  Blender Brushes made the coloring super quick with layering stencils.  Pixie spray helped with those stencils! MISTI helped repeated stamp Choose Hope with Amalgam Ink and of course the Gemini Jr made fast work die cutting.  For the cover dies, I chose Horizontal Stripes, Wood Frame Infinity Die and Leaves and Vines with a white 110 lb card stock.  Scotch foam tape was used with the frame die.  All the card bases were made with Recollections 110 lb card stock.

Sentiment Strips were stamped and attached with Bearly Art Glue.  Embellishments are from Trinity Stamps.  The Tiny Words stamp is from Simon Says Stamp.  Some sparkle pen was used for shimmer.

Have a great day and keep on crafting!

Affiliate links used at no cost to you.  Not all links are affiliate, I just want to share what I used.  All products were purchase by me unless noted.  I don’t sell anything nor am I employed.  This is my hobby and I hope to inspire you to play :)


Monday, January 31, 2022

Mini Slimline "Money Cards"

 Sorry, I've been away so long!  But I'm back now with some cards I gave at Christmas for those that chose $$$.  Even decided to leave them blank inside so they could reuse them.  The gift bag had the to/from information on it.

Slim Line Money Cards

When I saw the Paper Bag Die, I knew who would get a card with that!  I chose three colors of pink card stock from Michaels and some gold foil to use for the die cuts.  Once the "handles" were attached with glue, it was time to arrange them on a mini slimline die cut on vellum.  Glue dots were placed behind the bags to attach to hide the adhesive.  This was attached to two stacking die cuts and adhered to a mini slimline card base.

Money Card


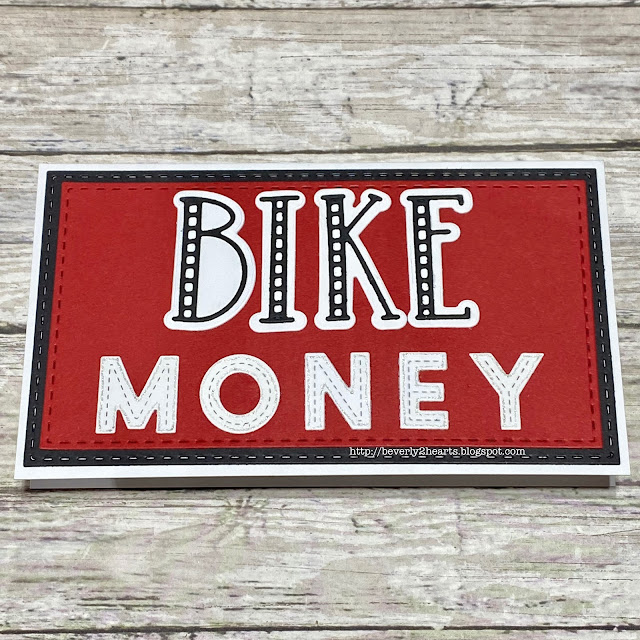
My second recipient is big into off road biking and thought the direct approach was best.  Choosing Red, White and Black the card was similarly made like the first.  Only using the Striped Alphas and the Oliver Dies.  A stardust pen adds interest to the alphas.

Have a great day and keep on crafting!

Affiliate links used at no cost to you.  Not all links are affiliate, I just want to share what I used.  All products were purchase by me unless noted.  I don’t sell anything nor am I employed.  This is my hobby and I hope to inspire you to play :)


Tuesday, July 20, 2021

Have I Told You How Much I Like Butterflies?

 I've fallen in love with all the recent butterfly products that have recently came out and my shopping has reflected it!  I've also decided that when I'm really happy with a card and I haven't put on a sentiment - I'm ok with that.

Today's card uses the Tim Holtz Mini Detailed Butterflies.  I die cut them with a white heavy card stock and generic black card stock using my mini die cut machine (Side Kick).  I actually sat on the floor and had a little desk set up with my Tonic Travel Glass Mat and die cut while watching a show on tv with the family.

Using Tombow markers I "loosely" colored on white with vibrant colors, knowing that a black outline die cut would be glued on top and hide imperfections.  Which is exactly what I did next using HoneyBee Creative Precision Tip Glue.  They went together really quickly and I ended up making lots of them.  

The background was made with a sizzix embossing folder that had been inked with a brayer and a mix of Lucky Clover and Mowed Lawn Distress Oxide Inks.  I ran that through my Gemini Jr and proceeded to assemble my card.  I've found I have better luck using score tape to attach my embossed piece to the card base.

My colorful butterflies and pearls (from my stash) were attached with glue.

Mini Detailed Butterflies

Mini Detailed Butterflies


Affiliate links used at no cost to you.  Not all links are affiliate, I just want to share what I used.  All products were purchase by me unless noted.  I don’t sell anything nor am I employed.  This is my hobby and I hope to inspire you to play :)


Tuesday, March 9, 2021

Spiritual Cards

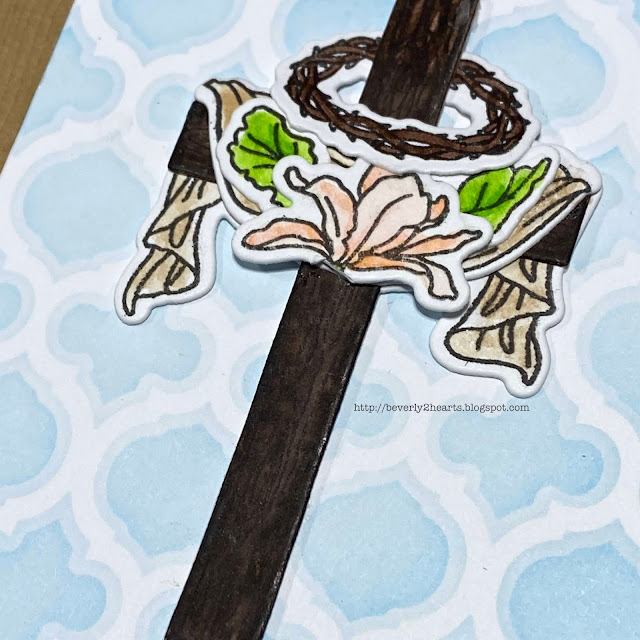
 I've been waiting for some spiritual stamps and dies and Honey Bee Stamps delivered.  The Old Rugged Cross Stamp and Honey Cuts sets are just lovely.  Their newest release included lots of elements that go quite nicely with this large 6x8 set.  One of these days I'm going to buy the whole new release when it comes out. (it's good to have dreams!)

I have two cards todays using the stamp set along with the Wood Frame Builders Set and Quatrafoil stencil set.   Both cards were stamped with Amalgam Ink onto watercolor paper.  Tombow markers and a water brush made coloring easy.  My sentiment is stamped with the amalgam ink and then again with versa mark ink, using my MISTI and then heat embossed with clear embossing powder.  All colored images along with the sentiment and Frame Builders set were die cut using my Gemini Jr.  Additional layers of the cross and frame were also cut, stacked and glued together.  I love how dies are included for the sentiments with Honey Bee Stamps, plus they are already cut apart - bonus!

Two colors of blue ink, Summer Shower and Sky Blue were used with the stencils for the background.   When assembling my cards, glossy accents was used on the flowers and to finish, I added Nuvo drops.

Old Rugged Cross

Old Rugged Cross


Old Rugged Cross

Old Rugged Cross
Have a great day and keep on crafting!

Affiliate links used at no cost to you.  Not all links are affiliate, I just want to share what I used.  All products were purchase by me unless noted.  I don’t sell anything nor am I employed.  This is my hobby and I hope to inspire you to play :)

Wednesday, January 20, 2021

Sympathy Cards, Needed but I wish it was Happy Moments!

 Unfortunately Sympathy cards are needed.  I sent out two recently and will probably need more soon.

Decided to use a "new to me" Altenew set called Crown Blooms and got to use brand new inks from Pink Fresh Studio as a Christmas gift.  I started with my MISTI and stamping the outline in amalgam ink and then stamping the layers with Ballet Slippers, Sparkling Rose, Bubble Gum and Raspberry Bliss for the flower.  Leaves were also stamped in layers with Olive and Key Lime.  Die cutting came next and then the sprig was colored with Copics.  After arranging the bouquet I decided I wanted a background cover die so I reached for an older die from Darice making a chicken wire.  Using E6000 spray made gluing those slim pieces easier.  Using Precision Tip Glue I adhered my bouquet along the left side.  Crystal Stickles adds a bit of sparkle.

My sentiment is die cut three times and layered then attached.

Altenew Crown Bloom


The next card is done exactly like the first but is larger, the first is an A2 card and this is a 5x7 size.  The Plaid A7 Cover Plate Top covers the card base.  A few more flowers and a sentiment strip is stamped and heat embossed.

Plaid A7 Cover Plate Top


Jennifer McGuire Ink offers many valuable tips and tricks to inspire and better your craft.  I purchased heavy weight card stock for layering and I have to say, it really makes the card substantial!  If you haven't before go check out her blog www.jennifermcguireink.com

Have a great day and keep on crafting!

Affiliate links used at no cost to you.  Not all links are affiliate, I just want to share what I used.  All products were purchase by me unless noted.  I don’t sell anything nor am I employed.  This is my hobby and I hope to inspire you to play :)

Friday, June 26, 2020

My First Gina K Card Kit - Card

First off, Nature's Touch was the first card kit I purchased from Gina K.  The attention to detail when I opened the box was impressive! It came in a priority mail box and had a sticky large bubble wrap (that came off easily) attached to the plastic storage box that holds kit contents.  If you’ve ever received one of these boxes crushed (I have) you’ll appreciate the effort!

Alcohol ink came to mind to use with the Best Flowers stamp set.  I had a few pieces done but needed two with different colors (green for the leaves).   After the yupo paper was dried with my heat tool, time to stamp.  My MISTI makes stamping easier. Since I have never stamped on yupo paper I decided to try amalgam ink.  Die cut with coordinating dies in my Gemini Jr.  Next, the white space was cut with stitched rectangles and the sentiment was again stamped in the MISTI.  Finally this piece is backed with black card stock. 


Time for to assemble the card. My base is Sea Glass (from the kit).  I arranged the the flowers to wrap around the sentiment, using some foam tape for dimension and added Sparkling Crystals.

Have a great day and keep on crafting

Affiliate links used at no cost to you.  Not all links are affiliate, I just want to share what I used.  All products were purchase by me unless noted.  I don’t sell anything nor am I employed.  This is my hobby and I hope to inspire you to play :)
Thursday, April 23, 2020

You Sparkle and Shine Card

Today's card was made using Concord & 9th Gem Turnabout Bundle.  Actually, I bought the stamp and then, later, the die and just really love how this card turned out.  Caution though, take care to not use a super juicy ink pad.  Some of the smaller images on the stamp can easily blur with a juicy pad.  
Gem Turnabout Bundle

Four colors of Hero Arts ink were used:  Dusty Blue, Sapphire, Navy and Soft Granite.  All stamped with the Gem Turnabout in my Misti.   Using my Gemini Jr to die cut the Gem Dies and Stitched Rectangle from The Stamps of Life.  Versamark ink stamped the sentiment and silver embossing powder was heat set for a shiny greeting.  A stardust pen adds more sparkle to this card and finally the shiny black back ground paper was from a My Monthly Hero Card Kit.  Foam tape add dimension and Valerie Ice gems were attached with connect glue.

Have a great day and keep on crafting.

Affiliate links used at no cost to you.  Not all links are affiliate, I just want to share what I used.  All products were purchase by my unless noted.  I don’t sell anything nor am I employed.  This is my hobby and I hope to inspire you to play :)

Saturday, April 18, 2020

Miss You Card

Today's card is made with a die set that I've had my eye on for quite a while.  I've been a member of Spellbinders Small Die of the Month club for 6 months, and a perk is getting reduced prices for previous club kits.  The October 2018 Large Die of the Month is  Truckin Through the Seasons with accessories and the sentiment fits on the tailgate.  They have since added additional sentiments and this month's Small Die coordinates with the truck. So guess who finally brought the truck and some accessories....
Spellbinders Kit of the Month

First using Berrylicious card stock from My Favorite Things, I die cut the truck and used scraps for the rest.  My Gemini Jr made quick work of die cutting with one pass, connect glue made attaching all the pieces fast!  

The Hexagon Stipple Plate from Honeybee Stamps and is backed with foam tape leaving room for the bakers twine.  As an after thought, I added a vellum piece for the window.  Miss You is also raised with foam tape.  

Have a great day and keep on crafting!


Affiliate links used at no cost to you.  Not all links are affiliate, I just want to share what I used.  All products were purchase by my unless noted.  I don’t sell anything nor am I employed.  This is my hobby and I hope to inspire you to play :)


Saturday, March 28, 2020

Magic Iris Easter Card and Sheltering In

Every year, my best friend and I plan a wonderful weekend attending the CK Convention.  In fact, we drove to Nashville before it started coming to St Louis.  We sign up for several classes and I designate a healthy budget for shopping.  This year Becky had a golf trip scheduled and would not be able to attend. (her trip was planned before we knew the CKC dates)  So my sister and decided to purchase a ticket to the vendor fare.  It was going to be shopping in the AM, hubby and I had tickets to see “Fluffy” the comedian, and a family wedding the next day.  Big weekend plans for us. 

Then the “Corona Virus” happened…. My immune system is compromised - two heart transplants require a drug regimen to keep me alive.  When I received these precious gifts I agreed to be a good steward, so careless risky decisions are a no no!  No CK Convention, Fluffy was postponed and we made the decision to miss the wedding.  Missing the wedding was a hard one!

What to do, what to do….support online small business is in order.  After all, I still had my budgeted money.  My dear sweet man, offered to later travel out of town to another CK Convention.  Since a “sheltering order” was now in effect, I shopped online.   Several companies were still shipping and having sales, so I shopped.  Scrapbook N Memories, Concord & 9th, My Favorite Things and Echo Park was where my $$ went.  This past week was delivery week, four shipments arrived and I started playing with new goodies!
Magic Iris
Magic Iris


I was totally smitten with Lawn Fawn’s Magic Iris dies and  I bought them all.  Today’s card uses the Add On die, Easter Before N After stamps, cloud dies from Yay Kites and Plane and Simple.  Cotton tale cutie, grass die and a die strip from a Hero Arts kit were used.  Images were colored with copic markers and cut with Gemini Jr machine.  The mechanism goes together quickly and was fun to assemble.  Arranging the scene was the best part.  A shimmer pen gave my clouds sparkle!  


Have a great day and keep on crafting!  It’s keeping me sane now!

Affiliate links used at no cost to you.  Not all links are affiliate, I just want to share what I used.  All products were purchase by my unless noted.  I don’t sell anything nor am I employed.  This is my hobby and I hope to inspire you to play :)

Saturday, January 4, 2020

Two for One Cards with Dies

I hope everyone had a wonderful time celebrating the holidays!  We did, but of course having a 9 month Grandson, added to the mix of his two brothers, made it a little more interesting!  Always fun watching the kids enjoy.

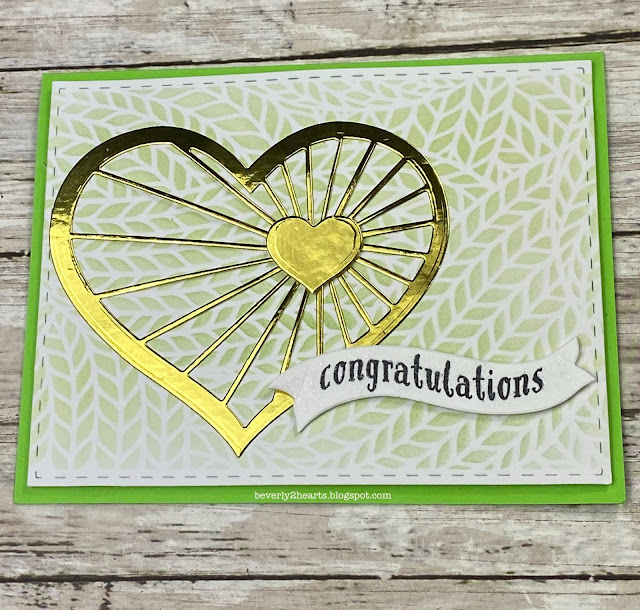
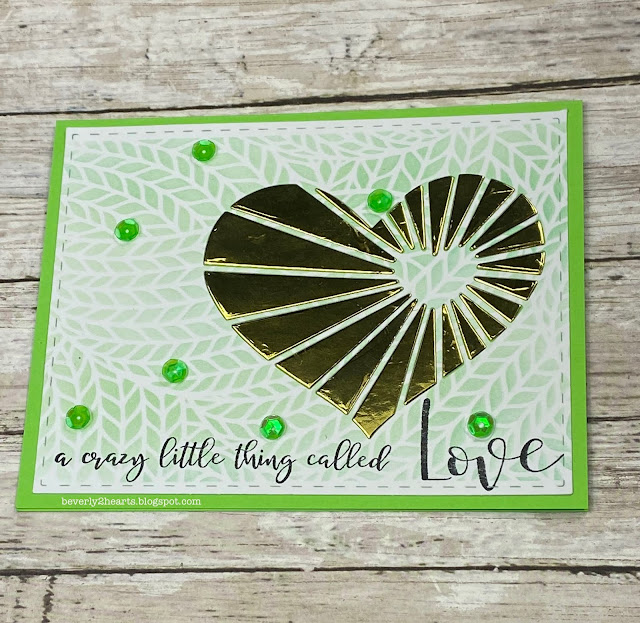
Todays cards are made with Heartstrings Dies that I purchased with a gift card from Christmas (thanks Sue!).   A sale, coupon and a gift card makes this girl a very happy shopper!  Starting with a piece of shiny gold specialty paper, I cut using the Gemini Jr.  This die cuts the negative pieces but to get it as a separate piece you need to use the outline die.  Did not realize this until I started to play and decided to make two cards.  

I already had made some backgrounds using a stencil from Carabelle Studios called Tricot and some ink from Hero Arts.  I tend to make more than one background at a time when I pull out stencils.  They were die cut with Stitched Rectangles and then I began assembling the cards.  The first card has the panel raised with a piece of fun foam and the smaller heart has foam tape under for dimension.  The sentiment is from Ribbon Messages from Hero 
arts and it includes a corresponding die.  Congratulations was stamped with Tuxedo Black Ink and die cut with the Gemini Jr.  It was also raised with foam tape.  All of this is adhered on my green card base.
Heartstrings Die

heartstrings die


Card number two used the remains of the first gold die cut. They were pieced in place, with a lot of adhesive on the card base.  The sentiment is from Ornate Love and stamped with Tuxedo Black in my Mini Misti.  Thank goodness I did because several stampings were needed.  Finally, some sequins were attached with glue.  One of these will be an Anniversary Card for my parents who are celebrating 60+ years of marriage!!
heartstrings die

heartstrings die

Have a great day and keep on creating!

Affiliate links used at no cost to you.  Not all links are affiliate, I just want to share what I used.  All products were purchase by my unless noted.  I don’t sell anything nor am I employed.  This is my hobby and I hope to inspire you to play :)

Wednesday, December 18, 2019

Two Christmas Cards This Year

I traditionally make 60+ Christmas Cards each year and it is a labor of love.  I have one dear friend who has kept the past 9 years worth and displays them as decorations.  When I saw the picture of them all, my heart melted!


My first card is made with Honey Bee Stamps Winter Bouquets Honey Cuts and a sentiment from a My Monthly Hero Kit.  Those beautiful poinsettias caught my eye and I was hooked.  I had my Gemini Jr working overtime to cut all those layers.  Next came inking with 3 colors of distress ink.  A stardust pen accents the pinecones and then the gluing began using Connect adhesive (it really holds together and dries fast).  Using a My Monthly Hero sentiment I stamped using my Mini Misti with Versamark and Heat Embossed with Ranger Gold Embossing Powder.  The background paper is The Paper Studio from Hobby Lobby.  Finally all elements were attached to a white card base.


Now for the second card...I was at Hobby Lobby buying background paper and found the Merry Christmas Wreath from Momenta.  Loved this delicate die and decided right then and there to add a second card.  So my Gemini Jr chugged right along cutting more die cuts.  So I said, I loved it...also hated it!  It's so pretty but is really a booger working with and glueing together.  Before I glued I sprayed Shimmer Spritz on the white layer, I know you can't see it in the photo but trust me it's there.  Inking the background paper always adds a little extra so I did that too with Distress Ink.  Finally all elements were attached to my red card base.


I chose no rhyme or reason when sending these out as to who got what card - I liked them both that much!

Affiliate links used at no cost to you.  Not all links are affiliate, I just want to share what I used.  All products were purchase by my unless noted.  I don’t sell anything nor am I employed.  This is my hobby and I hope to inspire you to play :)


Wednesday, June 5, 2019

Beautiful Bouquet of Flowers Card

Ok, so that title sounds like I'm bragging on my card...nope, I just love the Floral Mix Background Stamp.  I love flowers and more so, I love to color flower images!  If only the images could include that heavenly aroma....  

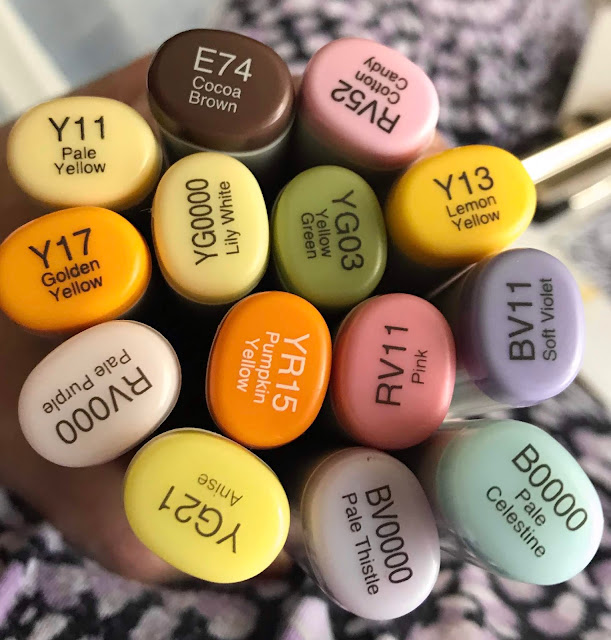
Today's card started with nocture ink on Neenah classic crest solar white card stock using Floral Mix Background Stamp.  Next is coloring with copic markers.  I wanted to keep the colors soft.  
Copic

Stitched rectangles and my Gemini Jr trims the piece.  Fun foam is attached to the back for dimension and is attached to the card base.  Three celebrate die cuts in black are stacked and attached.  Finally a shimmer pen is brushed over the flower centers.
Flowers
flowers
Have a great day and keep on crafting!


Affiliate links used at no cost to you.  Not all links are affiliate, I just want to share what I used.  All products were purchase by my unless noted.  I don’t sell anything nor am I employed.  This is my hobby and I hope to inspire you to play :)

Monday, March 18, 2019

Piece of Cake Birthday Card

Hello there, I'm using some new products on today's card.  I knew the moment I saw it, that I had to have the Piece of Cake stamp set from Honey Bee Stamps.  Let me tell you, the two stamps I ordered came super fast and was packed with love!  The other new element I used was an embossing folder that came with my gemini jr.  Normally, I stick with my big shot for embossing folders but the included folder worked just fine.  I do like the raised area along with the textured background.  

I started by stamping with memento ink on 80 lb Neenah card stock, knowing that I would be using my Silhouette to cut these images out.  Of course, I used the MISTI so for repeated stamping, then it was time to color with Copics.  This is usually my standard practice, stamp a lot, spend time coloring and then cut them all out - so when I'm ready to make a card, it goes pretty quick.   So to pull my card together, the embossed background was trimmed, fun foam attached behind, then I positioned my cake on the pedestal, added the other elements and glued them down.  The sentiment is stamped, sprinkled with embossing powderheat embossed and die cut with coordinating die.  All of this is attached to some new card stock from Hero Arts that has been inked and glued to my card base.
beverly2hearts.blotspot.com
Have a great day and keep on crafting!

Affiliate links used at no cost to you.  Not all links are affiliate, I just want to share what I used.  All products were purchase by my unless noted.  I don’t sell anything nor am I employed.  This is my hobby and I hope to inspire you to play :)
Friday, March 15, 2019

Happy Mail Cards

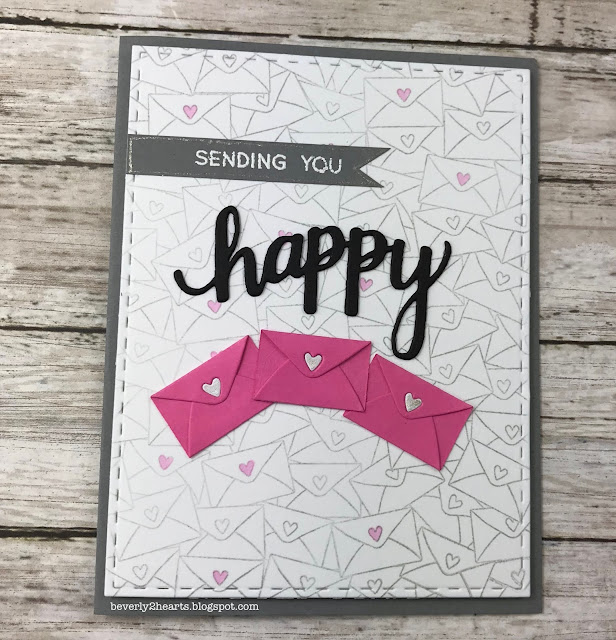
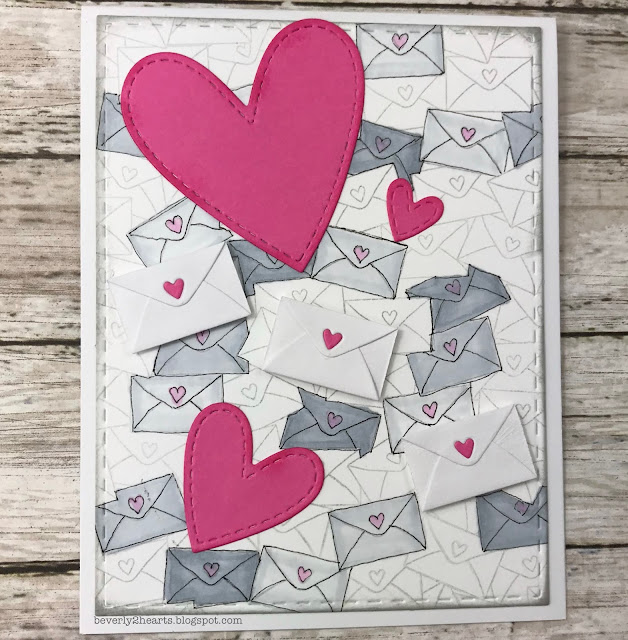
Hello there, today's cards are all about happy mail!  Who doesn't like getting mail (happy mail, not bills)?  Mail background and love mail dies are apart of all three of these cards, after all, I just got these in the MAIL!  lol

The first card was stamped, sprinkled with embossing powder and heat set.  Tumbled glass ink was blended around the edges with lighter touch in the center.  The love die was cut with black and then outline in a silver vellum.  The sentiment was stamped and heat embossed also.  Those cute little envelopes were die cut out of very heavy card stock, almost too heavy.  Bending those on the score line to fold took too much effort!  The rest of those cuties are cut with regular card stock (much easier).  Those tiny little hearts on the envelopes were colored with watercolor markers.  The background was die cut with stitched rectangles and placed on fun foam to add dimension.
Mail BackgroundMail Background
 Next card is sending you happy mail, Using both the background stamp (in cloud ink) and love mail dies were used.  The sentiment is stamped and heat embossed just like card above.  The happy die was cut and glued three times for dimension.  I colored some of the background hearts with Copic RV52. A touch of stardust pen on the envelope hearts add shimmer.  The rest of the card was assembled just like the above card.
Mail Background

Mail Background
The last card was done slightly different.  The background was stamped with cloud ink and then a few envelopes were colored with three different colors of alcohol ink.  Then, using a micron fine tip pen, I outlined them.  This one has no sentiment, that's for the inside, so this card can be used for more than one occasion.  Using the same dies, this time I also cut hearts and inked them with bubblegum ink.  The folded envelopes (cut with regular card stock - easier to fold) are raised with foam tape for dimension.  The rest of the card was assembled like the above two cards, only without fun foam.
Mail Background
Mail Background
Have a great day and keep on crafting!

Affiliate links used at no cost to you.  Not all links are affiliate, I just want to share what I used.  All products were purchase by my unless noted.  I don’t sell anything nor am I employed.  This is my hobby and I hope to inspire you to play :)

Wednesday, March 6, 2019

Hugs Card


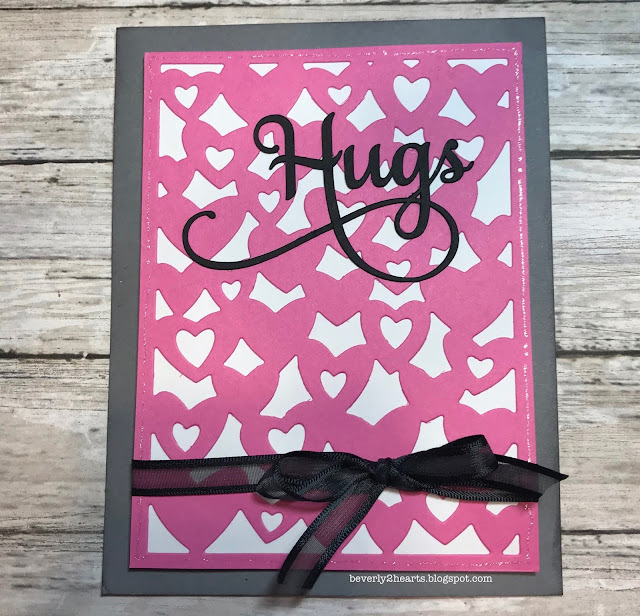
Hello there, todays card is a fast fast fast card.  The heart background has an inner and outer die so you can cut just the hearts without a border, I wanted the border.  I also cut a white rectangle to go behind the hearts.  For the sentiment, I used my Silhouette and the Samantha Font to cut Hugs with the swirly.  I stacked and glued together 2 of these before adhering to my card.  It's on grey card stock from Michaels that has inking around the edge.  A stardust pen adds shimmer and a ribbon completes the card.

Have a great day and keep on crafting!

Affiliate links used at no cost to you.  Not all links are affiliate, I just want to share what I used.  All products were purchase by my unless noted.  I don’t sell anything nor am I employed.  This is my hobby and I hope to inspire you to play :)