Showing posts with label Birthday. Show all posts

Sunday, June 1, 2025

Pattern Play Makes A Great Masculine Card

 When I saw Concord & 9ths Pattern Play, I knew it had possibilities.  I purposely chose different colors than my usual go to and once finished I had a card that could go for several sentiments.  My Son-In-Law had a birthday coming up and I used Honey Bee's Big Bold Birthday Stamps and Honey cuts.

http://beverly2hearts.blogspot.com
I tell you now, if you do a lot of die cutting the Anna Griffin Empress Elite is the way to go.   Splurge on it and you won't be disappointed!  It's the machine I reach for most.

I grabbed several scraps to fill this card front with two metallics and was pleased with my choices.  Got to love Bearly Arts Glue for adhering all these shapes down.  For my sentiment, I stamped with Versafine Onyx Ink in my MISTI and then added clear embossing powder.  After I melted the embossing powder, I ran it through the Empress Elite.  Foam Strips raise the sentiment. 

Affiliate links used at no cost to you.  Not all links are affiliate, I just want to share what I used.  All products were purchase by me unless noted.  I don’t sell anything nor am I employed.  This is my hobby and I hope to inspire you to play :)


Wednesday, March 19, 2025

"Bruce" Birthday card with his "Flat Stanley" adventure

Like many others, I struggle with masculine cards.  But when I saw Unity's Bruce stamp, inspiration struck.  Bruce was in my cart and I grievously paid for shipping.  I prefer to meet the minimum for free shipping but not today.  

Now for the "flat Stanley" adventure:  Following the tracking information - Bruce left New London MN and traveled to St Paul MN, on to St Louis MO within 2 days.  He then spent the night in St Louis MO and went to San Francisco CA where he spent the night, on to Oakland CA where he spent 2 nights, back to San Francisco CA and arrived in Memphis 2 days later, next night in St Louis MO where he rested for 4 days before making to my mailbox. Now, I would have loved to accompany him, particularly to the warmer weather, while we had frigid temps and snow.


Finally, time to create!  I decided to color with Copic Markers and used Onyx ink on Neenah card stock, then used YG03, YG09, YG17, BG96, RV11 and C1.  I used Hero Arts Circle Infinity Dies to cut Bazzill Quicksand and Patch card stock in my Empress Elite. To make Bruce's eyes shine I applied Glossy accents.  

For the background I used Large Sprinkled Dots Stencil with Frayed Burlap, Bundled Sage and Peeled Paint.  Once I was happy with that I sprayed Distress Mica Spray in Decayed for shimmer.  To bring the card together I used Bearly Arts Glue to attach "Bruce" and the sentiment.  Tiny Words Stamp from Simon Says Stamps added the perfect Happy Birthday!

Have a great day and keep on crafting!

Affiliate links used at no cost to you.  Not all links are affiliate, I just want to share what I used.  All products were purchase by me unless noted.  I don’t sell anything nor am I employed.  This is my hobby and I hope to inspire you to play :)

Thursday, February 13, 2025

Birthday Card Using My Stash

When I started card making there were a several favorite companies and one was The Stamps of Life.  Pulling out an oldie Die Set called Framelits Drop-Ins.  I searched for a link but alas, no luck.  I highly recommend The Stamps of Life Dies, especially the Flip-its, Step-Ups and other card bases, they are very versatile for many occasions, a true bang for your buck!

Birthday Card


Hero Arts Star Confetti Fancy Die was a quick answer for the many stars I wanted.  I used a silver, teal and holographic paper for stars.  The blue paper is from My Favorite Things Sweet Celebrations and the Coral is from DCWV Cardstock Stack.

My go to supplies for assembly include the Best die cutting machine I've ever used Anna Griffin Empress Elite, Bearly Arts Glue and Foam Tape.  American Crafts Premium Ribbon that I bought forever ago at Michaels with a 40% off coupon.  Gosh, I miss those 40% coupons!  Nearly everything I bought in those early days came from Michaels, Hobby Lobby and JoAnns with a coupon.

Affiliate links used at no cost to you.  Not all links are affiliate, I just want to share what I used.  All products were purchase by me unless noted.  I don’t sell anything nor am I employed.  This is my hobby and I hope to inspire you to play :)

Saturday, February 1, 2025

Happy Flappy Cards with Creek Bank Creations Card Base

 Hello, it's been a while.  You know when a life event changes the whole family dynamic - we had a few of those happen.  And as much as I love crafting, the blogging had to take a backseat.  The boat has stopped rocking, occasionally a ruffle in the ocean starts motion, but for the most part we have a new normal and smooth sailing.  

My family and I just celebrated 32 years living life with two heart transplants.  Wow, 32 years to watch my kids grow up and a host of experiences that wouldn't have happed - without the generous gifts of life.  Please have a conversation with your family about your wishes.  It's a gift, so let the Doctors decide what they can use!

Today's cards uses a nifty card base from Creek Bank Creations called Happy Flappy Card Base.  I was at a CKC convention where I happened on this Company's Booth.  They had a make and take and I was hooked!  Very clear instruction video on their site shows all the steps.


Fitting name for this Die set, don't you think? The second assembly goes quickly!  The Happy Mothers Day Sentiment Stamp provides a sentiment for all 3 places.  Didn't purchase the stamp set for "pull" so I improvised with what I had - definitely would look better with a size appropriate stamp set.

Warning, I dug into my stash of scrapbook paper, much of it was purchased many moons ago.  I tried finding links but alas - they gone!  For the card base I used Craftsmith Wedding Neutrals and the sparkly paper is from My Minds Eye - Laundry Line.  The flowers are from Be Bold Blooms and sentiments are stamped with Ballet Slipper.  The card front is raised with Foam Tape and my glue of choice lately is Bearly Arts Glue.  My latest purchase (drum roll please) Anna Griffin Empress Elite has taken die cutting to a whole new level.  More on that later....  Here's another card 


Products used on this version are DCWV Bahama Moma Pad,  Turquoise Ink, Honey Bee Stamps Tropical Bouquets Dies and a Micron 005 pen.  The sentiments are from the same Happy Mothers Sentiment Stamp.

Transplant Recipients have to be very careful of germs!  This time of year (cold and flu season) is hermit time for Bev, in the basement (my happy place) and I've been creating lots of cards lately, so there will be more blog posts.  

Have a great day and keep on crafting!

Affiliate links used at no cost to you.  Not all links are affiliate, I just want to share what I used.  All products were purchase by me unless noted.  I don’t sell anything nor am I employed.  This is my hobby and I hope to inspire you to play :)

Monday, August 30, 2021

Birthday Card with a Sundae

Have you heard about The Stamps of Life?  They have several really reasonably priced monthly subscription clubs. Actually, it was my first stamping subscription club I ever joined.  Todays card is made with the sundae2stamp set.

http://beverly2hearts.blogspot.com

 Who doesn't like ice cream?  Not anyone I know!  My Gemini Jr made quick work of the sundae2stamp dies and to make them stand out, I inked all the edges with coordinating colors.  Instead of centering the image on my A2 card, shifting it to the left made room for my daughters name along side with Olivers ABC Letters.  The perfect background paper is an older set from My Favorite Things that they no longer sell. Glossy accents add shine to the cherry on top and a sparkle pen adds interest to the letters.  Silver baubles from my stash are adhered for more shine.

Have a great day and keep on crafting!

Affiliate links used at no cost to you.  Not all links are affiliate, I just want to share what I used.  All products were purchase by me unless noted.  I don’t sell anything nor am I employed.  This is my hobby and I hope to inspire you to play :)


Friday, January 15, 2021

Birthday Box Card

 I hope you all had a good holiday!  I know it was a bit strange but at our house we made lemonade with this big pile of lemons.

My best friend gave me a bag full of The Stamps of Life goodies and today's card uses one of those - Thanks Becky!

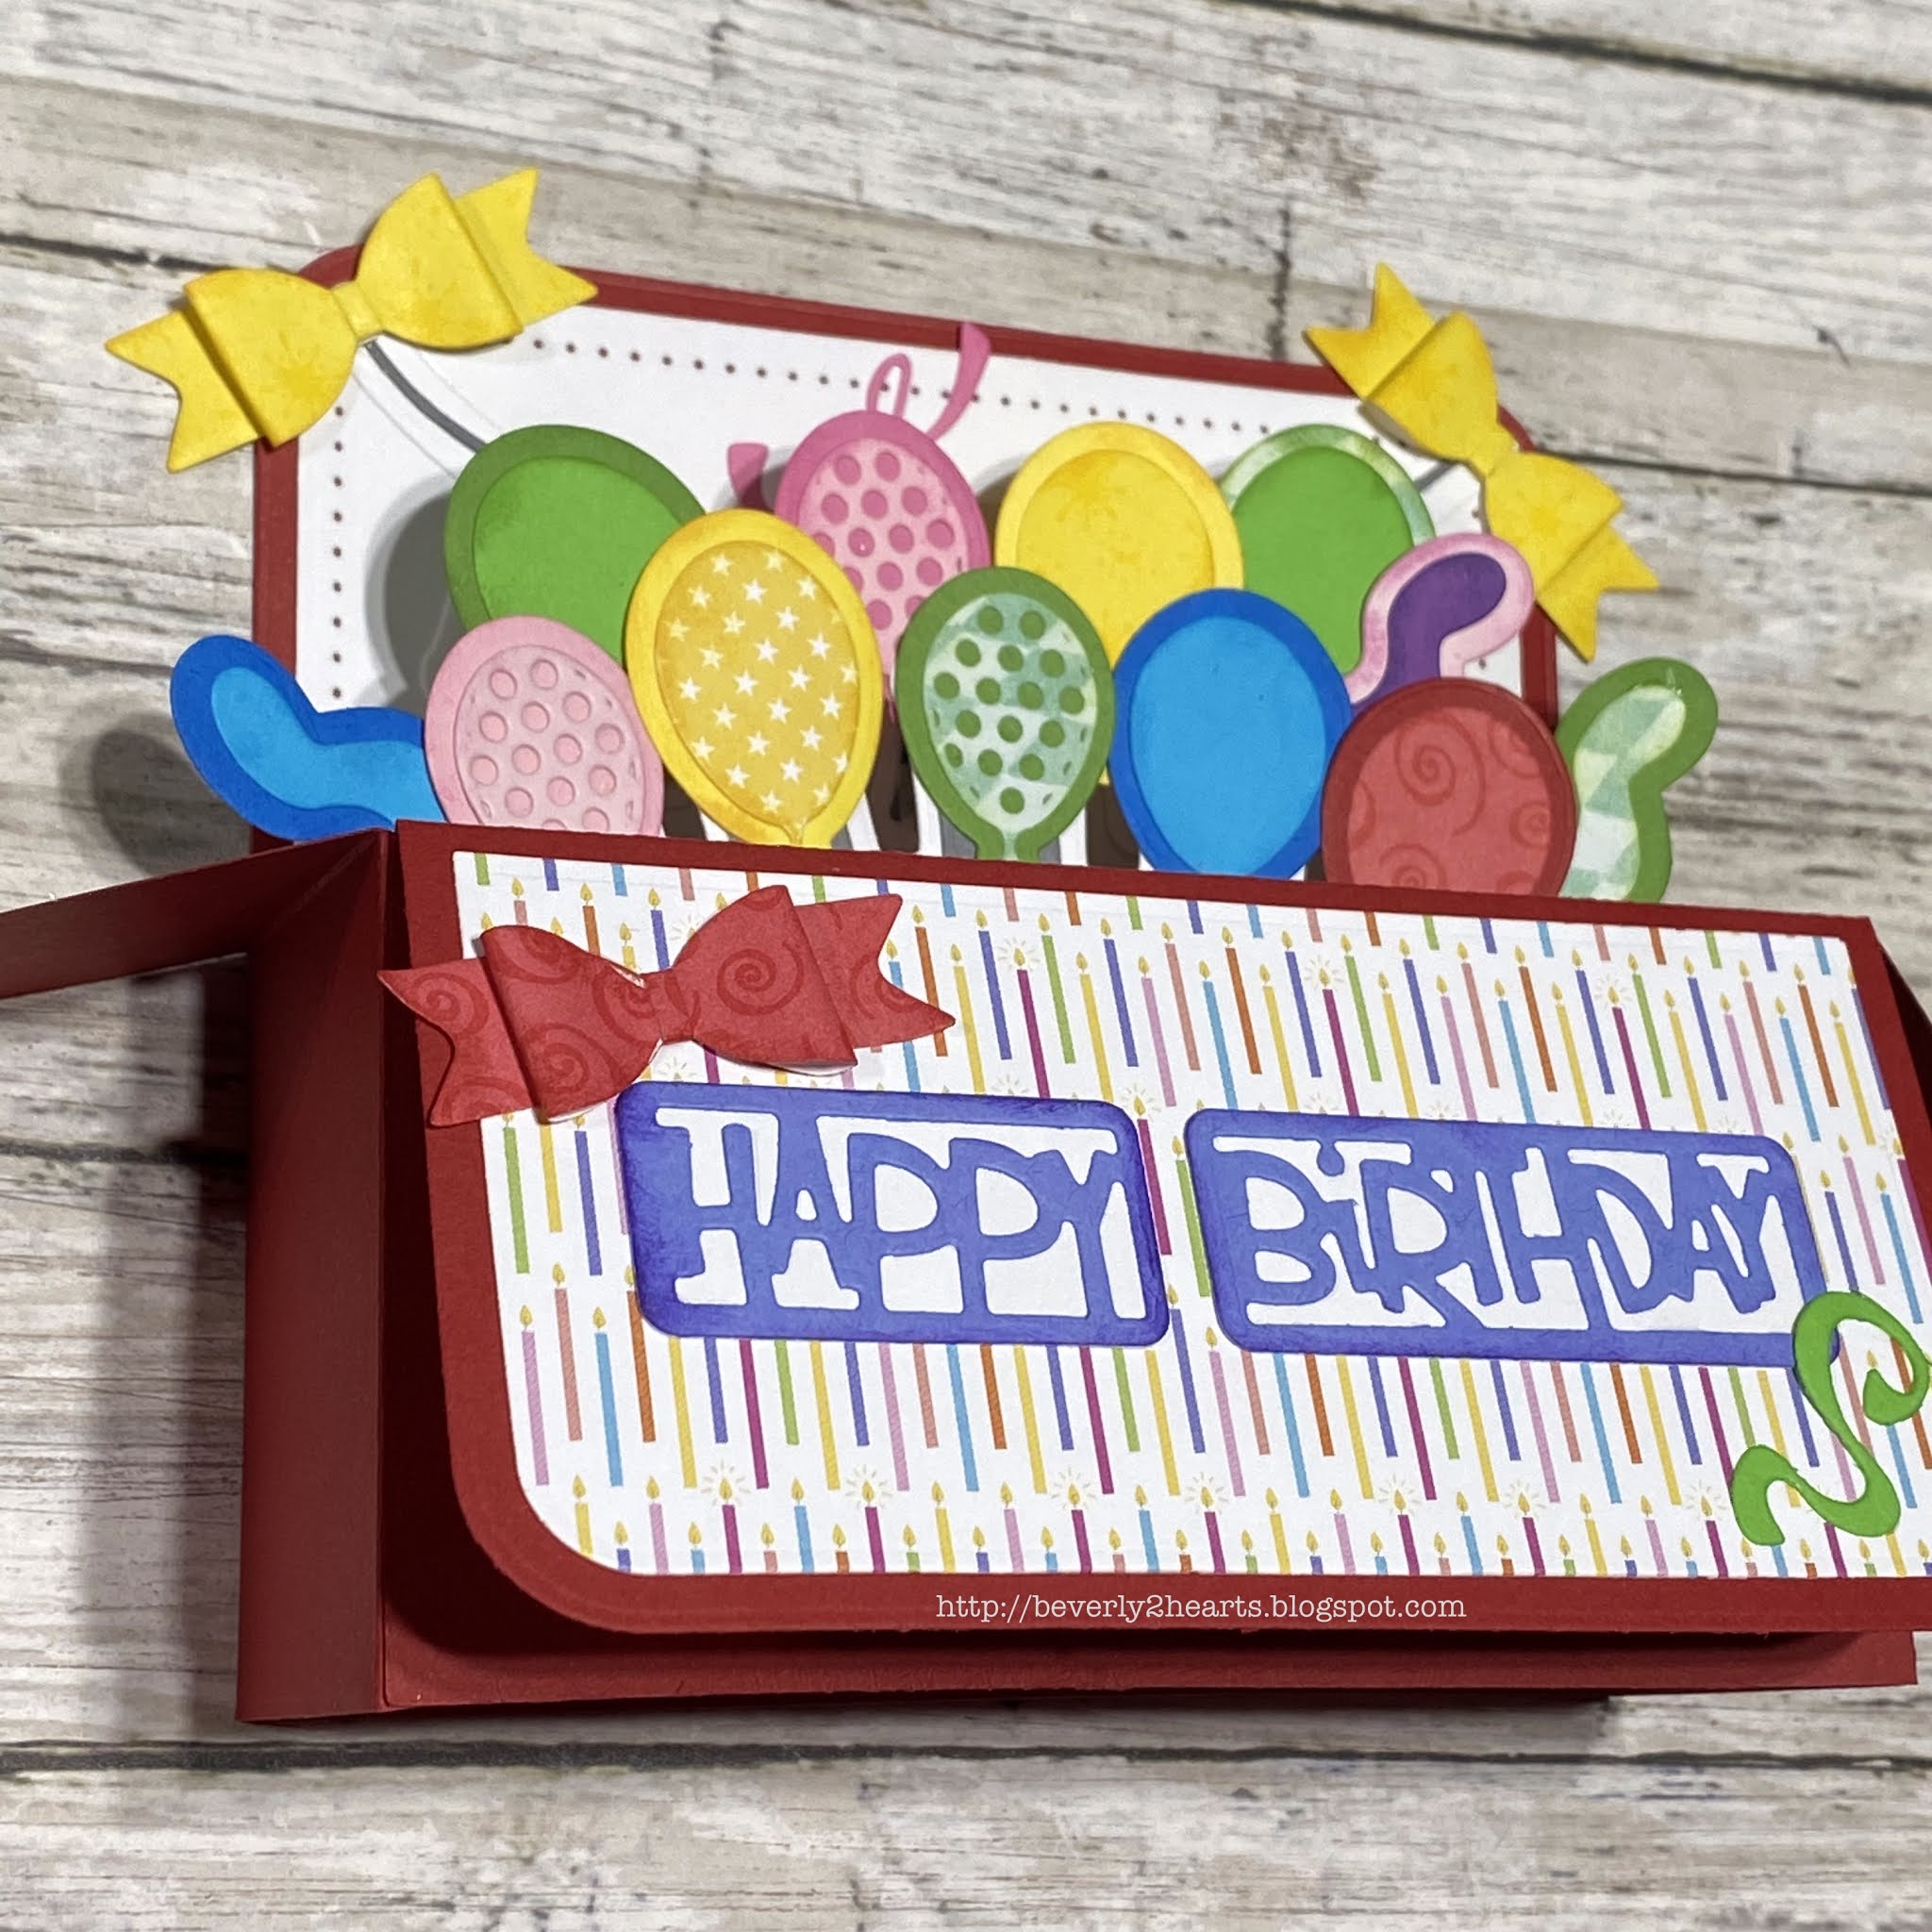
So this is a bigger box card - 5x7 but it all went through my regular size Gemini Jr just fine.  Included with this set was a booklet with instructions and examples and I pretty much scrap lifted from that.  

5x7 Box Card Set

5x7 box card set

5x7 box card set

5x7 box card set


The card went together quickly but there was lots of die cutting.  To combat this, I cut scraps to fit the smaller dies and filled the die cut plate to make fewer passes, purple tape helped corral all those bits.  I did use a few 6x6 paper pad scraps.  Then I added ink around the edges to define each color.  

Often, I will make two cards at once as I did today.  The difference is the sentiment and bows.  The framed rounded sentiment came with the die set,  while the stacked die, I already owned.  Just changing things up a bit.

Have a great day and keep on crafting!

Affiliate links used at no cost to you.  Not all links are affiliate, I just want to share what I used.  All products were purchase by me unless noted.  I don’t sell anything nor am I employed.  This is my hobby and I hope to inspire you to play :)


Thursday, April 2, 2020

Hey There Cupcake Card

Hi there, today’s card is a cupcake birthday card. In my opinion you can never have too many birthday cards! This card, is made with the April My Favorite Things card kit, (which is no longer available, but the individual items are linked), two My Favorite Things paper pads and an additional die-namic that was a gift with purchase.  These are usually available for purchase in the following month.
Cupcake and Sprinkles Die-namics


This card kit came with dies and special pouches to make shaker cards. The center panel is from Party Patterns paper pad and the plaid is from Sweet Celebrations paper pad. I die cut the cupcake bottom in the included kit card stock land inked with purple ink.  After I Decided which pattern papers I was going to use I placed the cupcake shaker pouch where I wanted it to be on the card and then die cut that out of Party Patterns paper.  I assembled the shaker by adding sequins and gems that I had on in my stash, I then attached the die cut pink cupcake topper with tape. When it came time to attach the shaker pouch firmly to the card back, I added two one inch strips using Sweet Celebrations pattern paper and decided it needed just a little bit more. So I cut two very thin strips of shiny silver paper to add as accents.

Then using the Hey There Cupcake die-namic, I cut out of the included bright pink card stock from the kit. Cupcake has two additional layers of white card stock that are then glued together and topped with the pink for dimension. I did something a little different with the hey there die-namic, after running through the die cut machine the letters were still in place. I turned the scrap with letters still in place over and used a dot runner over the letters.. I then flipped it over and placed it on the card front and using a craft pick I pressed the letters down while removing the excess. This way I got perfect alignment with the letters.


Have a great day and keep on crafting!  It’s keeping me sane now!

Affiliate links used at no cost to you.  Not all links are affiliate, I just want to share what I used.  All products were purchase by my unless noted.  I don’t sell anything nor am I employed.  This is my hobby and I hope to inspire you to play :)

Wednesday, September 18, 2019

Same Card, Two Colors, One is "black, like my soul"

Now I know that title sounds a bit weird.  Backstory is that I was making a card for someone specific.  I chose two colors of pink and gray.  Turned out really cute but then I remembered something she said recently.  She saw the new Starbucks reusable cup - it was textured and black - she "needed it because it was black, like my soul".  So I remade the same card with gray, black and black glitter and it looked pretty cool too.  I don't know if I'll give her just the black one or both.  Here they are:
Altenew Floral Cover Die


Altenew Floral Cover Die

Both cards are made the same way, using my Gemini Jr to die cut the Floral Cover A & B dies.  These dies make cards come together really quickly.  Just glue the die cuts together and then to a card base.  

The pink card has a sentiment from Sketched Flowers and was stamped with Soft Granite Ink and then again with Versamark Ink in my Mini Misti.  Clear Embossing powder was heat set with my Heat Tool.  This was die cut with Majestic Labels and backed with fun foam before adhering to the card.   Cupids Kiss gems were added to finish the card.

The black card has black glitter card stock behind the die cuts.

Have a great day and keep on crating!

Affiliate links used at no cost to you.  Not all links are affiliate, I just want to share what I used.  All products were purchase by my unless noted.  I don’t sell anything nor am I employed.  This is my hobby and I hope to inspire you to play :)

Monday, March 18, 2019

Piece of Cake Birthday Card

Hello there, I'm using some new products on today's card.  I knew the moment I saw it, that I had to have the Piece of Cake stamp set from Honey Bee Stamps.  Let me tell you, the two stamps I ordered came super fast and was packed with love!  The other new element I used was an embossing folder that came with my gemini jr.  Normally, I stick with my big shot for embossing folders but the included folder worked just fine.  I do like the raised area along with the textured background.  

I started by stamping with memento ink on 80 lb Neenah card stock, knowing that I would be using my Silhouette to cut these images out.  Of course, I used the MISTI so for repeated stamping, then it was time to color with Copics.  This is usually my standard practice, stamp a lot, spend time coloring and then cut them all out - so when I'm ready to make a card, it goes pretty quick.   So to pull my card together, the embossed background was trimmed, fun foam attached behind, then I positioned my cake on the pedestal, added the other elements and glued them down.  The sentiment is stamped, sprinkled with embossing powderheat embossed and die cut with coordinating die.  All of this is attached to some new card stock from Hero Arts that has been inked and glued to my card base.
beverly2hearts.blotspot.com
Have a great day and keep on crafting!

Affiliate links used at no cost to you.  Not all links are affiliate, I just want to share what I used.  All products were purchase by my unless noted.  I don’t sell anything nor am I employed.  This is my hobby and I hope to inspire you to play :)

Wednesday, May 23, 2018

I just love this Birthday Cake image

Hello all,
Power Poppy has this wonderful stamp set called Party Time and I love that you can change up the sentiment on the banner.  It also has a bunting and a slice of cake with a candle and a very cool stack of presents.  Today's card uses this set.  I colored my chocolate cake with Copic Markers after I stamped the image with Tuxedo Black Ink onto Neenah Classic Crest 110lb Card Stock.  To make my cherries shine I covered them with Glossy Accents.  Then I die cut my chocolate cake using Stitched Circle Dies through my Big Shot.  For the background, I used Bazzill Canvas Bling Cardstock with Horizontal Stripe Die.  To bring the card together, I attached the background to my card base with Kokuya Long Line Adhesive.  I trimmed some fun foam to fit behind my stitched circle and used Nuvo Deluxe Adhesive to attach.  Then using the included word hooray I die cut black cardstock with Sizzix Adhesive Sheets attached to the back - to make attaching easier.
Birthday

Birthday
Have a great day and keep crafting!

Affiliate links used at no cost to you.  Not all links are affiliate, I just want to share what I used.  All products were purchase by my unless noted.  I don’t sell anything nor am I employed.  This is my hobby and I hope to inspire you to play :)

Wednesday, February 14, 2018

Cupcake Day Card 4 Ways

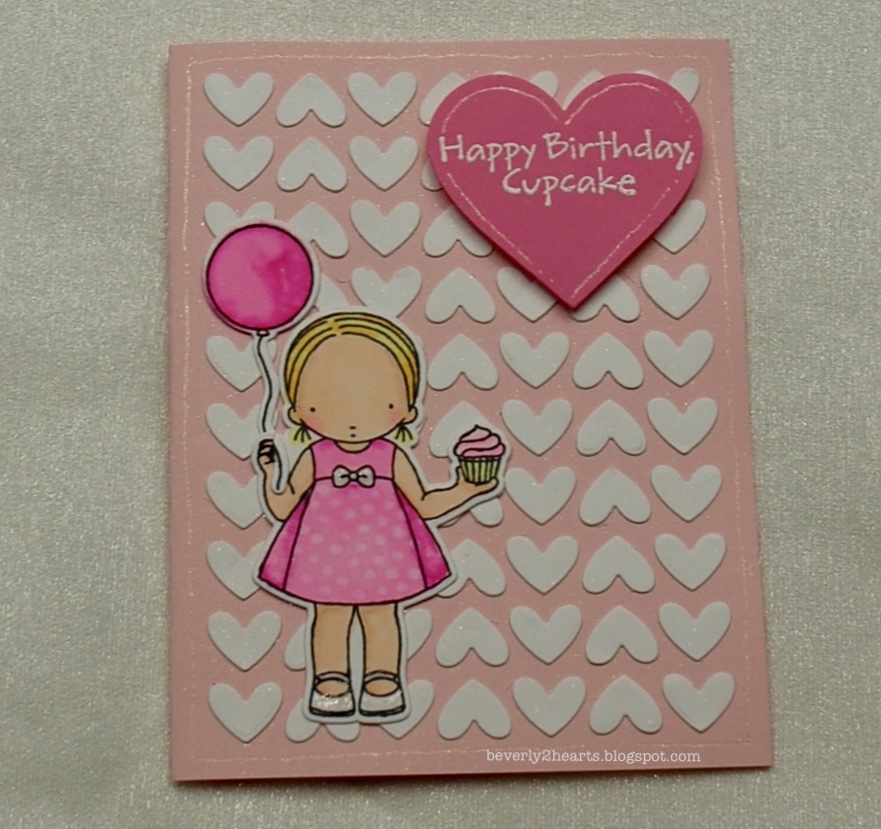
My Favorite Things has the most adorable little girl stamps called Pure Innocence and they are easy to color and personalize.  Todays cards are made with PI Cupcake Day Stamp and Die set.  


Both of these cards use Full of Heart Die from MFT.  Both the negative and positive were used.  First I laid the positive piece down and taped down.  Then I put Multi Medium Matte Glue in the heart holes and topped with negative hearts - this really didn't take long at all.  Carefully pulled up the positive piece and adhered it with Scor-Tape to my second card base.  Tadaaa - two card bases with one pass thru my Sizzix Big Shot.

Our little PI Cupcake Day girl was stamped with Memento Tuxedo Black ink on Neenah Solar White 110 lb card stock and colored with Copic Markers.  To get the polka-dot effect, the copic colorless blender was pressed on to the dress.  She's got Glossy Accents on her bow and shoes.  Her hand has slit cut with an xacto blade, additionally, the balloon string has a notch cut so it appears her hand is wrapped around the string when put together.  Her cupcake has Sparkle pen on the icing.

Both cards have the sentiment stamped with Versa Mark and heat embossed with Ranger White Embossing Powder, then cut out using Heart Infinity Dies from Hero Arts.   One card has Sheer Shimmer Spritz over the background - so much sparkle!


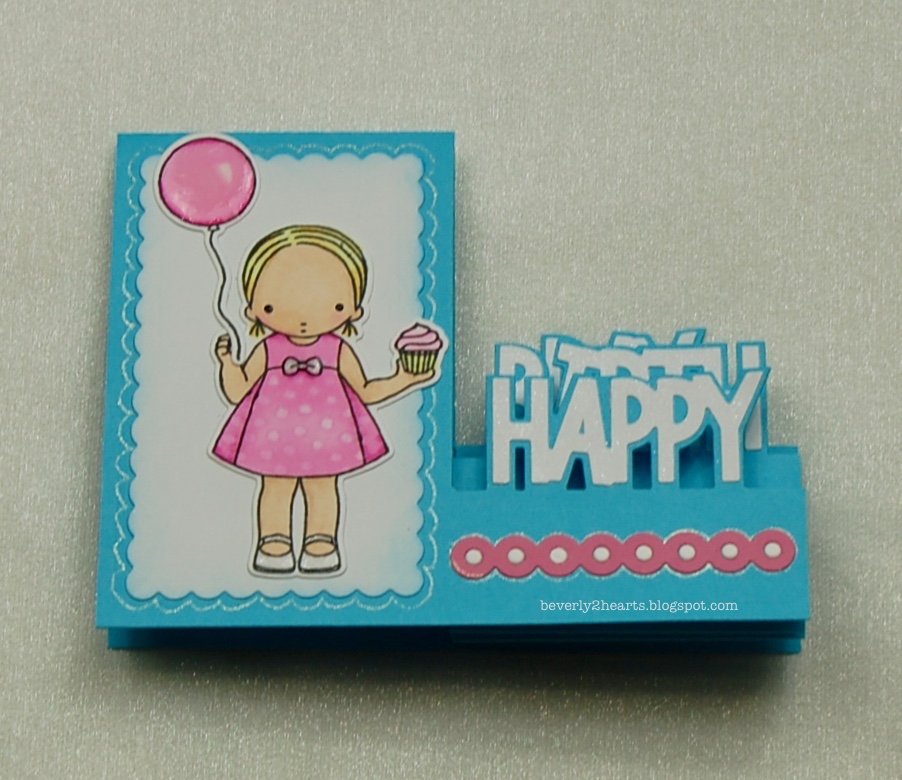
Here's our girl in blue.  I used the same background die only this time I used a cushion mat from Spellbinders and the correct platform for making an impression in my Big Shot.  She's got Celebrations Sheer Creations Ribbon and sequins.

This card base is from Sizzix Happy Birthday Step Up die set.  Our poor girl looks like she has alien eyes...I tried using a Black Pearl Pen and used a pencil tip dipped into a bit and dotted her eyes - waaaaay to big.  Next time I'll try a smaller tool, but really - I had to laugh at her.

All products were purchased by me.  Affiliate links used at no cost to you.

Have a great day and keep crafting!
#heroarts #mftstamps #sizzix

Wednesday, September 13, 2017

Rainbows and Unicorns Birthday Card

My middle daughter, Katie turned 30 this past weekend.  Since it was a biggie I thought she deserved Rainbows and Unicorns plus flamingos (her favorite), but last years card had flamingos.  I purchased the Mama Elephant Over the Rainbow Stamp and Die set at Joanns using a coupon, a while ago.  I loved coloring those little unicorns with my Tombow Markers!   

Loved the Avery Elle Horizontal Strips Die Set and thought it would go perfect with the small images.  My card has some shimmer with the Wink of Stella and crystal Stickles.  The light pink circle was inked with Guava from The Stamps of Life.

Hope you have a great day and keep on crafting!

Friday, March 31, 2017

I love using up supplies!

It's fun using up supplies with new products added to my stash!  I recently found some Art Impression Stamps on clearance at Hobby Lobby.  Of course I snatched them up.  This card has an image from the Birthday Wishes set that I colored with Tombow markers on Bristol Smooth paper.  Paper does make all the difference when coloring with different mediums.

So one of the other new items I purchased was Hero Arts Stamp and Cut sets.  JoAnns had all their stamps 50% off a few weeks ago and bought, Happy, Congrats and Thanks.  Obviously the Happy set was used.  The birthday sentiment was heat embossed with Zing White powder on a matching strip.

From my stash, I used Stitched Rectangles from The Stamps of Life to die cut the colored image and backing.  The background papers are from Nana's Nursery, Baby Boy card stack and inked with Raw Sienna Palette Ink.  I buy most of my card stock from Michaels Recollections with a coupon!  


Hope you have a wonderful day and keep on crafting!

Tuesday, March 29, 2016

Happy Birthday Dominic!

This bright eyed 8 year old guy is my oldest Grandson Dominic!


Right now this fellow is into Lego's, especially Lego's designed for Major League Hockey, video games and all things sports related.

Here's his birthday card made just for him!


First of all, the colors were chosen because of his new team.  The background was made with my silhouette.  I used wordmark.it to view my fonts and select several 8's and attached with Tombow Multi liquid glue.  The candle die is from The Stamps of Life and was attached with pop dots, after I wound twine around it.  I like all my cards to have a bit of bling so a little crystal stickles on the flame and done.

I also used a leftover 8 inside the card when writing the sentiment.


Wednesday, March 2, 2016

Why Not Make 4 Cards Instead Of One?

It is my opinion that once you cut into a piece of cardstock or pattern paper, why not use most of it up?  These days, I'm selecting the papers I'm going to use and if I'm not using scraps, then I'm making four cards.  Yes, four of the same card. 


I selected 3 patterned papers all 12x12 and then 2 pieces of 8 1/2 x 11 cardstock for the card shown below.  I used some black scraps and attached Sizzix adhesive sheets to the back to die cut my sentiment.  Dies are from The Stamps of Life.  These pattern papers were from The Paper Studio from Hobby Lobby and a textured piece from a clearance pad at Michaels.  I cut all my pieces, inked those puppies up and adhered them.  Every card needs a bit of bling and some ribbon so I grabbed some from my stash.  My hand is reaching for the ATG runner, the Herma Dotto Runner and Zots for adhesive.  I have to figure out how to label my Zots (outside the box) to easily find the right size - oh the troubles of having too many.  lol


Have a great day!

Wednesday, February 17, 2016

Made my first Exploding Box Card


I have thought these cards are just adorable, I've seen so many on pintrest and the possibilities are unlimited.  But I'm not one to sit and measure and fold etc.  That's why I was super excited when The Stamps of Life came out with their Box Card Die Set.  Just run that sucker through my Big Shot on the extended platform and walaaa!  All the side panels are included and a whole host of flowers, leaves and such. 


Now, I like to mix and match and I have quite the collection of dies.  While I was recovering from surgery I took several of those dies and used up scraps with Sizzix Adhesive Sheets on the back and cut oodles of tiny bits.  So this card has dies from Happy Birthday Step Ups, Mail Box Dies and stamps happymail2stamp.  All from The Stamps of Life.  Stephanie Bernard had lots of videos showing how to use her products.


I did use the Kuretake Gansi Tambi 36 Set Watercolors to color the mailbox and Tombow Brush Markers to color the bird.


Here's the other view.


Friday, February 12, 2016

Bubblicious Birthday


One of my bad habits is to procrastinate. I did that today...We have a birthday party tomorrow and I bought the gift today and made the card tonite.  I do have a stash of birthday cards all ready to go, but none for a special little guy who just turned one.

Silhouette to the rescue.  Whipped this one out pretty fast.  Just used a file I already purchased.  Sized it to all fit on an A2 card and cut.  All the small pieces were scraps (yay)!  Used some pop dots to raise the silver bubble.  My 23 year old asked what that was.  Guess she doesn't remember the magic bubbles she used to love.  Since I used a lot of letters for the sentiment, I chose to use the reverse cut and just glue in the bits for the a, o and such. 

I'm excited for the party tomorrow and enjoy some family time.  It's gonna be COLD one so everyone stay warm!  Enjoy your weekend.

Thursday, November 5, 2015

This little Sweetie just turned 3

My adorable Grandson Jacob just turned 3 and his Mimi (me) had to make his card.  Here's him blowing out candles on his new ride (from Great Grandparents Sugar and Big Daddy)
Those cupcakes have Avengers Rings which goes along with the Captain America Theme!

Here's the card I whipped up using what I had close by.

I'm sorry this isn't the best quality picture.  I used a stack from The Paper Studio (Hobby Lobby's brand).  I snatched one of my precut dies (made with scraps ahead of time) from Stephanie Bernards The Stamps of Life, buttons, floss, ink and went to town.  Love using pop dots to raise the sentiment and the number.

I'm off to make a Baby Card.  Have a great day!

Friday, October 30, 2015

Momma's Birthday Card

Hi there, it has been a while.  But I'm Back and hope to continue more postings.  I've been dabbling in a few other mediums and will share some of that later.  I always make my Mom a one of a kind card and don't repeat it for anyone else.  Here's what I came up with this year.

Been loving Stephanie Bernard's Stamps of Life Dies lately.  Cards go together fast and I have rather large collection of dies from many sources so mixing and matching is fun!  This card uses dies from Sizzix, Memory Box and Spellbinders.  I know, there is a lot of little pieces here.  I like to sit with a lot of scraps and cut out bunches so when I need them I have a little pile to choose from.  From Memory Box I used Amira Flourish, from Sizzix, 3-D Scallop with Gifts Drop-ins, Greetings Scalloped Edge Drop-ins and from Spellbinders, Spiral Blossom One, and the leaves are also Spellbinders.

The sentiment is from the Silhouette Store and cut using my Cameo.  The pearls are bulk bling from Want2Scrap.

Have a great day!

Sunday, April 21, 2013

Pop Up Birthday Card


Had to wait til today to post this one.  My Niece, Kendall celebrated her 16th birthday today and didn't want her to see it before hand.  What you don't see is the gift card the slides right behind the pink portion.  There is a slot that holds cards upright.

All paper products are from KI Memories.  The Pop Up is made using a die from Sizzix.

If you have looked at previous entries on my blog you will recognize the dies that have the sentiments stamped on.  I seem to always reach for this Spellbinders Die - Label 20.  For the inside mat I traced the outline of the die with an exacto knife to get a tight mat.

The bling on the front of the card is from Want2Scrap.  Love how they coordinate with Spellbinders.