Showing posts with label Bearly Arts Glue. Show all posts

Wednesday, March 19, 2025

"Bruce" Birthday card with his "Flat Stanley" adventure

Like many others, I struggle with masculine cards.  But when I saw Unity's Bruce stamp, inspiration struck.  Bruce was in my cart and I grievously paid for shipping.  I prefer to meet the minimum for free shipping but not today.  

Now for the "flat Stanley" adventure:  Following the tracking information - Bruce left New London MN and traveled to St Paul MN, on to St Louis MO within 2 days.  He then spent the night in St Louis MO and went to San Francisco CA where he spent the night, on to Oakland CA where he spent 2 nights, back to San Francisco CA and arrived in Memphis 2 days later, next night in St Louis MO where he rested for 4 days before making to my mailbox. Now, I would have loved to accompany him, particularly to the warmer weather, while we had frigid temps and snow.


Finally, time to create!  I decided to color with Copic Markers and used Onyx ink on Neenah card stock, then used YG03, YG09, YG17, BG96, RV11 and C1.  I used Hero Arts Circle Infinity Dies to cut Bazzill Quicksand and Patch card stock in my Empress Elite. To make Bruce's eyes shine I applied Glossy accents.  

For the background I used Large Sprinkled Dots Stencil with Frayed Burlap, Bundled Sage and Peeled Paint.  Once I was happy with that I sprayed Distress Mica Spray in Decayed for shimmer.  To bring the card together I used Bearly Arts Glue to attach "Bruce" and the sentiment.  Tiny Words Stamp from Simon Says Stamps added the perfect Happy Birthday!

Have a great day and keep on crafting!

Affiliate links used at no cost to you.  Not all links are affiliate, I just want to share what I used.  All products were purchase by me unless noted.  I don’t sell anything nor am I employed.  This is my hobby and I hope to inspire you to play :)

Thursday, February 6, 2025

Hoosier Cabinets - Extreme Fun

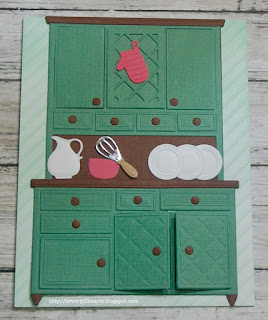
 When I saw Honey Bee Stamps Hoosier Honey Cuts I was enchanted and terrified at the same time!  Why "terrified" you ask?  So many tiny dies and tiny pieces!  Guess what?  The first one was a bit trying but the second one - went super quick and the third was even faster.  Why oh why was I scared of tiny dies - pretty silly now.  My Anna Griffin Empress Elite makes it sooo much easier because the large die plates can hold A LOT of dies!  I did go ahead and purchase the smaller cutting sandwich and I love that one too, you can put that sandwich in the machine "sideways" meaning the long side can fit in the opening.  Yay!

So here are a few cards using Hoosier Cabinet.  Some of the cabinet doors open so you can add lots of hidden dishes and kitchen tools - Go ahead and buy the Baking Add On to include more kitchen tools/dishes.  

Card 1


If you look closely at the second image you can see my boo boo - the rolling pin is hanging out. oops. This was my first try, once I got all the pieces where I wanted I used a plain cream card base.  This was the one change I wish I had made.  Besides the dies, cutting machine and scraps your best friends are a good glue and reverse tweezers.

Card 2


For my second try, I had a basket with all the scraps I had used before and a better understanding of what I liked and where to try other die cuts. There are oodles of options and it really makes you question what you like/dislike.  We moved 2 years ago and at my old house my kitchen aid mixer sat on the counter - now it hides in a cabinet.  Isn't it wild how your mind thinks?  The options include decorative cabinet: plain, swirled vines and lattice. This card base went through an embossing folder (older one) and got some complimentary ink Mint.  These newer brushes ROCK!  Our Crafting Goddess, Jennifer McGuires recommendation, was spot on!  If you're not watching her videos, you are missing out.

Card 3


Last card is very similar but does have a different embossing folder, cabinets covers and I think I like this one the best.

Have a great day and keep on crafting!

Affiliate links used at no cost to you.  Not all links are affiliate, I just want to share what I used.  All products were purchase by me unless noted.  I don’t sell anything nor am I employed.  This is my hobby and I hope to inspire you to play :)

Tuesday, March 1, 2022

Pinkfresh Floral Cards - So Versatile

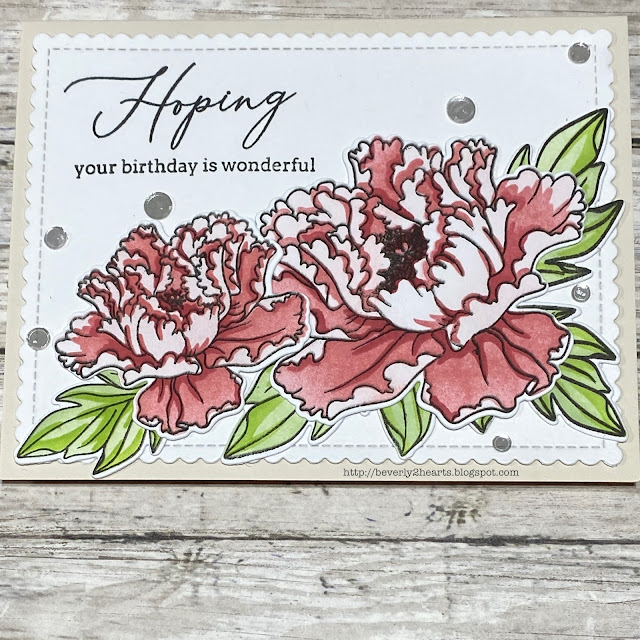
 I've been a big fan of Pinkfresh Studios stamp/stencil/die sets!  Recently Pinkfresh had a sale and I purchased a few sets.  Got to tell you, when you color your images with stencils and coordinating inks miracles happen FAST!  I was able to stamp, color and die cut lots of flowers and leaves very quickly.  

Friendship Blooms

Friendship Blooms

Friendship Blooms


Quick tip: using Pixie Spray on back of the stencils moves things along!  First I stamped Friendship Blooms on 110 lb paper with amalgam ink.  Do yourself a favor and stamp lots!  Next is to apply the pixie spray to the back of the stencils - there are five.  Using PinkfreshStudios Ink makes color selection a breeze - as there are four shades in each color family.  For these flowers I used Coral Reef, Passionfruit and Berrylicious, for the leaves, I used Fresh Pear and Grassy Knoll.  Blending brushes make coloring fast, fun and easy.

Once I had several sheets colored, it was time to break out my Gemini Jr and die cut those babies.  And now it's time to make cards!  I searched my cover dies and selected two:  Hexagon Cover Stipple plate and Blueprint 27 - for these I chose white 110 lb card stock and some pale 110 lb Recollections card stock from Michaels.  Used my score tool to fold them.  I attached the card fronts with Bearly Arts Glue-my new favorite wet glue.  Now time to arrange the flowers and leaves and attach.  Using my MISTI, Choose Hope Stamp Set, and Amalgam Ink I stamped the sentiments.  Once that was finished, I added some embellies from my stash.  The cards are finished but I still have more flowers and leaves in different colors to make more cards.

Have a great day and keep on crafting!

Affiliate links used at no cost to you.  Not all links are affiliate, I just want to share what I used.  All products were purchase by me unless noted.  I don’t sell anything nor am I employed.  This is my hobby and I hope to inspire you to play :)