Showing posts with label Honey Bee Stamps. Show all posts

Thursday, February 27, 2025

Love you to pieces card

 Valentines Day came and went but here's a card you could use for Heart Day or to let a special someone know how much you love them.  At our house, we celebrate February 14 and yes we got that from Tim the Tool man Taylor aka Tim Allen.  Yes, we are weird!

http://beverly2hearts.blogspot.com


This card started out with a bright pink card base stamped with Versa Mark ink using Heart to Heart Stamp.  White Satin Pearl embossing powder was sprinkled and heated - Love how it looks on that bright back ground!  While I had my Wagner Heat Tool out I put Honey Bee Stamps SWAK stamp in my MISTI and again stamped with Versa Mark ink and this time I used Pink Sparkle embossing powder.  I stamped several and used the coordinating Honey Bee Stamps SWAK die in my Empress Elite.  Next I used Simon Says Stamp Love Stamp and Die for the word die and sentiment strip - Raspberry Bliss ink was used.  To bring the card together, I trimmed the back ground, placed my lips with one Foam Strips and used Bearly Arts Glue to adhere everything down.  Sparkle accents were made with my Stardust Pen.  I wish you could see this card in person, as the sparkle lips really catch the light.

Have a great day and keep on crafting!

Affiliate links used at no cost to you.  Not all links are affiliate, I just want to share what I used.  All products were purchase by me unless noted.  I don’t sell anything nor am I employed.  This is my hobby and I hope to inspire you to play :)


Thursday, February 6, 2025

Hoosier Cabinets - Extreme Fun

 When I saw Honey Bee Stamps Hoosier Honey Cuts I was enchanted and terrified at the same time!  Why "terrified" you ask?  So many tiny dies and tiny pieces!  Guess what?  The first one was a bit trying but the second one - went super quick and the third was even faster.  Why oh why was I scared of tiny dies - pretty silly now.  My Anna Griffin Empress Elite makes it sooo much easier because the large die plates can hold A LOT of dies!  I did go ahead and purchase the smaller cutting sandwich and I love that one too, you can put that sandwich in the machine "sideways" meaning the long side can fit in the opening.  Yay!

So here are a few cards using Hoosier Cabinet.  Some of the cabinet doors open so you can add lots of hidden dishes and kitchen tools - Go ahead and buy the Baking Add On to include more kitchen tools/dishes.  

Card 1


If you look closely at the second image you can see my boo boo - the rolling pin is hanging out. oops. This was my first try, once I got all the pieces where I wanted I used a plain cream card base.  This was the one change I wish I had made.  Besides the dies, cutting machine and scraps your best friends are a good glue and reverse tweezers.

Card 2


For my second try, I had a basket with all the scraps I had used before and a better understanding of what I liked and where to try other die cuts. There are oodles of options and it really makes you question what you like/dislike.  We moved 2 years ago and at my old house my kitchen aid mixer sat on the counter - now it hides in a cabinet.  Isn't it wild how your mind thinks?  The options include decorative cabinet: plain, swirled vines and lattice. This card base went through an embossing folder (older one) and got some complimentary ink Mint.  These newer brushes ROCK!  Our Crafting Goddess, Jennifer McGuires recommendation, was spot on!  If you're not watching her videos, you are missing out.

Card 3


Last card is very similar but does have a different embossing folder, cabinets covers and I think I like this one the best.

Have a great day and keep on crafting!

Affiliate links used at no cost to you.  Not all links are affiliate, I just want to share what I used.  All products were purchase by me unless noted.  I don’t sell anything nor am I employed.  This is my hobby and I hope to inspire you to play :)

Saturday, February 1, 2025

Happy Flappy Cards with Creek Bank Creations Card Base

 Hello, it's been a while.  You know when a life event changes the whole family dynamic - we had a few of those happen.  And as much as I love crafting, the blogging had to take a backseat.  The boat has stopped rocking, occasionally a ruffle in the ocean starts motion, but for the most part we have a new normal and smooth sailing.  

My family and I just celebrated 32 years living life with two heart transplants.  Wow, 32 years to watch my kids grow up and a host of experiences that wouldn't have happed - without the generous gifts of life.  Please have a conversation with your family about your wishes.  It's a gift, so let the Doctors decide what they can use!

Today's cards uses a nifty card base from Creek Bank Creations called Happy Flappy Card Base.  I was at a CKC convention where I happened on this Company's Booth.  They had a make and take and I was hooked!  Very clear instruction video on their site shows all the steps.


Fitting name for this Die set, don't you think? The second assembly goes quickly!  The Happy Mothers Day Sentiment Stamp provides a sentiment for all 3 places.  Didn't purchase the stamp set for "pull" so I improvised with what I had - definitely would look better with a size appropriate stamp set.

Warning, I dug into my stash of scrapbook paper, much of it was purchased many moons ago.  I tried finding links but alas - they gone!  For the card base I used Craftsmith Wedding Neutrals and the sparkly paper is from My Minds Eye - Laundry Line.  The flowers are from Be Bold Blooms and sentiments are stamped with Ballet Slipper.  The card front is raised with Foam Tape and my glue of choice lately is Bearly Arts Glue.  My latest purchase (drum roll please) Anna Griffin Empress Elite has taken die cutting to a whole new level.  More on that later....  Here's another card 


Products used on this version are DCWV Bahama Moma Pad,  Turquoise Ink, Honey Bee Stamps Tropical Bouquets Dies and a Micron 005 pen.  The sentiments are from the same Happy Mothers Sentiment Stamp.

Transplant Recipients have to be very careful of germs!  This time of year (cold and flu season) is hermit time for Bev, in the basement (my happy place) and I've been creating lots of cards lately, so there will be more blog posts.  

Have a great day and keep on crafting!

Affiliate links used at no cost to you.  Not all links are affiliate, I just want to share what I used.  All products were purchase by me unless noted.  I don’t sell anything nor am I employed.  This is my hobby and I hope to inspire you to play :)

Wednesday, March 16, 2022

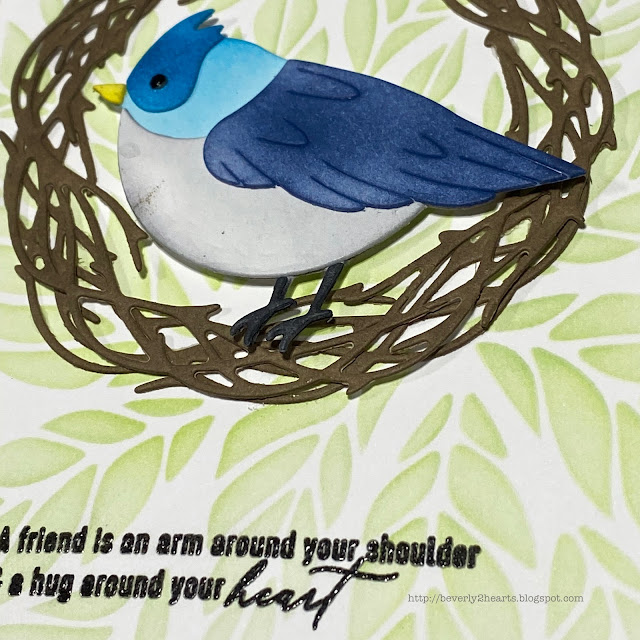
Birdie Friendship Card

 Today's card used white die cuts that I colored individually.  Heck, it's easier to die cut a bunch of white than finding the right color card stock and putting the right die on that paper.  So today, I pulled out my water media mat and some of those precut dies.  

Feathered Friends 4

Feathered Friends 4


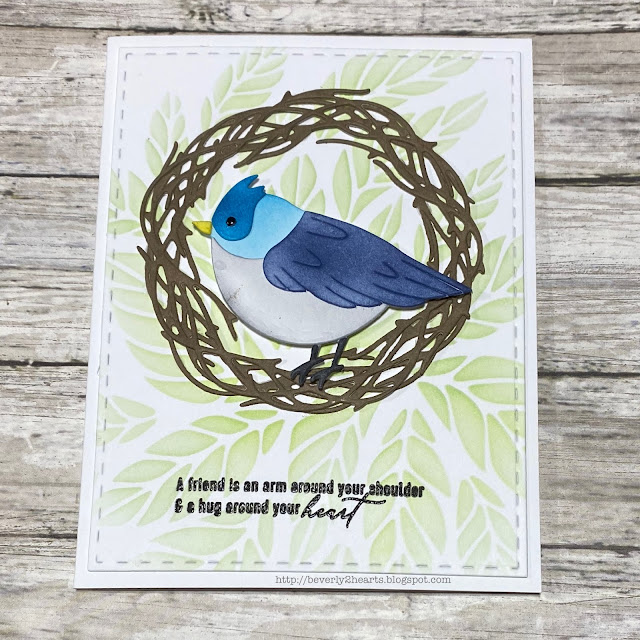
Feathered Friends 4 is the bird and I chose Blending Brushes to color Summer Sky, Deep Ocean, Navy, Lemon Drop and Tuxedo black.  Once it was dry I glued all the parts together with Bearly Arts Glue.  So my bird needs a nest and the Grapevine Wreath is perfect - and I also had that precut in white card stock, so I grabbed two.  Cup O Joe was applied with a mini blending tool and really got into all those nooks and crannies.  Now I need a background...I pulled out the Tumbling Leaves stencil with blending brushes and Fresh Pear and Grassy Knoll.  Stitched rectangles trimmed that perfectly in my Gemini Jr.  Lastly, I need a sentiment so I chose one from Friendship Blooms and I stamped in my MISTI with Amalgam ink, then Versamark and clear embossing powder was melted.  I haven't had much luck with black embossing powder and sentiments so I like to add clear over a black stamped sentiment.

Have a great day and keep on crafting!

Affiliate links used at no cost to you.  Not all links are affiliate, I just want to share what I used.  All products were purchase by me unless noted.  I don’t sell anything nor am I employed.  This is my hobby and I hope to inspire you to play :)


Tuesday, March 9, 2021

Spiritual Cards

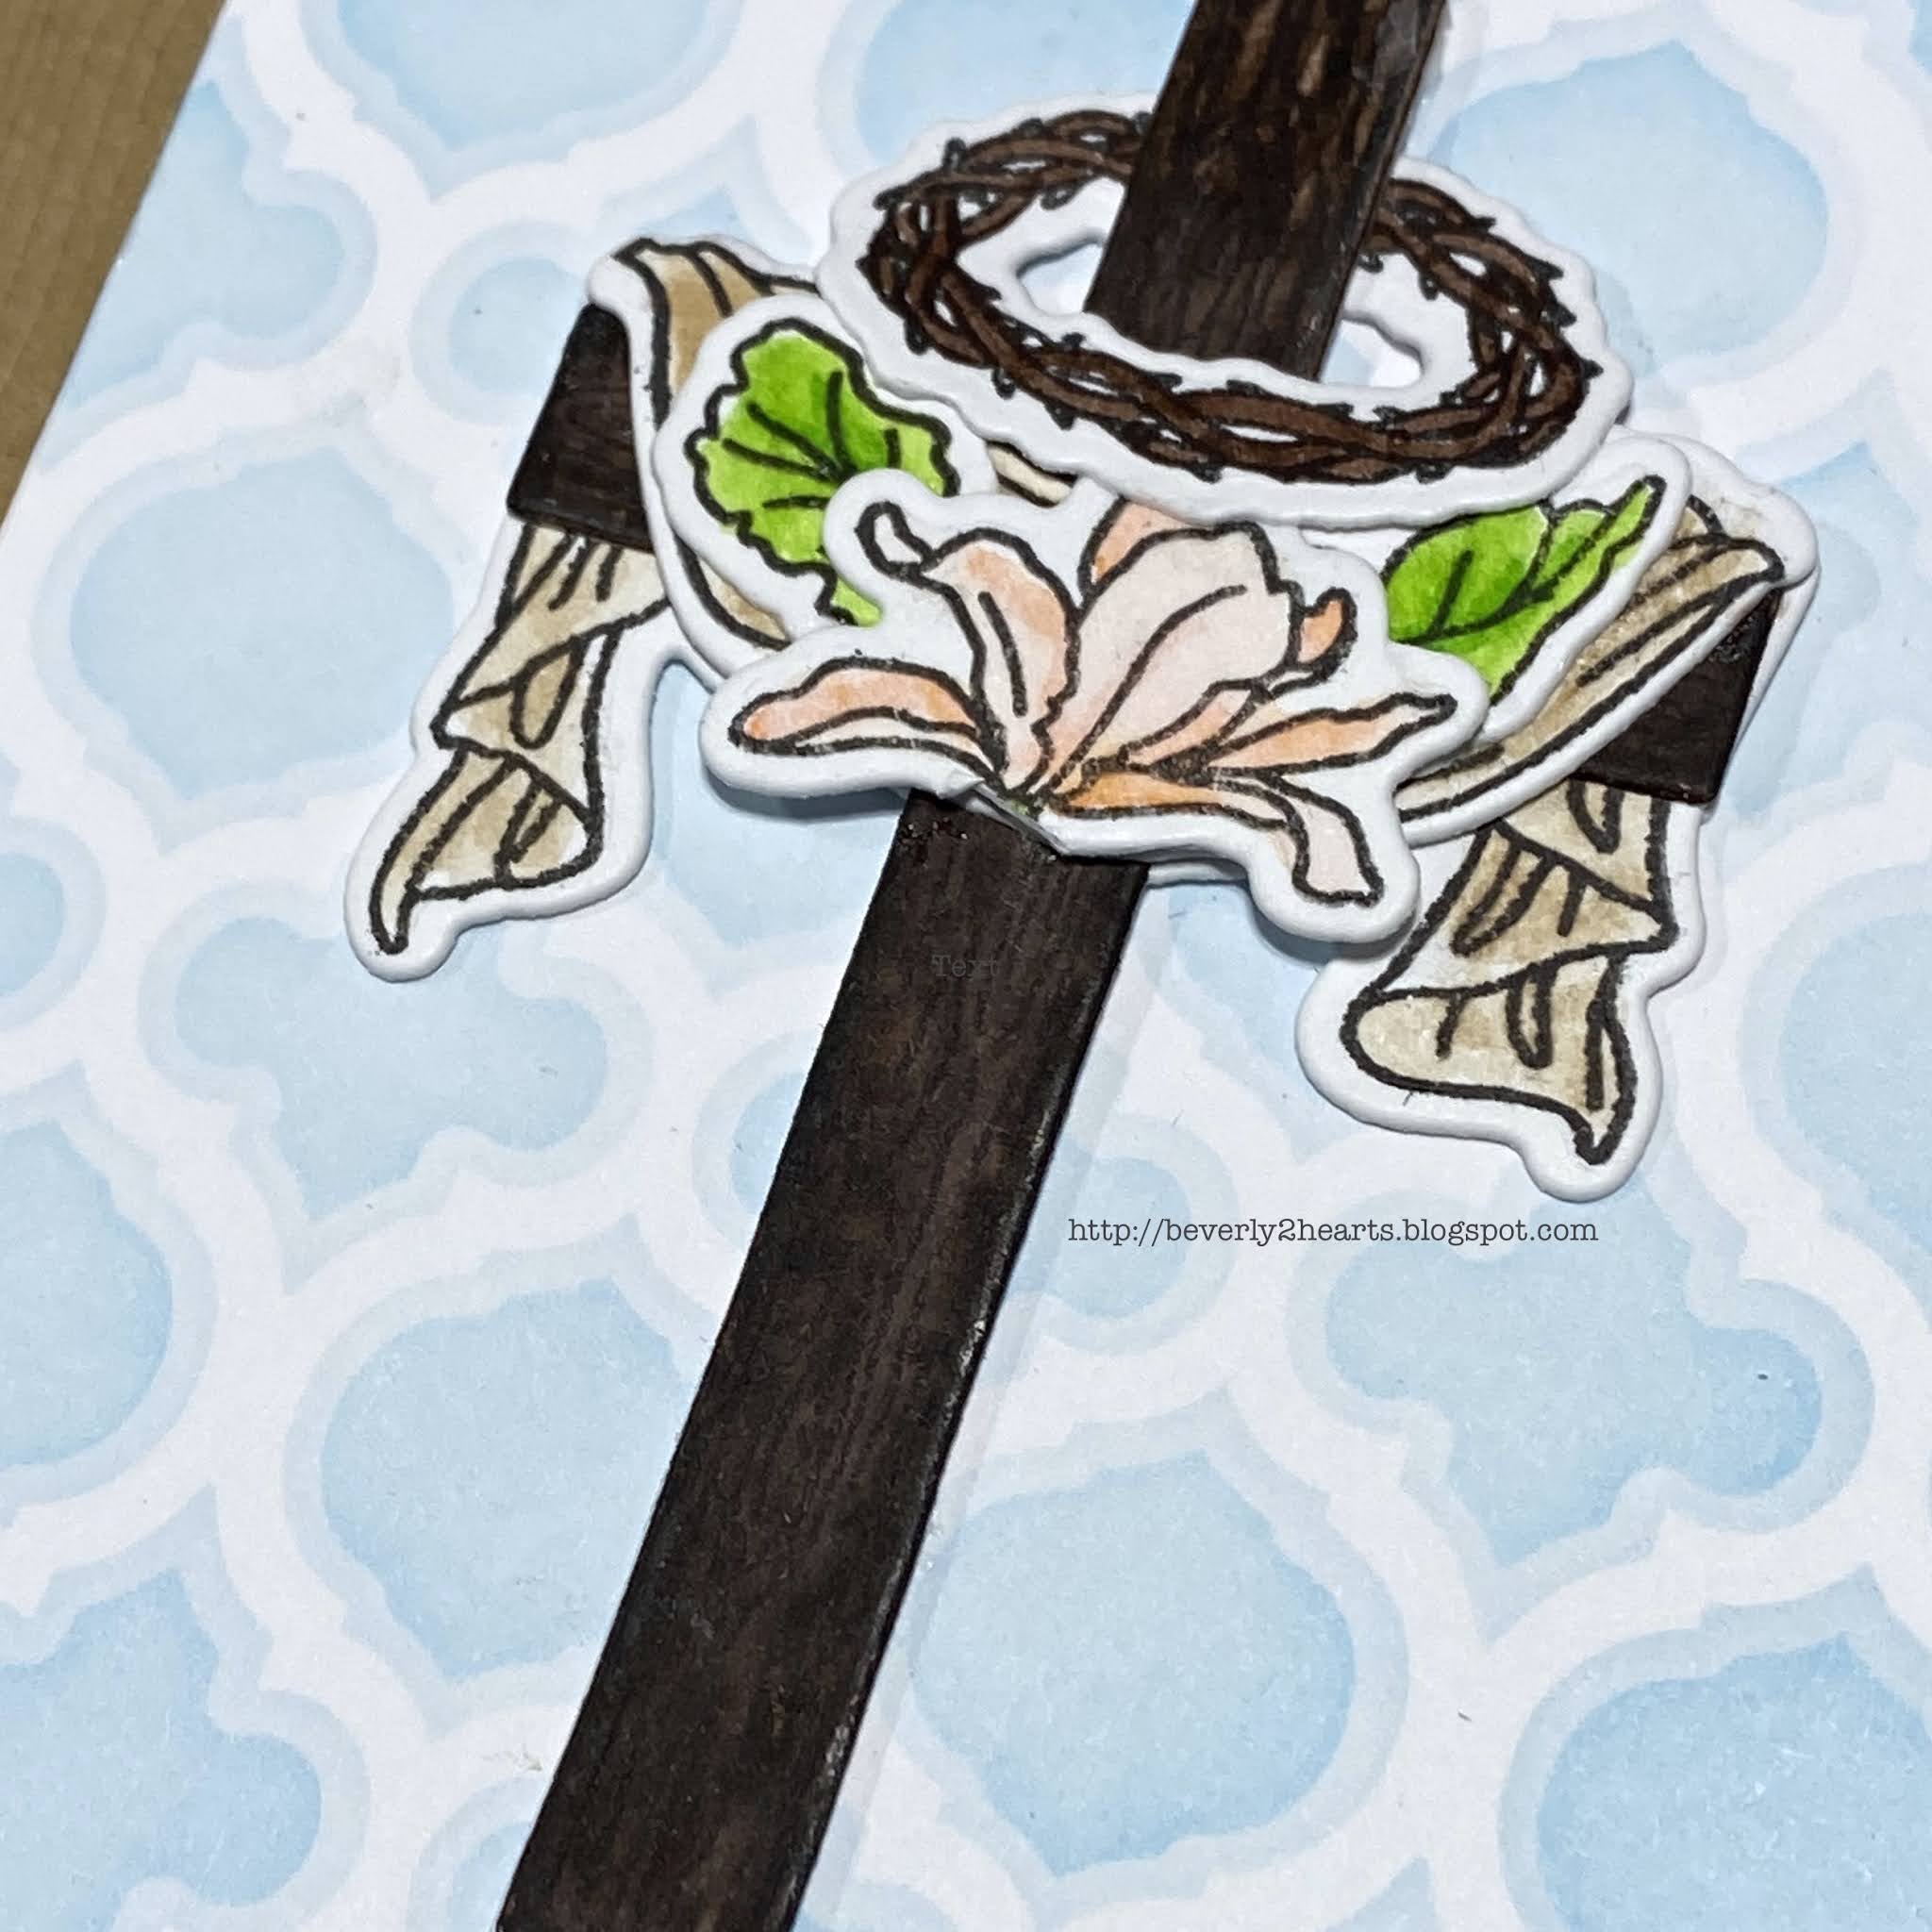
 I've been waiting for some spiritual stamps and dies and Honey Bee Stamps delivered.  The Old Rugged Cross Stamp and Honey Cuts sets are just lovely.  Their newest release included lots of elements that go quite nicely with this large 6x8 set.  One of these days I'm going to buy the whole new release when it comes out. (it's good to have dreams!)

I have two cards todays using the stamp set along with the Wood Frame Builders Set and Quatrafoil stencil set.   Both cards were stamped with Amalgam Ink onto watercolor paper.  Tombow markers and a water brush made coloring easy.  My sentiment is stamped with the amalgam ink and then again with versa mark ink, using my MISTI and then heat embossed with clear embossing powder.  All colored images along with the sentiment and Frame Builders set were die cut using my Gemini Jr.  Additional layers of the cross and frame were also cut, stacked and glued together.  I love how dies are included for the sentiments with Honey Bee Stamps, plus they are already cut apart - bonus!

Two colors of blue ink, Summer Shower and Sky Blue were used with the stencils for the background.   When assembling my cards, glossy accents was used on the flowers and to finish, I added Nuvo drops.

Old Rugged Cross

Old Rugged Cross


Old Rugged Cross

Old Rugged Cross
Have a great day and keep on crafting!

Affiliate links used at no cost to you.  Not all links are affiliate, I just want to share what I used.  All products were purchase by me unless noted.  I don’t sell anything nor am I employed.  This is my hobby and I hope to inspire you to play :)

Wednesday, January 27, 2021

Fun Family Card

 Honey Bee Stamps has some of the cutest stamps ever!  I actually laughed out loud when I read the sentiments on this stamp set.  


I put this card together using Woodland Winter Animals along with Nuts About You.  As usual, I stamped with Amalgam Ink and colored with Copics, the squirrels, however are done with Colored Pencils.  All colored and non colored (Aspen trees) are then die cut using my Gemini Jr..

For my base, I used Sky Blue with Cloud Stencil and Key Lime with Grass Stencil using blender brushes.  Time to assemble my card by attaching all pieces with Precision Tip Glue.

Using my MISTI, I added that funny sentiment with amalgam ink.  The card front is attached to brown card stock from my stash and then attached to a white card base.  White gel pen adds details.

Have a great day and keep on crafting!

Affiliate links used at no cost to you.  Not all links are affiliate, I just want to share what I used.  All products were purchase by me unless noted.  I don’t sell anything nor am I employed.  This is my hobby and I hope to inspire you to play :)

Wednesday, January 20, 2021

Sympathy Cards, Needed but I wish it was Happy Moments!

 Unfortunately Sympathy cards are needed.  I sent out two recently and will probably need more soon.

Decided to use a "new to me" Altenew set called Crown Blooms and got to use brand new inks from Pink Fresh Studio as a Christmas gift.  I started with my MISTI and stamping the outline in amalgam ink and then stamping the layers with Ballet Slippers, Sparkling Rose, Bubble Gum and Raspberry Bliss for the flower.  Leaves were also stamped in layers with Olive and Key Lime.  Die cutting came next and then the sprig was colored with Copics.  After arranging the bouquet I decided I wanted a background cover die so I reached for an older die from Darice making a chicken wire.  Using E6000 spray made gluing those slim pieces easier.  Using Precision Tip Glue I adhered my bouquet along the left side.  Crystal Stickles adds a bit of sparkle.

My sentiment is die cut three times and layered then attached.

Altenew Crown Bloom


The next card is done exactly like the first but is larger, the first is an A2 card and this is a 5x7 size.  The Plaid A7 Cover Plate Top covers the card base.  A few more flowers and a sentiment strip is stamped and heat embossed.

Plaid A7 Cover Plate Top


Jennifer McGuire Ink offers many valuable tips and tricks to inspire and better your craft.  I purchased heavy weight card stock for layering and I have to say, it really makes the card substantial!  If you haven't before go check out her blog www.jennifermcguireink.com

Have a great day and keep on crafting!

Affiliate links used at no cost to you.  Not all links are affiliate, I just want to share what I used.  All products were purchase by me unless noted.  I don’t sell anything nor am I employed.  This is my hobby and I hope to inspire you to play :)

Wednesday, January 6, 2021

Pickup Truck Birthday Card

 The Big Pickup Cab stamp and die just called to me.  I had to have it and a few others from Honey Bee Stamps, so I indulged!  Now was time to play and have some fun doing it.  

http://beverly2hearts.blogspot.com


Once the truck was stamped on copic friendly paper with amalgam ink, I went to town coloring, and it really is an easy image to do that.  A little sparkle pen over the "metal" parts gave some shimmer.  The emblem was die cut using mirror card stock.  Also stamped were the wiper blades and the sentiments.  So cool that HBS includes dies for the sentiments too!  All the die cutting went through my Gemini Jr.  This was the first time I brought out the Burlap die and added a little Vintage Photo Distress Oxide ink around the edges.  Then I adhered it to the ivory card stock using Honey Bee Glue, I like that it is a larger tube-makes it a little easier for me to hold.  Next I added the pickup and a few silver baubles that I had in my stash.

Affiliate links used at no cost to you.  Not all links are affiliate, I just want to share what I used.  All products were purchase by me unless noted.  I don’t sell anything nor am I employed.  This is my hobby and I hope to inspire you to play :)

Tuesday, September 8, 2020

Beach House Card

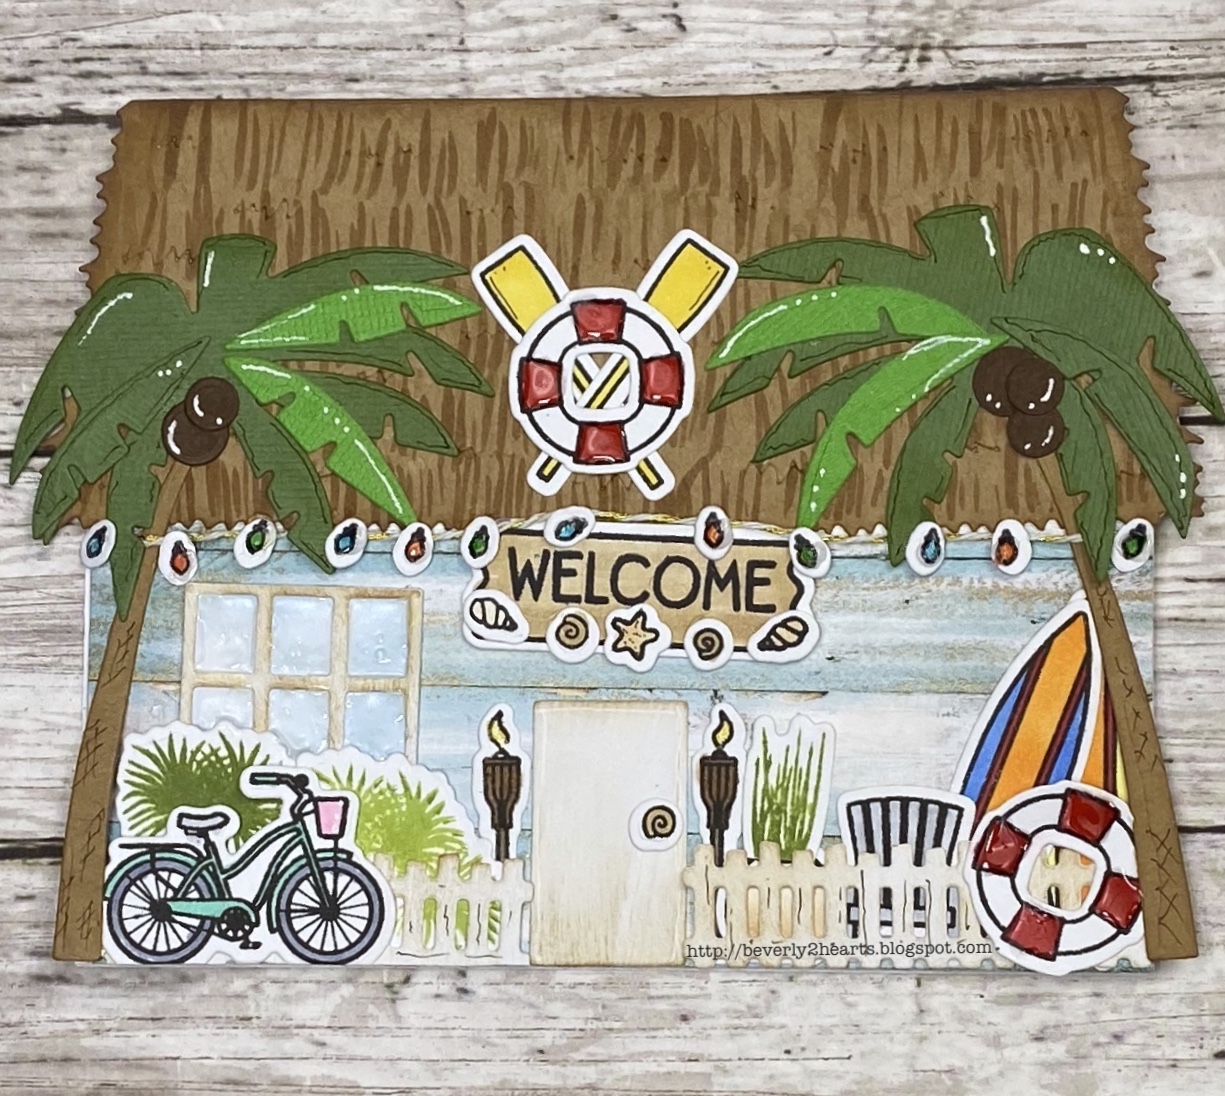
Honey Bee's House Builders Honey Cuts just make me happy, plain and simple!  I giggle every time I work with them. 

Using the Beach House Stamps and Honey Cuts have loads of options for your house.  My card started with the roof, I added copic coloring to mimic thatched roof.  For the siding, I used paper from Beach Vibes.  Next came stamping with Tuxedo Black and coloring with Copics.  Then comes die cutting, using my Gemini Jr., all the stamped images along with window, door, fence and other elements.  A little ink makes a big difference!  I decided I want most of my accessories inside the fence so I played with placement before I started to glue them down.  Instead of a traditional door handle, a shell works and shells are placed on the welcome sign.  Twinkle lights add sparkle and glossy accents add shine to the life preservers and window.  Micron Pen and Signo white gel pen adds detail.

http://beverly2hearts.blogspot.com

Have a great day and keep on crafting!

Affiliate links used at no cost to you.  Not all links are affiliate, I just want to share what I used.  All products were purchase by me unless noted.  I don’t sell anything nor am I employed.  This is my hobby and I hope to inspire you to play :)

Monday, August 17, 2020

Flippin Awesome Birthday Card

Had so much fun playing with new stamps and dies from Honey Bee Stamps!  Started with a slimline base and wanted it to resemble walking on the beach.  Kraft paper was die cut with slimline base and edges were inked.  Next, I stamped the flip flops on turquoise paper and again on white.  I die cut the flops and hand cut the white “straps”, they were then glued on top and crystal stickles were spread on top because this girl needs glitter.  Using my MISTI, I stamped several shells using different colors of ink.  Then they were die cut using the Gemini Jr. and colored pencils added detail.


Time to figure the layout, and once that happened I stamped the sentiment with versa mark ink and heat embossed the sea foam embossing powder.  Then…I got out my “sand” and put glue where I wanted the sand and sprinkled it on and let dry.  All the elements were attached, some with glue and some with pop dots.  Please Note:  I won the Mudd Puddles products as an attendance prize.


Have a great day and keep on crafting!


Affiliate links used at no cost to you.  Not all links are affiliate, I just want to share what I used.  All products were purchase by me unless noted.  I don’t sell anything nor am I employed.  This is my hobby and I hope to inspire you to play :)


Thursday, July 16, 2020

Butterfly Kisses Card

I just adore Birdie Brown images!  This one, from My Favorite Things is called Butterfly Kisses and was so fun and quick to color.  Unfortunately it is sold out. 

I stamped with Tuxedo black ink in my MISTI and colored with Copic markers. A gold pen added earrings, shoe buckle and bracelet while a white gel pen added details. 

Gemini Jr made die cutting the image, stitched rectangles and hexagon stipple plate background a breeze. 

Fun foam raises the rectangle. The sentiment is stamped with sea glass ink. And a stardust pen adds interest to the sentiment strip. Connect glue attaches all the components to the card base 


Have a great day and keep on crafting.

Affiliate links used at no cost to you.  Not all links are affiliate, I just want to share what I used.  All products were purchase by me unless noted.  I don’t sell anything nor am I employed.  This is my hobby and I hope to inspire you to play :)

Wednesday, June 24, 2020

60th Birthday Card


Got a card for a Big birthday …at least that’s what he keeps saying.  My love is turning 60 and I made him a special card.  

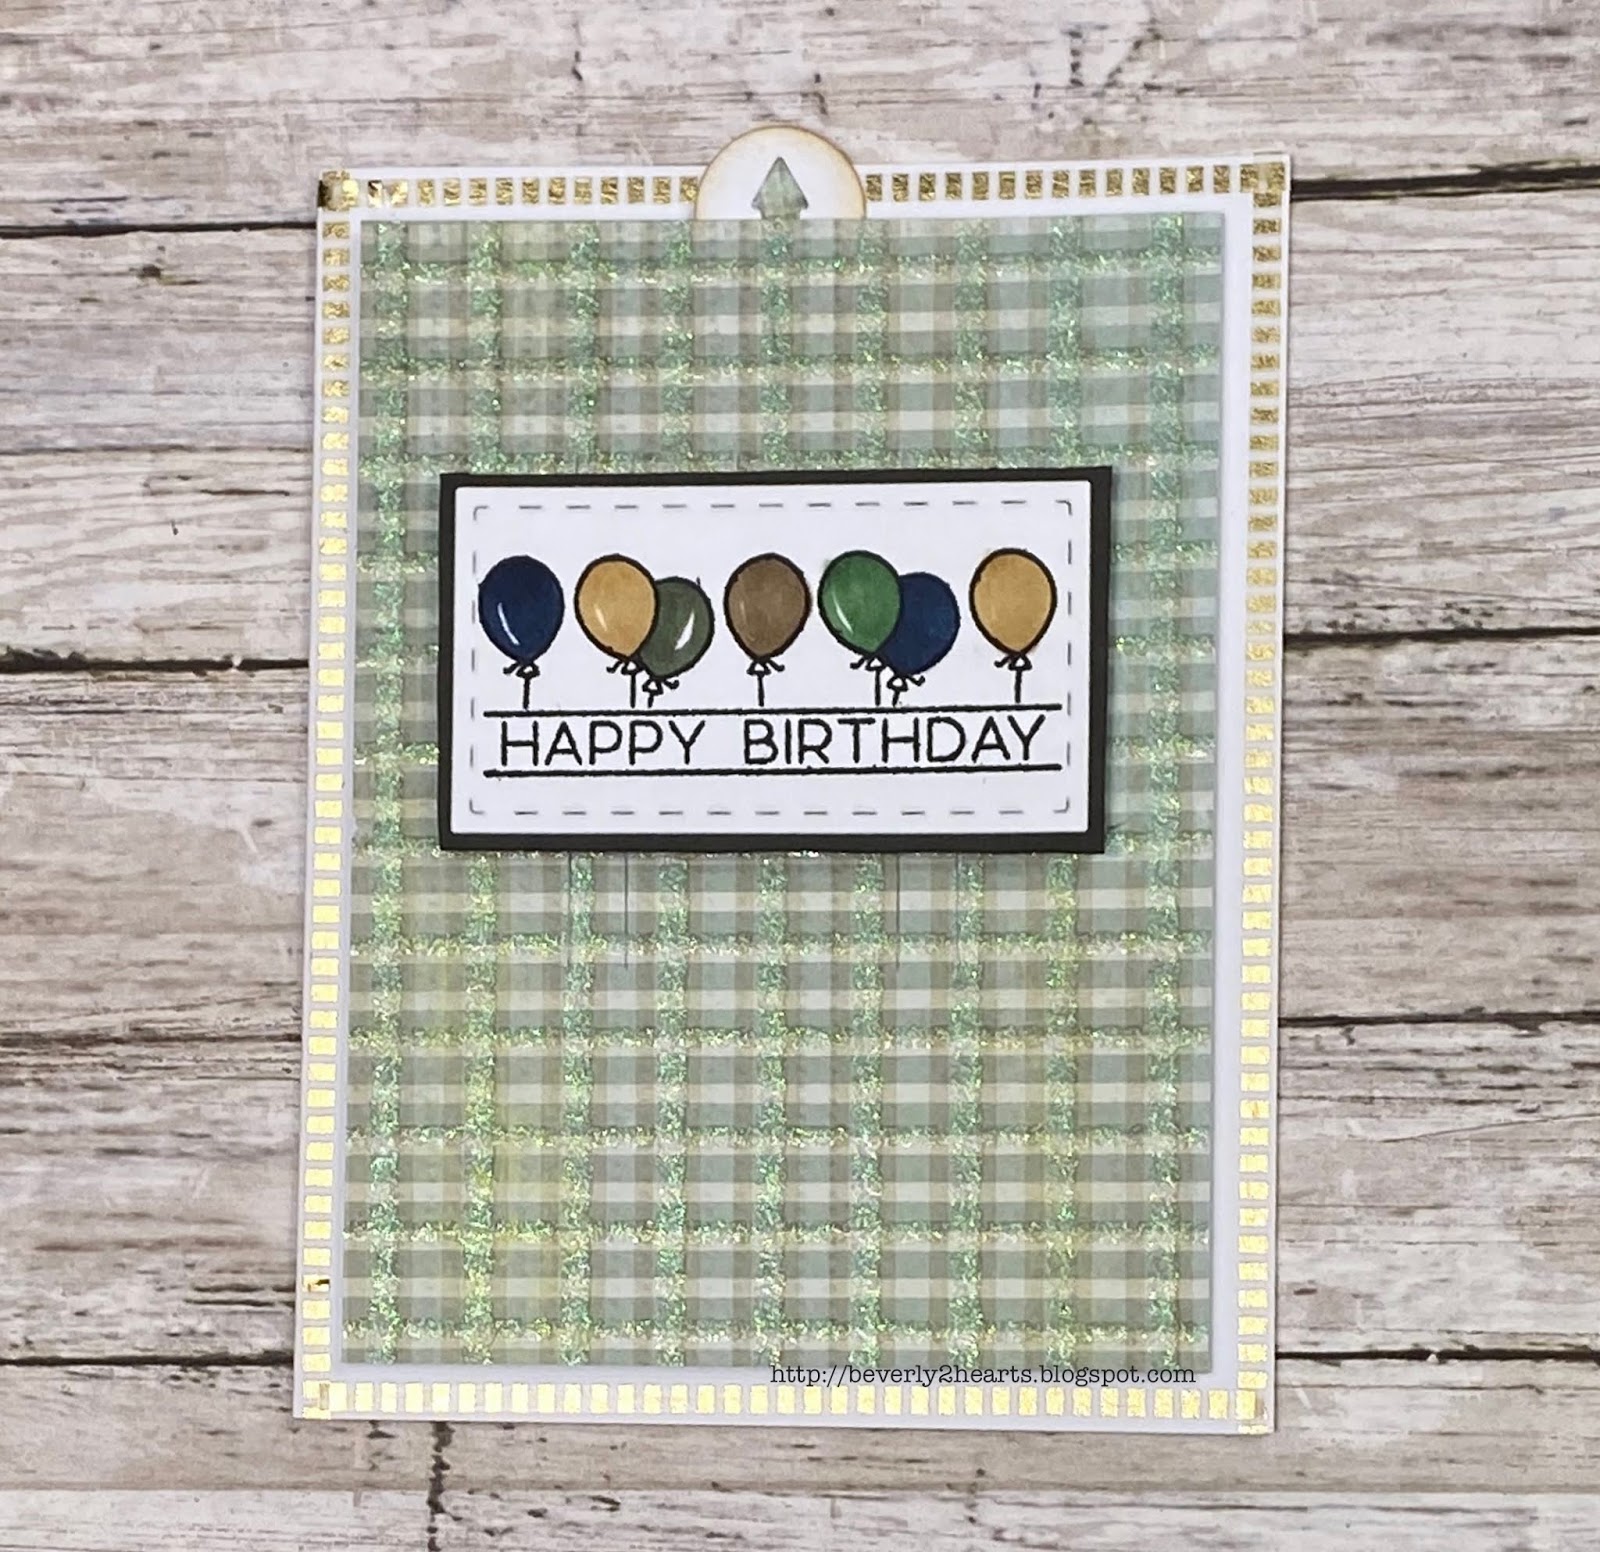
I’m using products from lots of companies today.  Starting with the Quintuple Slider from Simon Says Stamps.  Decided to have the Balloon Numbers from Honeybee Stamps cut in Gold Shine card stock, coming up from behind the sentiment - which is from The Stamping Village, it’s colored with Copic markers G46, BG96, E55, E44 and B99.  It’s cut out with Stitched Rectangles from The Stamps of Life and raised with foam tape.  All of this is on my background which is from Laundry Line Paper Pad by Jen Wilson that I got at Hobby Lobby.  I used my Gemini Jr for all the die cutting.  Once my card was assembled, I added some very thin washi tape (from Hobby Lobby) as a border.


Since I cut a 12x12 sheet of Laundry Line, I went ahead and cut card bases for 3 more cards.  Used the sentiments from same stamp set to quickly make 3 similar cards minus the Quintuple slider.

Have a great day and keep on crafting!

Affiliate links used at no cost to you.  Not all links are affiliate, I just want to share what I used.  All products were purchase by my unless noted.  I don’t sell anything nor am I employed.  This is my hobby and I hope to inspire you to play :)

Friday, May 29, 2020

Honey Bee House Builder Card

Hello everyone, anyone else getting annoyed with the this staying at home stuff?  Because I’m a two time Heart Transplant Recipient, I’m used to choosing my needs versus wants.  But it just about broke my heart when Golds Gym closed all the St Louis area locations.  I’m a swimmer and their pool was perfect for me.  Open all day and I could go around noon and practically have the pool to myself.  I miss my swim time - calms me and wears be out.  Enough about me…lets talk card making.

When Honey Bee Stamps introduced their Home Building Honey Cuts, I fell in love!  They have since added a Christmas, Halloween, Sweet Shop, Farm House add on, stencils and paper pads.  Oh the possibilities!  I haven’t bought it all, but I’m getting closer - lol.  While I will admit that looking at all those dies, it did seem a bit overwhelming.  But now that I’ve done a few….loving it!!!!  


You need the House Builder Honey Cut for the house base.  For this one I added the Farm House Add on Stamps and honey cuts along with the shutters from the Gingerbread HouseHome Essentials Paper Pad takes care of roof, siding, front door and chimney.  Stencils work if you don’t have the paper pad.  I will tell you that teeny tiny door handle takes some coordination to adhere, thank goodness for reverse tweezers!  This card makes me so happy - I think I giggled the whole time putting it together.


Have a great day and keep on crafting!  It’s keeping me sane now!

Affiliate links used at no cost to you.  Not all links are affiliate, I just want to share what I used.  All products were purchase by my unless noted.  I don’t sell anything nor am I employed.  This is my hobby and I hope to inspire you to play :)
Wednesday, April 29, 2020

How Awesome You Are Card

These are such strange times right now!  And, when you throw in another major life experience, like an child with an undiagnosed illness that requires a hospital stay or purchasing and closing on a new home things are bound to be more complicated!  Both have happened to family members and I'm sure it's happened to others, but isn't heart warming when you see kindness happening!  These are not my stories to tell but just a glimpse into situations that continue to arise all over.

Todays card is one to send love during these times.  

First step was stamping the background with Heart to Heart with Versamark ink and sprinkled clear embossing powder and heat set.  Picked rasberry and spun sugar ink was blended then a shimmer spray was applied.  The sentiment was stamped with charcoal ink and re-stamped with Versarmark and clear embossing powder was heat set for shine.  The piece was then die cut with stitched rectangles.  Next came the bow* made with 7/8 inch organza ribbon and attached.  Foam tape adds dimension to Razzle Berry card stock and finally Valerie ice gems were added with connect glue.

* I learned how to tie these bows from www.amazingpapergrace.com tutorial.  I could not find the same online tutorial but I recommend checking out her site!

Have a great day and keep on crafting!

Affiliate links used at no cost to you.  Not all links are affiliate, I just want to share what I used.  All products were purchase by my unless noted.  I don’t sell anything nor am I employed.  This is my hobby and I hope to inspire you to play :)
Wednesday, December 18, 2019

Two Christmas Cards This Year

I traditionally make 60+ Christmas Cards each year and it is a labor of love.  I have one dear friend who has kept the past 9 years worth and displays them as decorations.  When I saw the picture of them all, my heart melted!


My first card is made with Honey Bee Stamps Winter Bouquets Honey Cuts and a sentiment from a My Monthly Hero Kit.  Those beautiful poinsettias caught my eye and I was hooked.  I had my Gemini Jr working overtime to cut all those layers.  Next came inking with 3 colors of distress ink.  A stardust pen accents the pinecones and then the gluing began using Connect adhesive (it really holds together and dries fast).  Using a My Monthly Hero sentiment I stamped using my Mini Misti with Versamark and Heat Embossed with Ranger Gold Embossing Powder.  The background paper is The Paper Studio from Hobby Lobby.  Finally all elements were attached to a white card base.


Now for the second card...I was at Hobby Lobby buying background paper and found the Merry Christmas Wreath from Momenta.  Loved this delicate die and decided right then and there to add a second card.  So my Gemini Jr chugged right along cutting more die cuts.  So I said, I loved it...also hated it!  It's so pretty but is really a booger working with and glueing together.  Before I glued I sprayed Shimmer Spritz on the white layer, I know you can't see it in the photo but trust me it's there.  Inking the background paper always adds a little extra so I did that too with Distress Ink.  Finally all elements were attached to my red card base.


I chose no rhyme or reason when sending these out as to who got what card - I liked them both that much!

Affiliate links used at no cost to you.  Not all links are affiliate, I just want to share what I used.  All products were purchase by my unless noted.  I don’t sell anything nor am I employed.  This is my hobby and I hope to inspire you to play :)


Monday, March 18, 2019

Piece of Cake Birthday Card

Hello there, I'm using some new products on today's card.  I knew the moment I saw it, that I had to have the Piece of Cake stamp set from Honey Bee Stamps.  Let me tell you, the two stamps I ordered came super fast and was packed with love!  The other new element I used was an embossing folder that came with my gemini jr.  Normally, I stick with my big shot for embossing folders but the included folder worked just fine.  I do like the raised area along with the textured background.  

I started by stamping with memento ink on 80 lb Neenah card stock, knowing that I would be using my Silhouette to cut these images out.  Of course, I used the MISTI so for repeated stamping, then it was time to color with Copics.  This is usually my standard practice, stamp a lot, spend time coloring and then cut them all out - so when I'm ready to make a card, it goes pretty quick.   So to pull my card together, the embossed background was trimmed, fun foam attached behind, then I positioned my cake on the pedestal, added the other elements and glued them down.  The sentiment is stamped, sprinkled with embossing powderheat embossed and die cut with coordinating die.  All of this is attached to some new card stock from Hero Arts that has been inked and glued to my card base.
beverly2hearts.blotspot.com
Have a great day and keep on crafting!

Affiliate links used at no cost to you.  Not all links are affiliate, I just want to share what I used.  All products were purchase by my unless noted.  I don’t sell anything nor am I employed.  This is my hobby and I hope to inspire you to play :)