Wednesday, September 16, 2020

Birthday Slimline Underwater Card

I love anything that is water related!  My Favorite Things has a stencil that when used once and then rotate 3 times, looks amazingly like water!  Mine arrived over the weekend and I had to play today!

http://beverly2hearts.blogspot.com

http://beverly2hearts.blogspot.com


I chose to make a slimline card, underwater birthday card.  First I started with a sheet of Neenah 110lb card stock trimmed it to 4 1/4 x 8 1/2.  


Now, time to work with the stencil.  The stencil is approximately 6x6 so I did one section then flipped my card stock around to do the other side.  First I placed purple tape onto my glass media mat to place my card stock.  Then I prayed Pixie Spray onto the back of the stencil to keep in place.  Then I taped my card stock to the mat.  Tumbled Glass Oxide ink was used with a blender brush then I rotated the stencil and repeated inking until stencil has rotated 4 times.  To finish the other side, my card stock is flipped.  Finally, with a light touch, I blended Peacock Feathers all over to hide the seam of ink.


The second piece of card stock is inked with Vintage Photo and a blender brush.  Using my Gemini Jr I die cut the  “sand” piece with Slimline Stitched Hillside Borders and layered them for an ocean bottom.  Then adhered it to the “ocean” piece with connect glue.  Using the Large Slimline with sliders die I ran it through my Gemini Jr.  Finally I used the Small Slimline with Lift the Flaps Die on top and ran that through the Gemini Jr.


Now time to decorate!  Using some older My Monthly Hero Kit stamps I added seaweed with Hero Arts Ink.  Then I stamped with Versamark ink (in my MISTI) two coral pieces and applied Pink Puff Embossing powder and heat set.   Then using You are Sublime I stamped the sentiment with amalgam ink using my MISTI for easy placement.


I pulled out some previously stamped, colored and die cut fishes from You are Sublime and Gill Friends and played with arranging them before adhering with connect glue.  This was soooo fun to do!


Paradise card stock is trimmed to 8 1/2 x 7 and folded in half.  I then opened the flaps and make tick marks with a pencil for placement guide.  A sentiment is stamped with amalgam ink and previously colored images are attached.  I erased the tick marks with the couture creation tool.  Finally, the card top is adhered to the card base.


Have a great day and keep on crafting!


Affiliate links used at no cost to you.  Not all links are affiliate, I just want to share what I used.  All products were purchase by me unless noted.  I don’t sell anything nor am I employed.  This is my hobby and I hope to inspire you to play :)

Tuesday, September 8, 2020

Beach House Card

Honey Bee's House Builders Honey Cuts just make me happy, plain and simple!  I giggle every time I work with them. 

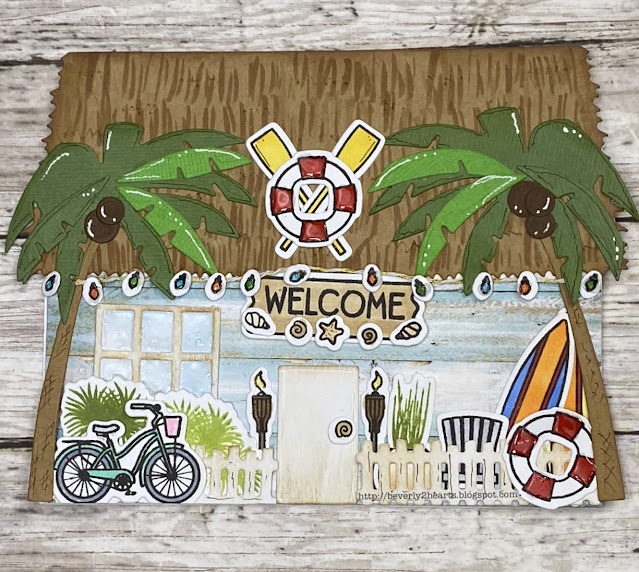
Using the Beach House Stamps and Honey Cuts have loads of options for your house.  My card started with the roof, I added copic coloring to mimic thatched roof.  For the siding, I used paper from Beach Vibes.  Next came stamping with Tuxedo Black and coloring with Copics.  Then comes die cutting, using my Gemini Jr., all the stamped images along with window, door, fence and other elements.  A little ink makes a big difference!  I decided I want most of my accessories inside the fence so I played with placement before I started to glue them down.  Instead of a traditional door handle, a shell works and shells are placed on the welcome sign.  Twinkle lights add sparkle and glossy accents add shine to the life preservers and window.  Micron Pen and Signo white gel pen adds detail.

http://beverly2hearts.blogspot.com

Have a great day and keep on crafting!

Affiliate links used at no cost to you.  Not all links are affiliate, I just want to share what I used.  All products were purchase by me unless noted.  I don’t sell anything nor am I employed.  This is my hobby and I hope to inspire you to play :)

Sunday, September 6, 2020

Graduation Celebrate with Pop Up Card

I needed a graduation card but wanted something non-traditional.  So I chose celebrate rather than congratulations.  I’m very proud of this graduate and she has big plans!

http://beverly2heaarts.blogspot.com

http://beverly2hearts.blogspot.com


Starting with a top folding base I chose Grapesicle.  Next I used the quilted background die with white card stock.  Ran that through my Gemini Jr..  Next I used the Celebrate die and cut two white and one from silver mirror card stock.  Once that was done, the layers are attached.  I had some colored wired ribbon in my stash that looked perfect.  I wrapped it around the white background piece and attached on the reverse side.  Next I glued that to the background and applied the sentiment with enough glue to soak through the ribbon.  That pretty light purple peeks through the “quilting”.


For the inside, I chose Pivot Pop Up and again chose that same silver mirror card stock for the Bold Numerals 2020.  A very close color match of ink is brushed around the edges.


The sentiment and signature was inked when I realized I hadn’t taken a photo, so I layed a piece of card stock over for the pic.


Have a great day and keep on crafting!


Affiliate links used at no cost to you.  Not all links are affiliate, I just want to share what I used.  All products were purchase by me unless noted.  I don’t sell anything nor am I employed.  This is my hobby and I hope to inspire you to play :)


Monday, August 17, 2020

Flippin Awesome Birthday Card

Had so much fun playing with new stamps and dies from Honey Bee Stamps!  Started with a slimline base and wanted it to resemble walking on the beach.  Kraft paper was die cut with slimline base and edges were inked.  Next, I stamped the flip flops on turquoise paper and again on white.  I die cut the flops and hand cut the white “straps”, they were then glued on top and crystal stickles were spread on top because this girl needs glitter.  Using my MISTI, I stamped several shells using different colors of ink.  Then they were die cut using the Gemini Jr. and colored pencils added detail.


Time to figure the layout, and once that happened I stamped the sentiment with versa mark ink and heat embossed the sea foam embossing powder.  Then…I got out my “sand” and put glue where I wanted the sand and sprinkled it on and let dry.  All the elements were attached, some with glue and some with pop dots.  Please Note:  I won the Mudd Puddles products as an attendance prize.


Have a great day and keep on crafting!


Affiliate links used at no cost to you.  Not all links are affiliate, I just want to share what I used.  All products were purchase by me unless noted.  I don’t sell anything nor am I employed.  This is my hobby and I hope to inspire you to play :)


Thursday, July 16, 2020

Butterfly Kisses Card

I just adore Birdie Brown images!  This one, from My Favorite Things is called Butterfly Kisses and was so fun and quick to color.  Unfortunately it is sold out. 

I stamped with Tuxedo black ink in my MISTI and colored with Copic markers. A gold pen added earrings, shoe buckle and bracelet while a white gel pen added details. 

Gemini Jr made die cutting the image, stitched rectangles and hexagon stipple plate background a breeze. 

Fun foam raises the rectangle. The sentiment is stamped with sea glass ink. And a stardust pen adds interest to the sentiment strip. Connect glue attaches all the components to the card base 


Have a great day and keep on crafting.

Affiliate links used at no cost to you.  Not all links are affiliate, I just want to share what I used.  All products were purchase by me unless noted.  I don’t sell anything nor am I employed.  This is my hobby and I hope to inspire you to play :)

Saturday, July 11, 2020

Congratulations Slimline Card

Todays card is quick and easy and is part of #thedailymarker30day challenge.  The coloring part is is the second layer.  I didn’t have the right color blue card stock, so I used ink and made it.

Using the Large Slimline die and the Small Slimline with flaps dies, I used my Gemini Jr to cut all three layers, the royal blue and two white panels.  Summer Sky ink is the perfect color, so I used a blender brush to color the edges.  The top panel covers the middle.

Congratulations was die cut with Bold Alphabet from glitter card stock.  It was a glittery afternoon!  I attached the lined up letters with Connect glue and adhered all three layers onto my card base.

This card is for a High School Graduate during this pandemic.  I chose his school colors and I’m sure he will appreciate the inside ($$$) more than the card itself, lol!

Have a great day and keep on crafting.

Affiliate links used at no cost to you.  Not all links are affiliate, I just want to share what I used.  All products were purchase by me unless noted.  I don’t sell anything nor am I employed.  This is my hobby and I hope to inspire you to play :)

Sunday, July 5, 2020

Another Card from Gina K's Card Kit

Hi there everyone, I've got another card, actually cards, (4) but I'm only showing one made with Gina K's card kit.  They are all the same except the others have a different sentiment.

First comes die cutting with Small Slimline with Flaps for the coloring panel.  Gemini Jr makes quick work on that!  

Distress Ink was brushed on in three colors and blended.  Using my heat tool, the ink was quickly dried and then an anti static tool covered the surface.  Black ink was used to stamp the flower silhouette and sentiment then clear embossing powder was melted. 

Dark grey card stock was attached behind the stamped piece and trimmed.  Time for a 7 x 8 1/2 card base to be folded in half.   Fun foam backs the stamped piece and is adhered to coral reef.

Keep on crafting and have a great day!

Affiliate links used at no cost to you.  Not all links are affiliate, I just want to share what I used.  All products were purchase by me unless noted.  I don’t sell anything nor am I employed.  This is my hobby and I hope to inspire you to play :)

Wednesday, July 1, 2020

First day and card for The Daily Marker 30 Day Coloring Challenge


Today’s card is the start of The Daily Marker 30 day Coloring Challenge.  My coloring was direct to paper with faded jeans, picked raspberry, seedless preserves and wilted violet distress oxide ink.  


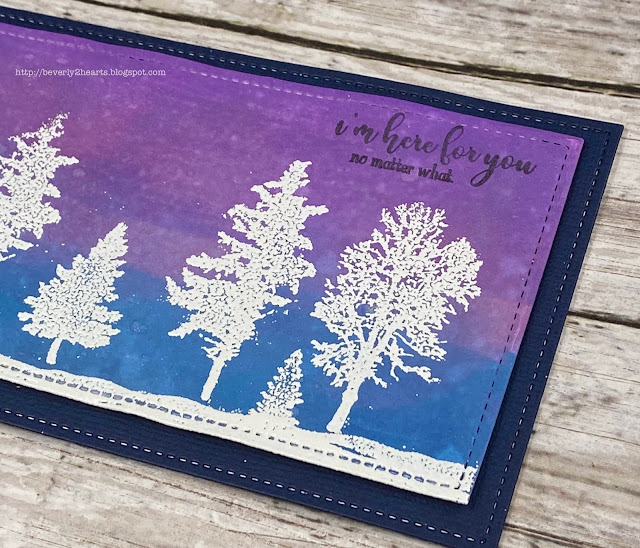
A blender brush help the colors come together.  Next I die cut the inked piece with Small Slimline Lift the Flaps from Lawn Fawn with my Gemini Jr.  MISTI helped with stamping the trees (Natures Silhouette) with VersaMark ink and sprinkle with white embossing powder and heat to melt.  Sheer Simmer Spritz was sprayed for some sparkle, and fun foam was added to the back for dimension.  Bazzil Admiral paper was die cut with the Large Slimline Die and used as the card base.  Finally, the sentiment from We Can Do This from Gina K was stamped with amalgam ink.
Have a great day and keep on crafting!

Affiliate links used at no cost to you.  Not all links are affiliate, I just want to share what I used.  All products were purchase by me unless noted.  I don’t sell anything nor am I employed.  This is my hobby and I hope to inspire you to play :)


Friday, June 26, 2020

My First Gina K Card Kit - Card

First off, Nature's Touch was the first card kit I purchased from Gina K.  The attention to detail when I opened the box was impressive! It came in a priority mail box and had a sticky large bubble wrap (that came off easily) attached to the plastic storage box that holds kit contents.  If you’ve ever received one of these boxes crushed (I have) you’ll appreciate the effort!

Alcohol ink came to mind to use with the Best Flowers stamp set.  I had a few pieces done but needed two with different colors (green for the leaves).   After the yupo paper was dried with my heat tool, time to stamp.  My MISTI makes stamping easier. Since I have never stamped on yupo paper I decided to try amalgam ink.  Die cut with coordinating dies in my Gemini Jr.  Next, the white space was cut with stitched rectangles and the sentiment was again stamped in the MISTI.  Finally this piece is backed with black card stock. 


Time for to assemble the card. My base is Sea Glass (from the kit).  I arranged the the flowers to wrap around the sentiment, using some foam tape for dimension and added Sparkling Crystals.

Have a great day and keep on crafting

Affiliate links used at no cost to you.  Not all links are affiliate, I just want to share what I used.  All products were purchase by me unless noted.  I don’t sell anything nor am I employed.  This is my hobby and I hope to inspire you to play :)

Wednesday, June 24, 2020

60th Birthday Card


Got a card for a Big birthday …at least that’s what he keeps saying.  My love is turning 60 and I made him a special card.  

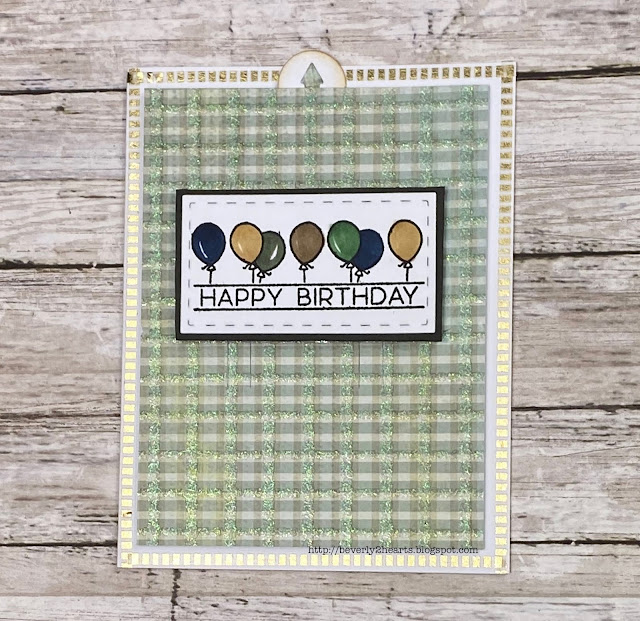
I’m using products from lots of companies today.  Starting with the Quintuple Slider from Simon Says Stamps.  Decided to have the Balloon Numbers from Honeybee Stamps cut in Gold Shine card stock, coming up from behind the sentiment - which is from The Stamping Village, it’s colored with Copic markers G46, BG96, E55, E44 and B99.  It’s cut out with Stitched Rectangles from The Stamps of Life and raised with foam tape.  All of this is on my background which is from Laundry Line Paper Pad by Jen Wilson that I got at Hobby Lobby.  I used my Gemini Jr for all the die cutting.  Once my card was assembled, I added some very thin washi tape (from Hobby Lobby) as a border.


Since I cut a 12x12 sheet of Laundry Line, I went ahead and cut card bases for 3 more cards.  Used the sentiments from same stamp set to quickly make 3 similar cards minus the Quintuple slider.

Have a great day and keep on crafting!

Affiliate links used at no cost to you.  Not all links are affiliate, I just want to share what I used.  All products were purchase by my unless noted.  I don’t sell anything nor am I employed.  This is my hobby and I hope to inspire you to play :)

Thursday, June 18, 2020

Taco Birthday Card


Today I have for you a birthday card using products from many companies.  I get the Small Die of the Month kit from Spellbinders, and May’s set has these adorable stacked deco edges dies.  Unfortunately it has sold out.  

I placed the die near the edge of my base and ran it through my Gemini Jr.  Then I chose a strip of Bees Knees Paper Pad slightly wider than the die and glued it to the back of the die cut.  Using Sea Glass ink and blending brush I inked my card base.  

Next I stamped with Tuxedo Black ink the Year Nine (Taco) stamp twice.  These images were super quick to color with Copics and fussy cut.  Once the placement was decided, I stamped the sentiment, using my MISTI helped.  One of the tacos is raised with foam tape.

Have a great day and keep on crafting!

Affiliate links used at no cost to you.  Not all links are affiliate, I just want to share what I used.  All products were purchase by my unless noted.  I don’t sell anything nor am I employed.  This is my hobby and I hope to inspire you to play :)

Friday, May 29, 2020

Honey Bee House Builder Card

Hello everyone, anyone else getting annoyed with the this staying at home stuff?  Because I’m a two time Heart Transplant Recipient, I’m used to choosing my needs versus wants.  But it just about broke my heart when Golds Gym closed all the St Louis area locations.  I’m a swimmer and their pool was perfect for me.  Open all day and I could go around noon and practically have the pool to myself.  I miss my swim time - calms me and wears be out.  Enough about me…lets talk card making.

When Honey Bee Stamps introduced their Home Building Honey Cuts, I fell in love!  They have since added a Christmas, Halloween, Sweet Shop, Farm House add on, stencils and paper pads.  Oh the possibilities!  I haven’t bought it all, but I’m getting closer - lol.  While I will admit that looking at all those dies, it did seem a bit overwhelming.  But now that I’ve done a few….loving it!!!!  


You need the House Builder Honey Cut for the house base.  For this one I added the Farm House Add on Stamps and honey cuts along with the shutters from the Gingerbread HouseHome Essentials Paper Pad takes care of roof, siding, front door and chimney.  Stencils work if you don’t have the paper pad.  I will tell you that teeny tiny door handle takes some coordination to adhere, thank goodness for reverse tweezers!  This card makes me so happy - I think I giggled the whole time putting it together.


Have a great day and keep on crafting!  It’s keeping me sane now!

Affiliate links used at no cost to you.  Not all links are affiliate, I just want to share what I used.  All products were purchase by my unless noted.  I don’t sell anything nor am I employed.  This is my hobby and I hope to inspire you to play :)

Wednesday, April 29, 2020

How Awesome You Are Card

These are such strange times right now!  And, when you throw in another major life experience, like an child with an undiagnosed illness that requires a hospital stay or purchasing and closing on a new home things are bound to be more complicated!  Both have happened to family members and I'm sure it's happened to others, but isn't heart warming when you see kindness happening!  These are not my stories to tell but just a glimpse into situations that continue to arise all over.

Todays card is one to send love during these times.  

First step was stamping the background with Heart to Heart with Versamark ink and sprinkled clear embossing powder and heat set.  Picked rasberry and spun sugar ink was blended then a shimmer spray was applied.  The sentiment was stamped with charcoal ink and re-stamped with Versarmark and clear embossing powder was heat set for shine.  The piece was then die cut with stitched rectangles.  Next came the bow* made with 7/8 inch organza ribbon and attached.  Foam tape adds dimension to Razzle Berry card stock and finally Valerie ice gems were added with connect glue.

* I learned how to tie these bows from www.amazingpapergrace.com tutorial.  I could not find the same online tutorial but I recommend checking out her site!

Have a great day and keep on crafting!

Affiliate links used at no cost to you.  Not all links are affiliate, I just want to share what I used.  All products were purchase by my unless noted.  I don’t sell anything nor am I employed.  This is my hobby and I hope to inspire you to play :)

Thursday, April 23, 2020

You Sparkle and Shine Card

Today's card was made using Concord & 9th Gem Turnabout Bundle.  Actually, I bought the stamp and then, later, the die and just really love how this card turned out.  Caution though, take care to not use a super juicy ink pad.  Some of the smaller images on the stamp can easily blur with a juicy pad.  
Gem Turnabout Bundle

Four colors of Hero Arts ink were used:  Dusty Blue, Sapphire, Navy and Soft Granite.  All stamped with the Gem Turnabout in my Misti.   Using my Gemini Jr to die cut the Gem Dies and Stitched Rectangle from The Stamps of Life.  Versamark ink stamped the sentiment and silver embossing powder was heat set for a shiny greeting.  A stardust pen adds more sparkle to this card and finally the shiny black back ground paper was from a My Monthly Hero Card Kit.  Foam tape add dimension and Valerie Ice gems were attached with connect glue.

Have a great day and keep on crafting.

Affiliate links used at no cost to you.  Not all links are affiliate, I just want to share what I used.  All products were purchase by my unless noted.  I don’t sell anything nor am I employed.  This is my hobby and I hope to inspire you to play :)
Saturday, April 18, 2020

Miss You Card

Today's card is made with a die set that I've had my eye on for quite a while.  I've been a member of Spellbinders Small Die of the Month club for 6 months, and a perk is getting reduced prices for previous club kits.  The October 2018 Large Die of the Month is  Truckin Through the Seasons with accessories and the sentiment fits on the tailgate.  They have since added additional sentiments and this month's Small Die coordinates with the truck. So guess who finally brought the truck and some accessories....
Spellbinders Kit of the Month

First using Berrylicious card stock from My Favorite Things, I die cut the truck and used scraps for the rest.  My Gemini Jr made quick work of die cutting with one pass, connect glue made attaching all the pieces fast!  

The Hexagon Stipple Plate from Honeybee Stamps and is backed with foam tape leaving room for the bakers twine.  As an after thought, I added a vellum piece for the window.  Miss You is also raised with foam tape.  

Have a great day and keep on crafting!


Affiliate links used at no cost to you.  Not all links are affiliate, I just want to share what I used.  All products were purchase by my unless noted.  I don’t sell anything nor am I employed.  This is my hobby and I hope to inspire you to play :)


Wednesday, April 8, 2020

Hello Friend Art Supplies Card

Todays card is for all the crafters!  I fell in love with this stamp set and decided to buy it on a Wednesday - well, let me tell you, on Wednesday Lara at Ink Road Stamps has a gift with purchase and that's how my order grew....sound familiar?  So take a visit to Ink Road Stamps on Wednesdays to get your shop on!

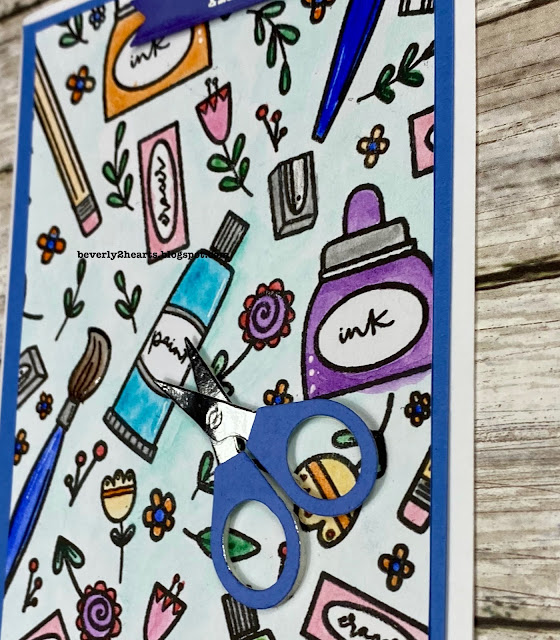
Holly Pixels Art Supplies Background stamp his stamped on Bristol paper and watercolored with Altenews Water Colors.  Details were added with a white gel pen, sparkle pen and glossy accents.  I backed this piece with blue card stock and attached to my card base.  

That's' when I decided it needed more.  Using Concord & 9th craft dies I die cut the scissors and layered them.  The sentiment is from a Hero Arts Monthly Kit and is heat embossed with white embossing powder.  Both the scissors and sentiment is raised with foam tape.  I made two of these and they are going out to two special friends!

Have a great day and keep on crafting!

Affiliate links used at no cost to you.  Not all links are affiliate, I just want to share what I used.  All products were purchase by my unless noted.  I don’t sell anything nor am I employed.  This is my hobby and I hope to inspire you to play :)