Showing posts with label Heat Embossing. Show all posts

Sunday, June 1, 2025

Pattern Play Makes A Great Masculine Card

 When I saw Concord & 9ths Pattern Play, I knew it had possibilities.  I purposely chose different colors than my usual go to and once finished I had a card that could go for several sentiments.  My Son-In-Law had a birthday coming up and I used Honey Bee's Big Bold Birthday Stamps and Honey cuts.

http://beverly2hearts.blogspot.com
I tell you now, if you do a lot of die cutting the Anna Griffin Empress Elite is the way to go.   Splurge on it and you won't be disappointed!  It's the machine I reach for most.

I grabbed several scraps to fill this card front with two metallics and was pleased with my choices.  Got to love Bearly Arts Glue for adhering all these shapes down.  For my sentiment, I stamped with Versafine Onyx Ink in my MISTI and then added clear embossing powder.  After I melted the embossing powder, I ran it through the Empress Elite.  Foam Strips raise the sentiment. 

Affiliate links used at no cost to you.  Not all links are affiliate, I just want to share what I used.  All products were purchase by me unless noted.  I don’t sell anything nor am I employed.  This is my hobby and I hope to inspire you to play :)


Thursday, February 27, 2025

Love you to pieces card

 Valentines Day came and went but here's a card you could use for Heart Day or to let a special someone know how much you love them.  At our house, we celebrate February 14 and yes we got that from Tim the Tool man Taylor aka Tim Allen.  Yes, we are weird!

http://beverly2hearts.blogspot.com


This card started out with a bright pink card base stamped with Versa Mark ink using Heart to Heart Stamp.  White Satin Pearl embossing powder was sprinkled and heated - Love how it looks on that bright back ground!  While I had my Wagner Heat Tool out I put Honey Bee Stamps SWAK stamp in my MISTI and again stamped with Versa Mark ink and this time I used Pink Sparkle embossing powder.  I stamped several and used the coordinating Honey Bee Stamps SWAK die in my Empress Elite.  Next I used Simon Says Stamp Love Stamp and Die for the word die and sentiment strip - Raspberry Bliss ink was used.  To bring the card together, I trimmed the back ground, placed my lips with one Foam Strips and used Bearly Arts Glue to adhere everything down.  Sparkle accents were made with my Stardust Pen.  I wish you could see this card in person, as the sparkle lips really catch the light.

Have a great day and keep on crafting!

Affiliate links used at no cost to you.  Not all links are affiliate, I just want to share what I used.  All products were purchase by me unless noted.  I don’t sell anything nor am I employed.  This is my hobby and I hope to inspire you to play :)


Sunday, February 7, 2021

All About The Heart Cards

 Hoping your staying warm today, it's 7 degrees here, in St Louis. Actually it's Super Bowl Day - I never watched football until after my second heart transplant.  Still in the hospital with nothing to do.  

Hospital tv doesn't have a lot of variety so I starting watching the pre game shows and was thoroughly entertained.  2013 game was played in New Orleans and they featured lots of local information.  It was also the year that the power went out and changed pace of the game for an upset.  Now, I plan to watch the whole day of Super Bowl coverage.  I'll be watching while I spend the day die cutting - hurray for multi-tasking!

Hearts have always been a favorite of mine, even before the heart transplants.  When The Greetery came out with this line of heart dies and stamps I did my happy dance!  The "add to cart" button was hit several times!  Here are two of the cards I made.

Boxwood Heart Detail Die

Boxwood Heart Detail Die


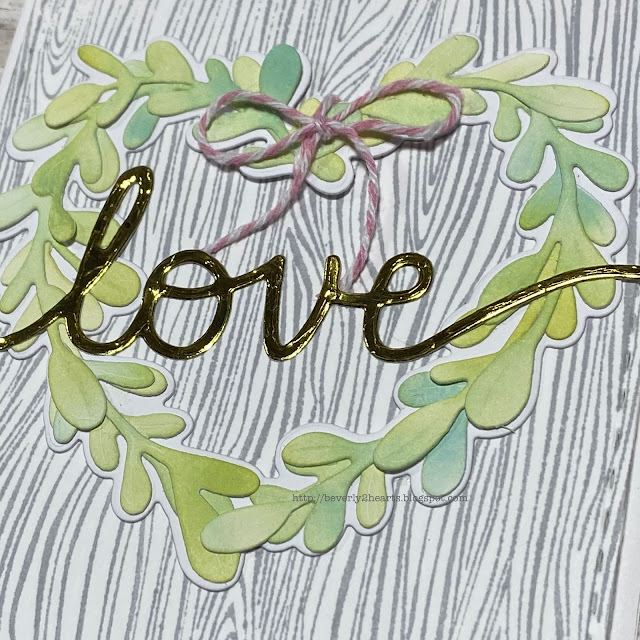
The first card is made using Designer Woodgrain by Hero Arts stamped with Soft Granite Ink,  Then die cut with Stitched Rectangles in my Gemini Jr.  This is added to my card base.  Boxwood Heart Detail Die was run through the Gemini Jr,   I taped the die cut pieces back into the negative place and colored the piece with blender brushes and Twisted Citron, Tumbled Glass and Peeled Paint Oxide Inks.  I also die cut Boxwood Heart Base out of white card stock.  Using the attached directions, I assembled the leaves and attached with Precision Glue.  Using gold foil paper, I die cut the word love from The Stamps of Life and adhered to the heart.  Love is, is stamped with amalgam ink for the sentiment.  Finally, a bow, made with string, is attached.

Love Is Stamp

Love Is Stamp


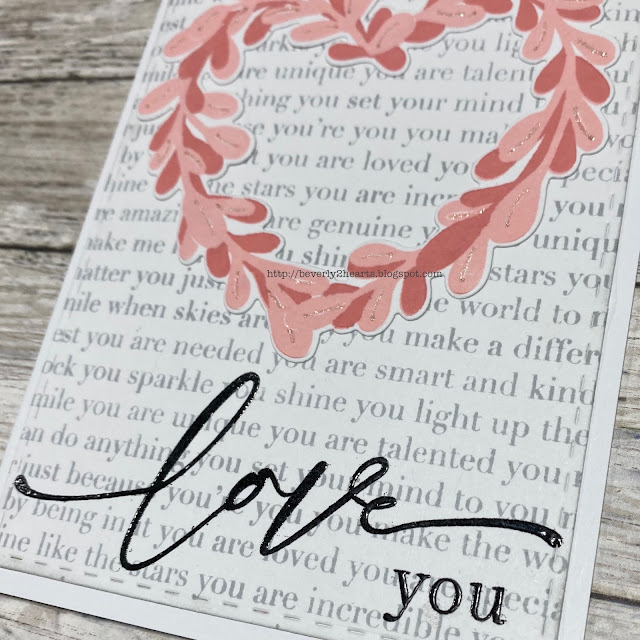
The second card is made similarly but the background stamp is Simon Says Stamp You Are.  Love Is stamp is stamped with Coral Reef and Passion Fruit.  Boxwood Heart Base is used to die cut.  After adhering to base a Stardust pen add sparkle to leaf veins.  Using my MISTI, Amalgam ink and then VersaMark Ink I stamped Love You and heat embossed with clear embossing powder.

Have a great day and keep on crafting!

Affiliate links used at no cost to you.  Not all links are affiliate, I just want to share what I used.  All products were purchase by me unless noted.  I don’t sell anything nor am I employed.  This is my hobby and I hope to inspire you to play :)

Saturday, March 30, 2019

I Run on Coffee and Chaos Card

Hello there, today's card is for all the Boy Moms out there.  A super cute stamp set from The Ink Road Stamps called Boy Mom is new for me and just loved creating this card.  I've said this before, that I like to create when the mood strikes and this time I used a background from one of those occasions.  It's made with direct to paper distress inking, a little blending and finally spritzing the back of a stencil with water, and applying it to my inked paper.  A paper towel soaks up extra water and once it's dry you get a cool background!  I've had the stencil for a long time and I'm sorry I don't have the name for you :(
Boy Mom

Boy Mom
I simply placed my images in my MISTI, stamped with onyx ink, sprinkled with clear embossing powder and heat set.  I went on to mat black card stock before adhering to my card base.  Pretty fast card and when you already have a background done - pretty easy also!

Have a great day and keep on crafting!

Affiliate links used at no cost to you.  Not all links are affiliate, I just want to share what I used.  All products were purchase by my unless noted.  I don’t sell anything nor am I employed.  This is my hobby and I hope to inspire you to play :)

Friday, May 4, 2018

Deco Foil Thankful Card

Hello All, Hope you are having a good day!  Remember those deco foil backgrounds I showed on Instagram?  Today's card makes use of one of those backgrounds called Botanical Dream along with Deco Foil Transfer GelRainbow Deco Foil and my Marigold Laminator.


The sentiment is from Thankful Heart Stamp Set (Simon Says Stamps) and stamped on Neenah Classic Crest 110lb with Versafine Ink then sprinkled with Clear Embossing Powder (Ranger) and heat set with a Marvy Heat Tool.  Using my Big Shot (Sizzix) I ran the sentiment through with Stitched Rectangles Die Set (The Stamps of Life).  Some scotch foam tape raises the sentiment and Crystal Stickles are applied for some sparkle.

Have a great day and keep crafting!

Affiliate links used at no cost to you.  Not all links are affiliate, I just want to share what I used.  All products were purchase by my unless noted.  I don’t sell anything nor am I employed.  This is my hobby and I hope to inspire you to play :)


Thursday, April 20, 2017

Mixing Old & New!

About a million years ago, you know, when I first started paper crafting, I bought my first Stampin Up Stamp Set.  It was a Birthday set that had all the pieces of a cupcake.  Thought I would be using it often, yeah, not so much...  Then there's the butterfly stamp I bought at a stamp store in Branson, MO at least 12 years ago from Holly Berry House.  

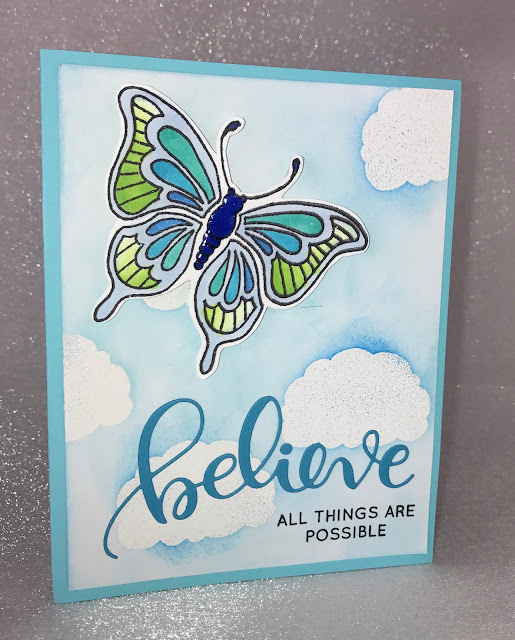
I finally bought the necessary paper to color with Copic markers, and stamped a bunch of images to practice with.  It also helped having just acquired a Stamp and Storage container to hold my Copies.  Just the push I needed to color!  Loved this little butterfly and needed a background.  I pulled out the "frosting" stamp from the Stamping Up Birthday Set and used Versamark and Zing White Embossing Powder to make resist clouds on white yardstick.  Then used two colors of blue ink to color the sky.

Hello 2017 and I'm looking for uses for the Simon Says Stamps Believe Dies and Stamps.  The cloudy sky made a pretty background for the popped up butterfly and Believe sentiment.  A bit of sparkle and shine (Crystal Stickles and Glossy Accents).  Note to self:  get the air bubbles out of stickles before it drys.

Here's two of the cards I made, one with stickles and one with glossy accents.  Enjoy!


Have a great day and keep crafting!

Friday, March 31, 2017

I love using up supplies!

It's fun using up supplies with new products added to my stash!  I recently found some Art Impression Stamps on clearance at Hobby Lobby.  Of course I snatched them up.  This card has an image from the Birthday Wishes set that I colored with Tombow markers on Bristol Smooth paper.  Paper does make all the difference when coloring with different mediums.

So one of the other new items I purchased was Hero Arts Stamp and Cut sets.  JoAnns had all their stamps 50% off a few weeks ago and bought, Happy, Congrats and Thanks.  Obviously the Happy set was used.  The birthday sentiment was heat embossed with Zing White powder on a matching strip.

From my stash, I used Stitched Rectangles from The Stamps of Life to die cut the colored image and backing.  The background papers are from Nana's Nursery, Baby Boy card stack and inked with Raw Sienna Palette Ink.  I buy most of my card stock from Michaels Recollections with a coupon!  


Hope you have a wonderful day and keep on crafting!

Tuesday, November 1, 2016

Hero Arts Kit Card

So I recently found out Hero Arts offers a Monthly Card Kit and was tickled as can be!  Was really bummed out when I missed the September Card kit because it was really nice.  I jumped on board with the October Card kit and here's the card I made.


It is my very first shaker card and I'll admit to watching a few youtube videos to find out the tips and techniques.  I'm thinking a few more videos might help!  When I make this card again, I'll put the snowdrift more forward and put foam tape to keep the sprinkles from falling down into the bottom.  I have loads and loads of the goodies left to make more!
Have a great day and keep on crafting.

Friday, March 16, 2012

Exposed Filigree Acrylic Mini


I scored three of these Exposed Clear Acrylic Albums from an online sale for only $.99 each!  What a bargain, plus I got oodles of odds and ends for cheap!!!!  This mini album features my Daughter Ellie and Grandson Dominic playing in the sprinkler.  First thing I did is spray Tattered Angels The Paint System Sprays on the cover and dry with a heat tool.  Inking all edges with The Angel Company Ink, I cut a scrap strip and used a two inch circle punch for the picture.  Using Staz On I stamped the Technique Tuesday Sentiment and added Making Memories Flutter Trim and a felt star.   The fibers and paper was adhered with a xyron sticker maker covering the entire back so it wouldn't show on the back side.  On the back I placed another circle punch sticker exactly where the previous side pic was.


The second page was done similarly only using a square 2 inch punch for the pictures.  Spellbinders Labels 18 were cut and placed on each side for journaling and a Bazzill Border was placed using the xyron also.  One side has Tattered Angels Glam and the other side has gems along the border.


The final page has Zing Embossing powder on the surface not covered by a photo.  Careful to not overheat the powder or the acrylic will melt and bend.  The Back side has cardstock covering the entire page.  Technique Tuesday sentiment and doodles are stamped.  KI Memories makes the glitter border sticker.  I probably wouldn't have added that if I hadn't goofed and stamped the sentiment upside down....See, that goof made my page prettier, I think!


Finally, I added the ring to bind the pages and covered it with lots of various ribbons.

Tuesday, September 22, 2009


This is a composition notebook that I altered. "Hello Gorgeous" with the first thing my Father In Law would say to me whenever he saw me. The next thing would be "you look beautiful today" Well, that dear sweet man passed away a few weeks ago and I wanted a place to put down those special stories about him.
The lesson for today is:
Paper changes color when you pat it with Versamark ink and then heat emboss with clear embossing powder.
For the title I used the new Ashlyn's Alphabet font from cricut. Then I used the Versamark and clear embossing powder. Heated the letter and then immediately put it back into the powder, tapped off excess and reheat. Three layers of powder to get shiny raised letters.

Here you can see the original color of the letters, it matches the pale blue dots in the background. I did ink the edges of the letters before I did the embossing.
The combination of the Versamark ink (clear) and embossing powder just about turned the blue paper translucent.
I wanted letters that had a little more pop and staying power than just plain paper letters. To
adhere the letters, I used the Xyron sticker maker to get full coverage adhesive on the back.
Got to love this spatula that cricut makes! It really helps getting small bits off the sticky mat without ruining them.
Since the paper color changed I used a Micron pen to outline them.
The swirly is from the Home Decor Cricut Cartridge.
As always, I hope you can benefit from my mistakes to NOT make them yourselves. Have a great day