Showing posts with label Die Cuts. Show all posts

Friday, January 15, 2021

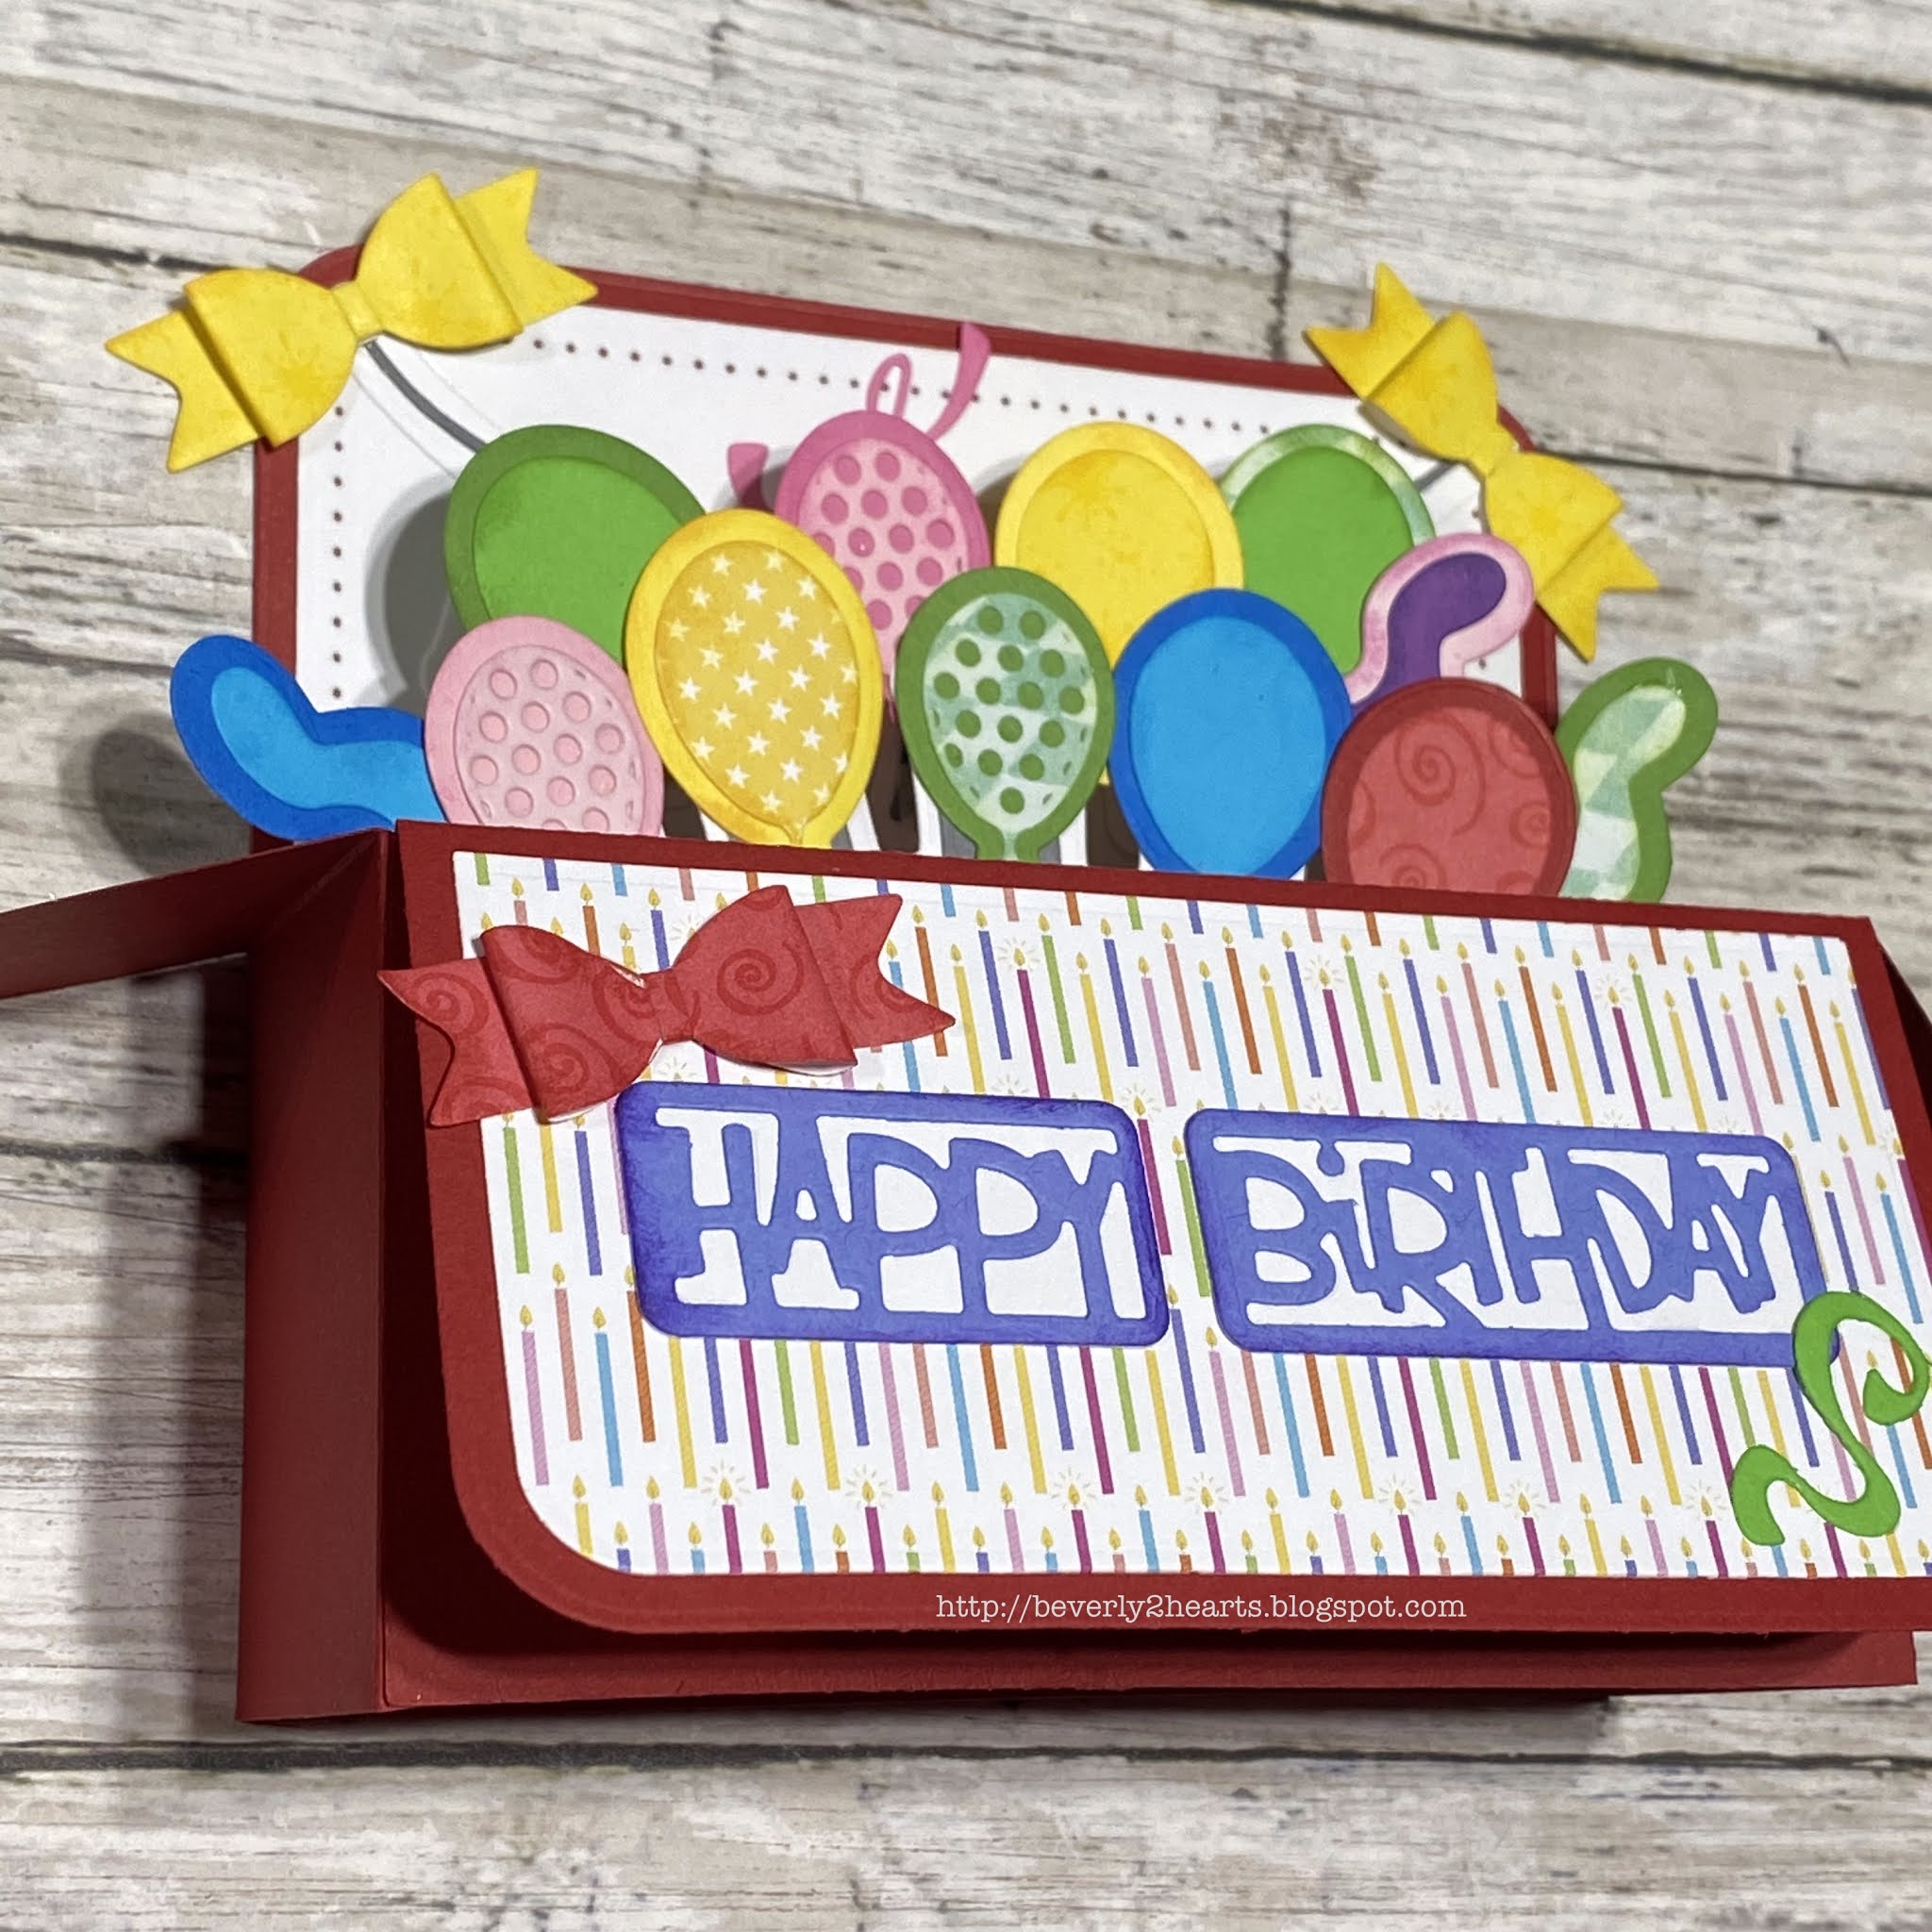
Birthday Box Card

 I hope you all had a good holiday!  I know it was a bit strange but at our house we made lemonade with this big pile of lemons.

My best friend gave me a bag full of The Stamps of Life goodies and today's card uses one of those - Thanks Becky!

So this is a bigger box card - 5x7 but it all went through my regular size Gemini Jr just fine.  Included with this set was a booklet with instructions and examples and I pretty much scrap lifted from that.  

5x7 Box Card Set

5x7 box card set

5x7 box card set

5x7 box card set


The card went together quickly but there was lots of die cutting.  To combat this, I cut scraps to fit the smaller dies and filled the die cut plate to make fewer passes, purple tape helped corral all those bits.  I did use a few 6x6 paper pad scraps.  Then I added ink around the edges to define each color.  

Often, I will make two cards at once as I did today.  The difference is the sentiment and bows.  The framed rounded sentiment came with the die set,  while the stacked die, I already owned.  Just changing things up a bit.

Have a great day and keep on crafting!

Affiliate links used at no cost to you.  Not all links are affiliate, I just want to share what I used.  All products were purchase by me unless noted.  I don’t sell anything nor am I employed.  This is my hobby and I hope to inspire you to play :)


Thursday, February 28, 2019

Fast & Pretty Die Only Card

Hello there,  You know, if you seen any of my blogs, that I can't make a card with out using a die cut machine.  There's just something about die cuts that makes me happy.  Even more, is my growing collection of dies:)  
I apologize for the card angle in this photo, but isn't it a pretty card?  Came together really fast and probably the most time spent was glueing the stacked layers together.  My base is card stock from Michaels.  The Gemini Jr made these go even faster!  The hearts are called Caprice and just grabbed three colors of pink and trimmed pieces small enough to go behind each die.  That way I could cut three layers with one pass through the machine.  Gina K connect glue was used to attach the hearts together.  Then using the quilted background die and white card stock I die cut, then trimmed both sides so more pink would show.  A little foam tape to attach the hearts and done.  Pink and white combo's are one of my favorites!  No sentiment on this one, I think you could use it for many occasions and if need be, one could be added simply.

Have a great day and keep crafting!

Affiliate links used at no cost to you.  Not all links are affiliate, I just want to share what I used.  All products were purchase by my unless noted.  I don’t sell anything nor am I employed.  This is my hobby and I hope to inspire you to play :)

Thursday, April 20, 2017

Mixing Old & New!

About a million years ago, you know, when I first started paper crafting, I bought my first Stampin Up Stamp Set.  It was a Birthday set that had all the pieces of a cupcake.  Thought I would be using it often, yeah, not so much...  Then there's the butterfly stamp I bought at a stamp store in Branson, MO at least 12 years ago from Holly Berry House.  

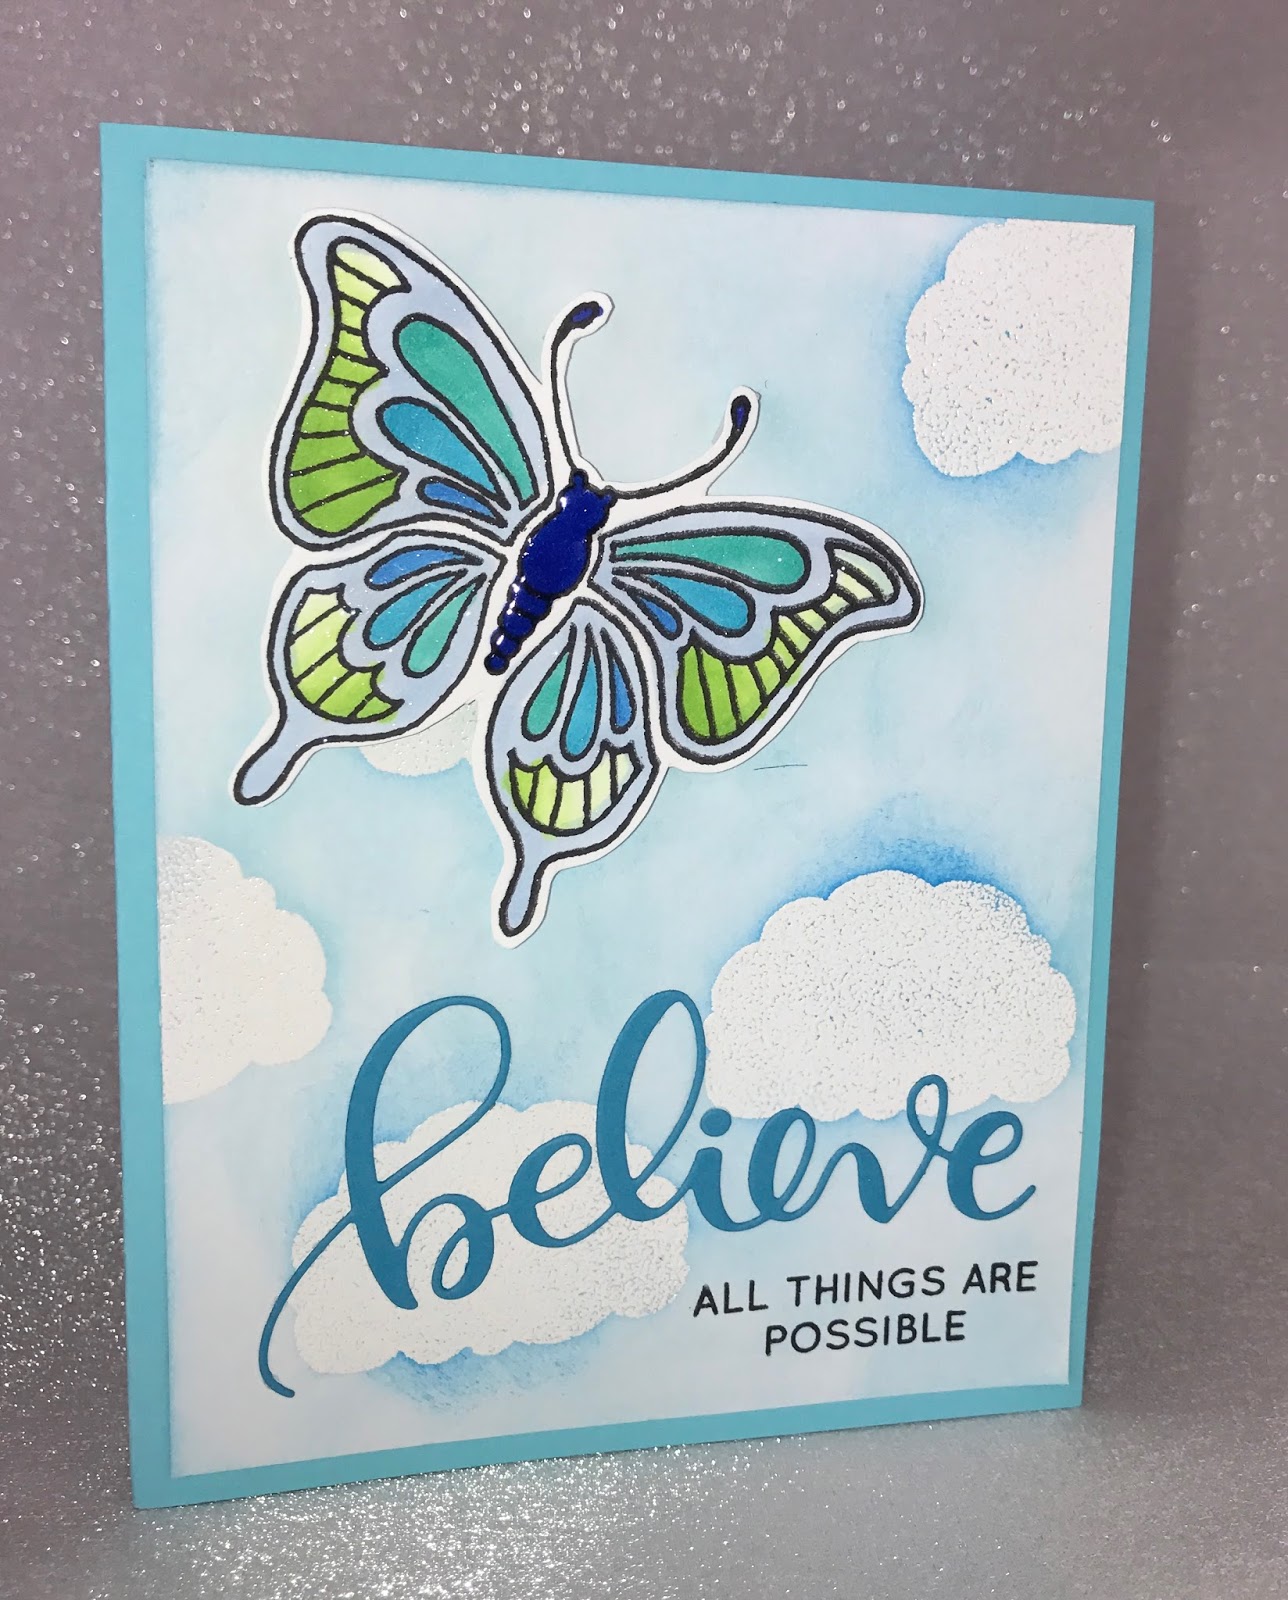
I finally bought the necessary paper to color with Copic markers, and stamped a bunch of images to practice with.  It also helped having just acquired a Stamp and Storage container to hold my Copies.  Just the push I needed to color!  Loved this little butterfly and needed a background.  I pulled out the "frosting" stamp from the Stamping Up Birthday Set and used Versamark and Zing White Embossing Powder to make resist clouds on white yardstick.  Then used two colors of blue ink to color the sky.

Hello 2017 and I'm looking for uses for the Simon Says Stamps Believe Dies and Stamps.  The cloudy sky made a pretty background for the popped up butterfly and Believe sentiment.  A bit of sparkle and shine (Crystal Stickles and Glossy Accents).  Note to self:  get the air bubbles out of stickles before it drys.

Here's two of the cards I made, one with stickles and one with glossy accents.  Enjoy!


Have a great day and keep crafting!

Wednesday, August 31, 2016

Congrats Cards

Here I am again using The Stamps of Life products.  Seems that's all I'm reaching for these days.  Anyways...I made two cards and embellished basically the same except... one I used ink to "chalk" inside the die to highlight the sentiment, and the other I used a micron pen and doodled inside the sentiment.  You be the judge, which one do you like better?


The papers were all scraps, mostly Recollection Cardstock from Michaels, scraps of ribbon and the Congrats Die from The Stamps of Life.


Hope you have a great day and keep on crafting!

Monday, August 15, 2016

You're the Apple of my eye

I'm a member of The Stamps of Life Die Hard Club which means every month I receive The Stamp and Die of the Month set before the public can buy it.  I really love this month's set apple2stamp.  Most months there are coordinating stamps to add patterns and additional sentiments.  Big Plus if you join one of the three available clubs you get an additional 15% off other products! AND if that's not enough to make you want to join, one the first of the month they release a new item and have a FLASH Sale for 40% off for 24 hours only - plus club members get the 15% off that also! 


Ok, enough about club stuff, todays card came together super fast using apple2stamp, dies and scraps!  It seems that most cards I make these days have stitched rectangles on them.  Kraft paper is the base and the rectangle is inked with Amaretto Powder Puff from Quick Quotes.  The white sentiment is not going anywhere because I used Sizzix Adhesive Sheets before die cutting.  A bit of The Ribbon Boutique sheer black dotted ribbon from Michaels and we're done.


Have a great day and keep crafting!

Saturday, August 6, 2016

You're so Sweet

I just love those tiny hearts and the tiny sentiment of this card!  The stamped images are from The Stamps of Life hearts2love.  All of the dies are from The Stamps of Life also, Birdcage Club Die Set,  that teeny pink flower is from Sizzix Flowers and Fence Dies and Stamps and finally Stitched Rectangles.  A bit of ribbon and a black rivet finish this card.


Have a great day and keep on crafting!

Thursday, July 21, 2016

Congrats/Flower Card

I wanted to make a simple card using lots of stamping and this is what I ended up with.  My base for this card is one I seem to be using quite a bit these days - Sizzix Circle Flip-its in red cardstock. Most of my card making cardstock is purchased at Michaels in one of their Recollections packs.


The two different sized flowers from The Stamps of Life thanks2you set along with the sentiment on the back of the circle were all stamped in Tim Holtz Festive Berries.  The Congrats Circle Die really stands out of this card.  This particular die doesn't come with an outer circle so I just cut a slightly smaller 3" circle before cutting with my Sizzix Big Shot.  A bit of sheer ribbon and a black rivet completes the card.  Oh and don't forget the doodling.


Have a great day and keep on crafting!


Monday, July 18, 2016

Box Birthday Card for my Bestie!

So for the first time, I believe, I had my best friends birthday card made up ahead of time!  Go me!  Did lots of stamping on this one. and tried out a new die as well.  I bought the Tim Holtz Celebration Words Thinlits Dies for both her and myself.  I had been on the lookout for these babies for a while but couldn't find them in the store.  Let's face it, purchasing items with a coupon is best, second best online.  Scrapbook.com had them.


The base of this card was made using The Stamps of Life Box Card Die and all the flowers were made with flowerpower2fill stamp set and Flower Power Dies.  It really go together fast with the stamps and matching dies.  My ink choices are from The Stamps of Life:  Guava, Tangerine, Sea Glass and Palette:  French Lilac, Raw Sienna and Cote D'Azure.  I really like a bold sentiment and the happy birthday was a tiny bit bigger than the card base, so I cut 2 of them, one with Sizzix Adhesive Sheet on the back.  When I placed it on the base I used the extra sentiment to cover the sticky on the back.  The tiny ladybug came from Gift Card Flip-its Set from The Stamps of Life.


I also find that when using this box card die, you really need to use a strong adhesive. 


Have a great day and keep on crafting!!

Friday, April 22, 2016

Using My New Stamps of Life Stamps and Dies

Still using my newly purchased stamps and dies from CKC and having a blast!


This card uses several sets, including bicycle2stamp, bicycle club die set, Sizzix Thinking of You 3D Drop Ins, Sizzix 3D Drop In Scallop, Stitched Rectangles and finally Mini Flower Dies.  Now, I already owned the 3D Scallop and Thinking of You Drop Ins.  Really love the Mini Flower Dies because there are just soooooo many and I do love using up scraps with tiny dies to have ready to go!


Here's the card,


You can't tell from the picture, but the white and lavender layers are raised with pop dots, including the sentiment.  The twine I used is pretty thick and this was the best way to keep it contained on the card.  Inside the card had a row of those Mini Flower Dies with a bit of Stickles in the center.  The bicycle has Glossy Accents on the frame and finally the flowers stamped on lavender was using Pixie Ink from The Stamps of Life