Showing posts with label Cards. Show all posts

Tuesday, May 3, 2016

Trying Out More New Goodies from CKC - Art Impressions

Playing with Art Impressions Water color Stamps are a lot of fun.  The best part is there is loads of video's on You Tube showing just how easy it is!   The skinny on doing these super easy watercolors is using waterbased markers to color the stamp and beautifying it with a damp paint brush.  They recommend Marvy Markers but I have a rather large collection of Tombow Markers so I used those.  This is one of the stamp sets  I used along with this flower set and this foliage set.  Now I'm not going to tell you that this start up was cheap, but I definitely think it was worth the $$.  Watch the videos, scroll down on each product page.  You can also follow them on You Tube, and they have loads of samples on Pinterest.


I've been using The Stamps of Life Stitched Rectangle Dies on most of my cards these days.  Looooove them!


The inside was made using this 3D Drop In with Scallop and this 3D Drop In Thinking of You.  Doodling around the scallop with my Gelly Roll sparkle pen.


Hope you have a great day!

Friday, February 19, 2016

The Simple Things Card


I really love the sentiment on this card, it's from Our Daily Bread Designs, Little Things,Item D298.  They are rubber stamps and as long as I use a ruled block, I have no problem getting them aligned.

Papers are from Hobby Lobby's The Paper Studio, Tattered and Worn pad.  I love their pads, especially when they are half off!  The dies used are Spellbinders Labels 5 and Fleur De Lis Accents.  Bling is from Want to Scrap,  Ribbon is American Crafts and the flower, button and floss was from my stash.

Have a great day!

Wednesday, February 17, 2016

Made my first Exploding Box Card


I have thought these cards are just adorable, I've seen so many on pintrest and the possibilities are unlimited.  But I'm not one to sit and measure and fold etc.  That's why I was super excited when The Stamps of Life came out with their Box Card Die Set.  Just run that sucker through my Big Shot on the extended platform and walaaa!  All the side panels are included and a whole host of flowers, leaves and such. 


Now, I like to mix and match and I have quite the collection of dies.  While I was recovering from surgery I took several of those dies and used up scraps with Sizzix Adhesive Sheets on the back and cut oodles of tiny bits.  So this card has dies from Happy Birthday Step Ups, Mail Box Dies and stamps happymail2stamp.  All from The Stamps of Life.  Stephanie Bernard had lots of videos showing how to use her products.


I did use the Kuretake Gansi Tambi 36 Set Watercolors to color the mailbox and Tombow Brush Markers to color the bird.


Here's the other view.


Friday, February 12, 2016

Bubblicious Birthday


One of my bad habits is to procrastinate. I did that today...We have a birthday party tomorrow and I bought the gift today and made the card tonite.  I do have a stash of birthday cards all ready to go, but none for a special little guy who just turned one.

Silhouette to the rescue.  Whipped this one out pretty fast.  Just used a file I already purchased.  Sized it to all fit on an A2 card and cut.  All the small pieces were scraps (yay)!  Used some pop dots to raise the silver bubble.  My 23 year old asked what that was.  Guess she doesn't remember the magic bubbles she used to love.  Since I used a lot of letters for the sentiment, I chose to use the reverse cut and just glue in the bits for the a, o and such. 

I'm excited for the party tomorrow and enjoy some family time.  It's gonna be COLD one so everyone stay warm!  Enjoy your weekend.

Thursday, February 11, 2016

I Love You More Than Cupcakes


Got to love Silhouette!  If you don't have one, you really need to think about getting one.  This image was from the Silhouette Store.  It was super easy to download and cut.  More of my cards these days have doodling on them.  The Cupcakes are actually die cuts from The Stamps Of Life Happy Birthday Step Ups


My stash of saved scraps were starting to take over my craft area.  So I started with my pile of scraps and my pile of dies and started using some of them up.  Once I have a bunch together, I sit, glue, doodle all while sitting in front of the tv.  Then when I need an embellishment, I have a stash.


Hope  you have a great day!

Friday, October 30, 2015

Momma's Birthday Card

Hi there, it has been a while.  But I'm Back and hope to continue more postings.  I've been dabbling in a few other mediums and will share some of that later.  I always make my Mom a one of a kind card and don't repeat it for anyone else.  Here's what I came up with this year.

Been loving Stephanie Bernard's Stamps of Life Dies lately.  Cards go together fast and I have rather large collection of dies from many sources so mixing and matching is fun!  This card uses dies from Sizzix, Memory Box and Spellbinders.  I know, there is a lot of little pieces here.  I like to sit with a lot of scraps and cut out bunches so when I need them I have a little pile to choose from.  From Memory Box I used Amira Flourish, from Sizzix, 3-D Scallop with Gifts Drop-ins, Greetings Scalloped Edge Drop-ins and from Spellbinders, Spiral Blossom One, and the leaves are also Spellbinders.

The sentiment is from the Silhouette Store and cut using my Cameo.  The pearls are bulk bling from Want2Scrap.

Have a great day!

Tuesday, May 15, 2012

Sympathy Card


I found a tutorial on Youtube  for this card here.  Loved it so much I used it for a sympathy card.  A family friend passed away and I wanted to make something special for them.  Basicgreys Green at  Heart Line was used along with Spellbinders Labels 18 and Marthas border punch.

Saturday, May 12, 2012

Kendalls Card


My sweet Niece Kendall just turned 15 so I wanted to make her a special card.  Using Basicgreys Wisteria line, I die cut all the parts using Sizzix Lilac Build A Flower Die.  Spraying Tattered Angels Mist on the leaves and on the background was a way to add sparkle.  I did use a chandelier mask for the background.  Copic markers and micron pens were used to accent the leaves and of course I added a little more bling with the gems and sparkly thread (that I snagged at Michaels - in the yarn section).  The leaves are raised with pop dots and were curled a bit to add dimension.  Finally a sentiment stamped using a $1 stamp from Michaels.

Friday, April 27, 2012

Justrite Stamps Thank you Card

After receiving my new Justrite Stamps in the mail, I had to give them a try!  I made this Thank You Card  with someone very dear in mind.  These angels in our life have been through the ups and downs in life with us.  We recently had some down stuff and as usual, they were there cheering us on and sending prayers and praises up to heaven.

This card was made with Basicgrey Wisteria Collection along with Spellbinders and those Kindness Justrite Stamps.  The corsage pin was made with goodies I already had.


Saturday, April 7, 2012

Can you say BLING - CARD

B
Pinterest is one of my favorite places to browse.  I saw a card just like this one but it had buttons under the monogram and if you read my last post I warned you that my cards would have more "Bling" on them :)   I used my cricut for the B and of course the negative spots as well as the entire front has pop dots under it.  Hope you like this one, as it was a blast putting it together.  


Have a wonderful Easter!

Friday, April 6, 2012

Moroccan Accents - Card

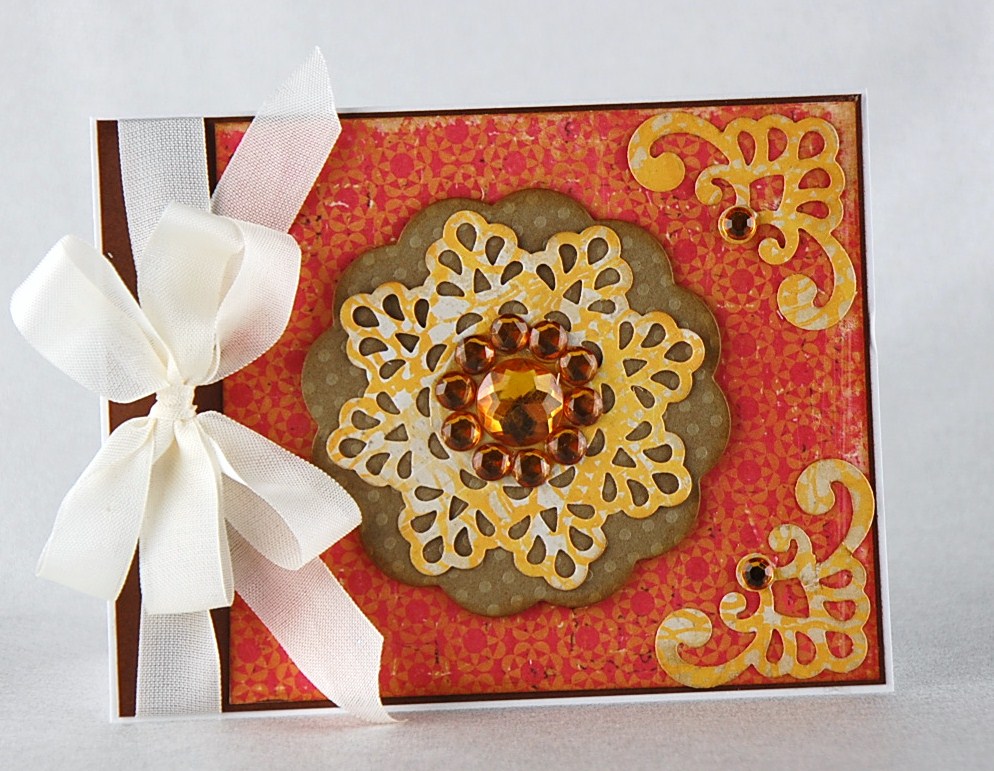
So my Daughter gave me a Thank You Gift, a Michaels Gift Card, recently, which I promptly marched myself into the Spellbinders Aisle and snagged Spellbinders Moroccan Accents dies.  This card was made after I scrapbooked two pages using  Crate Paper Restorations line so the scraps were handy to use.  At my last trip to Hobby Lobby I got a huge plastic container filled with bits of bling with a 40% off Coupon.  You can count on seeing more bling on my cards and layouts.  Bazzill Dotted Swiss, another favorite of mine, gets used quite a bit.  Just love the added texture.  To learn how to tie the perfect bow, just wander over to www.amazingpapergrace.com and click on tutorials.  Becca Feeken  does a wonderful job with her Peg Bow Tutorials, actually, all of her tutorials are Fabulous!

Friday, March 16, 2012

Fleur De Lis Card

This Fleur De Lis Stamp is from Stampendous.  The background paper is from Teresa Collins and the dies are Spellbinders Fleur de Lis Rectangles and Fleur de Lis Doily Accents that are raised with pop dots.  I didn't have a black button so I just got my sharpie marker out and colored a blue one black then tied a bow with Scrap Floss and used Red Line Adhesive to attach both the dotted bow and button.

Pinterest Inspired Card


I don't know about you, but Pinterest has been taking up lots of my time these days.   Here is the original posting that shows how to use a square punch to make banners.  For this card I stamped the Heidi Grace sentiment on ribbon and made a bow using a tutorial at www.amazingpapergrace.com. (Made by the lovely Becca Feeken), then used the pinterest post about making banners to use on some of my scraps.   A little bling, a little inking, a little doodling and ta daaaa, a card.

Basket of Cards

This is my basket for the Trivia Night.  It had 30 different handmade cards.  I'm fortunate enough to often make more of one card at a time so I didn't have to make each card just for this basket.  That being said, I did make 10 cards just for this.  Our Trivia Night was a success and we raised over $14,000 for our Team to go to the Tranplant Games of America this July.

Sunday, February 12, 2012

Yes, still making cards!

My daughter is hooked on Fleur Di Lis right now and that's why I bought this stamp.  I thought it looked pretty cool too.  Got this stamp at Hobby Lobby and I paid full price for it.....no coupon...FOR SHAME!
This stamp is from The Angel Company.  I stamped in brown and used the copics.  Had this really pretty shimmery pink scraps that I paid a fortune for a while back.  

Another card using the same stamp, only in blue.  The sentiment is actually a sticker as are the stars all from a page kit that I've used before.

The Trivia Night is Saturday so I'm going to put all these cards, plus more in a basket for the Silent Auction.

Have a great day.

Saturday, February 11, 2012

Still Making Cards

These papers are from Teresa Collins, the drink stamp cost me a buck at Michaels.  After I colored it in with Copics, I put Crystal Glaze on the glass parts.  The sentiment was outlined and then cut with my cricut.  


Yes, still working on cards for my Silent Auction Basket.


Not really excited about this one, I used two colors of ink to stamp and colored in with copics.  It's got a versamark stamped background and a touch of stickles in the center.

I've had this border stamp for years and this is the first time I've used it.  When it's completely closed the scallop edge rests against a solid red stripe.  Simple card.

Thursday, December 8, 2011

Trim really does make it different

 Same base, same paper, same ink, same diecuts and same sentiment.  These two cards are the same except the trim.  One is for a lady celebrating her 90th Birthday and the other for a gentleman celebrating his 74th Birthday (hi Dad)!


Papers are from My Mind's Eye, Twinkle, Twinkle, little Boy, Spellbinders Dies Fancy Tags 3 and Labels Twenty One, Ribbon and glitter from Michaels and trim from a fabric store.

Sunday, November 27, 2011

Yes, I recycled my hubbys shirt for this years Christmas Cards

Being the thrifty scrapper that I am means recycling is a GOOD thing!  My hubby had on a shirt, a green plaid, and griped that he had a hole in the elbow.  He was ready to rip it off and toss it when I said "wait, throw that in the washer".  You should have seen the look I got.  


After that puppy was washed, I ripped it into thin strips and those green plaid strips are across this years Christmas Card.  I guess I'm gonna have to scrap that story....lol


My daily wander over to Amazing Paper Grace gave me the inspiration for this year.  It always takes me a bit to find a stamp I like, and paper that yells "me me", but once I saw this beauty I made my decision right away.  Becca's creations are always so lovely but I need to make 65 of these so I had to adjust my scraplift accordingly.


Here's my version
 The stamps are from Waltzingmouse Stamps and are available here.  Spellbinders 2011 Heirloom Ornament Die and Lacey Squares Dies were used.  The papers are all bazzill, with the exception of the kraft paper.  I like the way the linen texture looks with the heat embossing on it.  The gold swirls are Aleenes Paper Glaze with Recollections Gold Glitter and I just free handed the swirls.  My ornament is hanging with a paper clip that I cut and bent.

Sunday, May 23, 2010

Layered Card

My Mom was given a huge bag of lace from another family member who knows my Mom sews.  Mom makes awesome doll clothes for all her grandkids and being the wonderful Mom that she is, she passed on the bag and said to pick some out! 

Soooooo I made some flowers by gathering one edge with a running stitch and then pulling tight.  A knot secures the flower.

In this layered card, I used some Hero Arts Stamps, a 1 1/4 circle punch, 2 sizes of the scalloped circle nestabilites, of course my favorite ink (colorbox chalk ink), cuttlebug embossing folders and stickles.  The little string bow was attached with diamond glaze.


Wednesday, May 5, 2010

More Lyrical Letters


I'm really loving cards with Kraft Paper and was able to whip these two out so quickly!

The Spellbinders Nestabilities Label 8 dies are perfect for cards. I cut two and then doodled around the edge.

I used the Lyrical Letters for both sentiments. Love that both were a 1 button option. By pressing the shift key I was able to get the flower/stem/leaf cut in another color. (I used Copic markers to color the stem and leaf.) A gem and a bit of Baby Blue Stickles finished off the flower. A little stamping and I'm done!


Again, I used the Lyrical letters cart for the leaves and Orange Peal Stickles for the knot in the bow.

Love those one touch cuts!!!