Hello there, today's cards are all about happy mail! Who doesn't like getting mail (happy mail, not bills)? Mail background and love mail dies are apart of all three of these cards, after all, I just got these in the MAIL! lol
The first card was stamped, sprinkled with embossing powder and heat set. Tumbled glass ink was blended around the edges with lighter touch in the center. The love die was cut with black and then outline in a silver vellum. The sentiment was stamped and heat embossed also. Those cute little envelopes were die cut out of very heavy card stock, almost too heavy. Bending those on the score line to fold took too much effort! The rest of those cuties are cut with regular card stock (much easier). Those tiny little hearts on the envelopes were colored with watercolor markers. The background was die cut with stitched rectangles and placed on fun foam to add dimension.


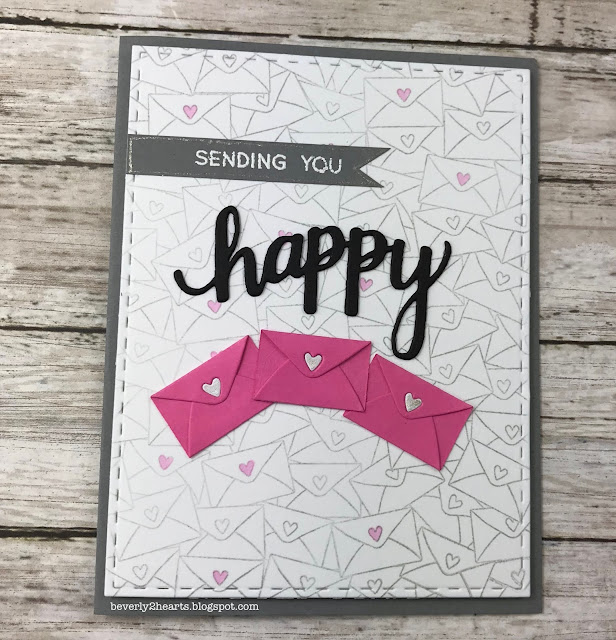
Next card is sending you happy mail, Using both the background stamp (in cloud ink) and love mail dies were used. The sentiment is stamped and heat embossed just like card above. The happy die was cut and glued three times for dimension. I colored some of the background hearts with Copic RV52. A touch of stardust pen on the envelope hearts add shimmer. The rest of the card was assembled just like the above card.

The last card was done slightly different. The background was stamped with cloud ink and then a few envelopes were colored with three different colors of alcohol ink. Then, using a micron fine tip pen, I outlined them. This one has no sentiment, that's for the inside, so this card can be used for more than one occasion. Using the same dies, this time I also cut hearts and inked them with bubblegum ink. The folded envelopes (cut with regular card stock - easier to fold) are raised with foam tape for dimension. The rest of the card was assembled like the above two cards, only without fun foam.
Have a great day and keep on crafting!
Affiliate links used at no cost to you. Not all links are affiliate, I just want to share what I used. All products were purchase by my unless noted. I don’t sell anything nor am I employed. This is my hobby and I hope to inspire you to play :)
Todays Easter card uses Cottontail Cuties Stamp Set from Neat and Tangled. First it's stamped with Tuxedo Black Ink on Neenah Classic Crest 110lb card stock. It's colored with Copic Markers and this was my first go at "halo" coloring. One of my table mates at the Daily Marker Road Trip demonstrated it. Finally, the sentiment is stamped in VersaMark Ink and heat embossed with Pink Prisma Embossing Powder (Hero Arts Kit).
The Die'sire Edge'ables Parisian was found at Hobby Lobby -ON CLEARANCE (score!)- and is a little bit smaller than 5 1/2 " tall. I trimmed my paper after I ran both sides through my Big Shot (Sizzix). Wax paper between the paper and die sure does make a difference when cutting detailed dies - paper just pops right out. To finish my card I trimmed my colored image and inked edges with Summer Sky Ink (Memento). Then I created a band of Vellum and card stock. The Easter egg is stamped in the same blue ink and colored with Copic Marker.
Hope you have a wonderful Easter, cherish the ones you love and give thanks to the Lord.
Affiliate links are used at no cost to you. Not all links are affiliate, I just want to share where I found them. All products were purchased by me. I don't sell anything and I'm not employed, this is my hobby and hope you are inspired to play :)


