Showing posts with label Momenta. Show all posts

Thursday, April 21, 2022

Card with Stitched Flowers

 So I jumped on the stitched card band wagon.  Let me back track, I've sewn most of my life but this is the first time I've stitched on paper before.  I bought just one of Spellbinders stitching die and really enjoyed the mindless stitching.  The Stitched Flowers was small and was fast to stitch, plus you have so many options.    When you keep your hands busy it's easier to avoid snacking - BONUS!  lol

I had a pile of flowers and leaves and here is two cards I made.

http://beverly2hearts.blogspot.com

http://beverly2hearts.blogspot.com

http://beverly2hearts.blogspot.com

http://beverly2hearts.blogspot.com
The first card started with a card base and Ocean Waves Stamp and Misty Coast ink.  Next I die cut three Wood Frame Infinity dies and glued them together.  After I found a pleasing arrangement I attached them with glue.  A Momenta celebrate die was cut with metallic silver paper and again with white and attached them together.  Some flat sequins from my stash added a sparkle.

The second card used the center cut outs from the wood frame on the first.  I glued them together.  Next a scalloped border from Blueprint 27 in Simon Says Stamps Fog card stock was die cut.  All the elements were attached along with the same flat sequins.  Both of these cards went together pretty fast since the focal elements were ready to go.

Have a great day and keep on crafting!

Affiliate links used at no cost to you.  Not all links are affiliate, I just want to share what I used.  All products were purchase by me unless noted.  I don’t sell anything nor am I employed.  This is my hobby and I hope to inspire you to play :)

Monday, September 9, 2019

Mr & Mrs Shower Card

We have a wedding coming up!  My daughter Katie is marrying the love of her life and I wanted to make a special card for her bridal shower.  Here it is:

I started with the Mr & Mrs Die from Momenta.  I bought this on clearance at Hobby Lobby and unfortunately is not available at the sites I shop at.  Using my Gemini Jr I die cut three times with white card stock and one with a smooth glitter card stock.  The glitter card stock came with a My Monthly Hero Kit (www.heroarts.com).  I stacked and glued the die cuts adding the glitter on top.

Then, using a gray wood grain specialty paper (also from My Monthly Hero Kit) I die cut my background using Stitched Rectangles.  This was attached to fun foam (for dimension) and glued to my card base.  Mr & Mrs was then adhered and Crystal Gems were added.

I was really pleased with the how the card turned out.  Excuse the wet glue under the gems.

The shower was perfect!  It was at a restaurant and was beautifully decorated by a cousin!  Here is a picture of my three daughters and youngest grandson.
Have a great day and keep on crafting!

Affiliate links used at no cost to you.  Not all links are affiliate, I just want to share what I used.  All products were purchase by my unless noted.  I don’t sell anything nor am I employed.  This is my hobby and I hope to inspire you to play :)

Thursday, March 21, 2019

I Won! Here's the Card I Made

Hello there,  I've got a picture I want to share with you.

This wonderful set of crafty goodness arrived by mail from @cards.by.becca on Instagram.  She had a giveaway to celebrate her 2000 followers.  Check out that decorated envelope and zoom in on that fabulous card she made!  Truly packed with love!  I won (clapping and jumping) and here is the card I made:

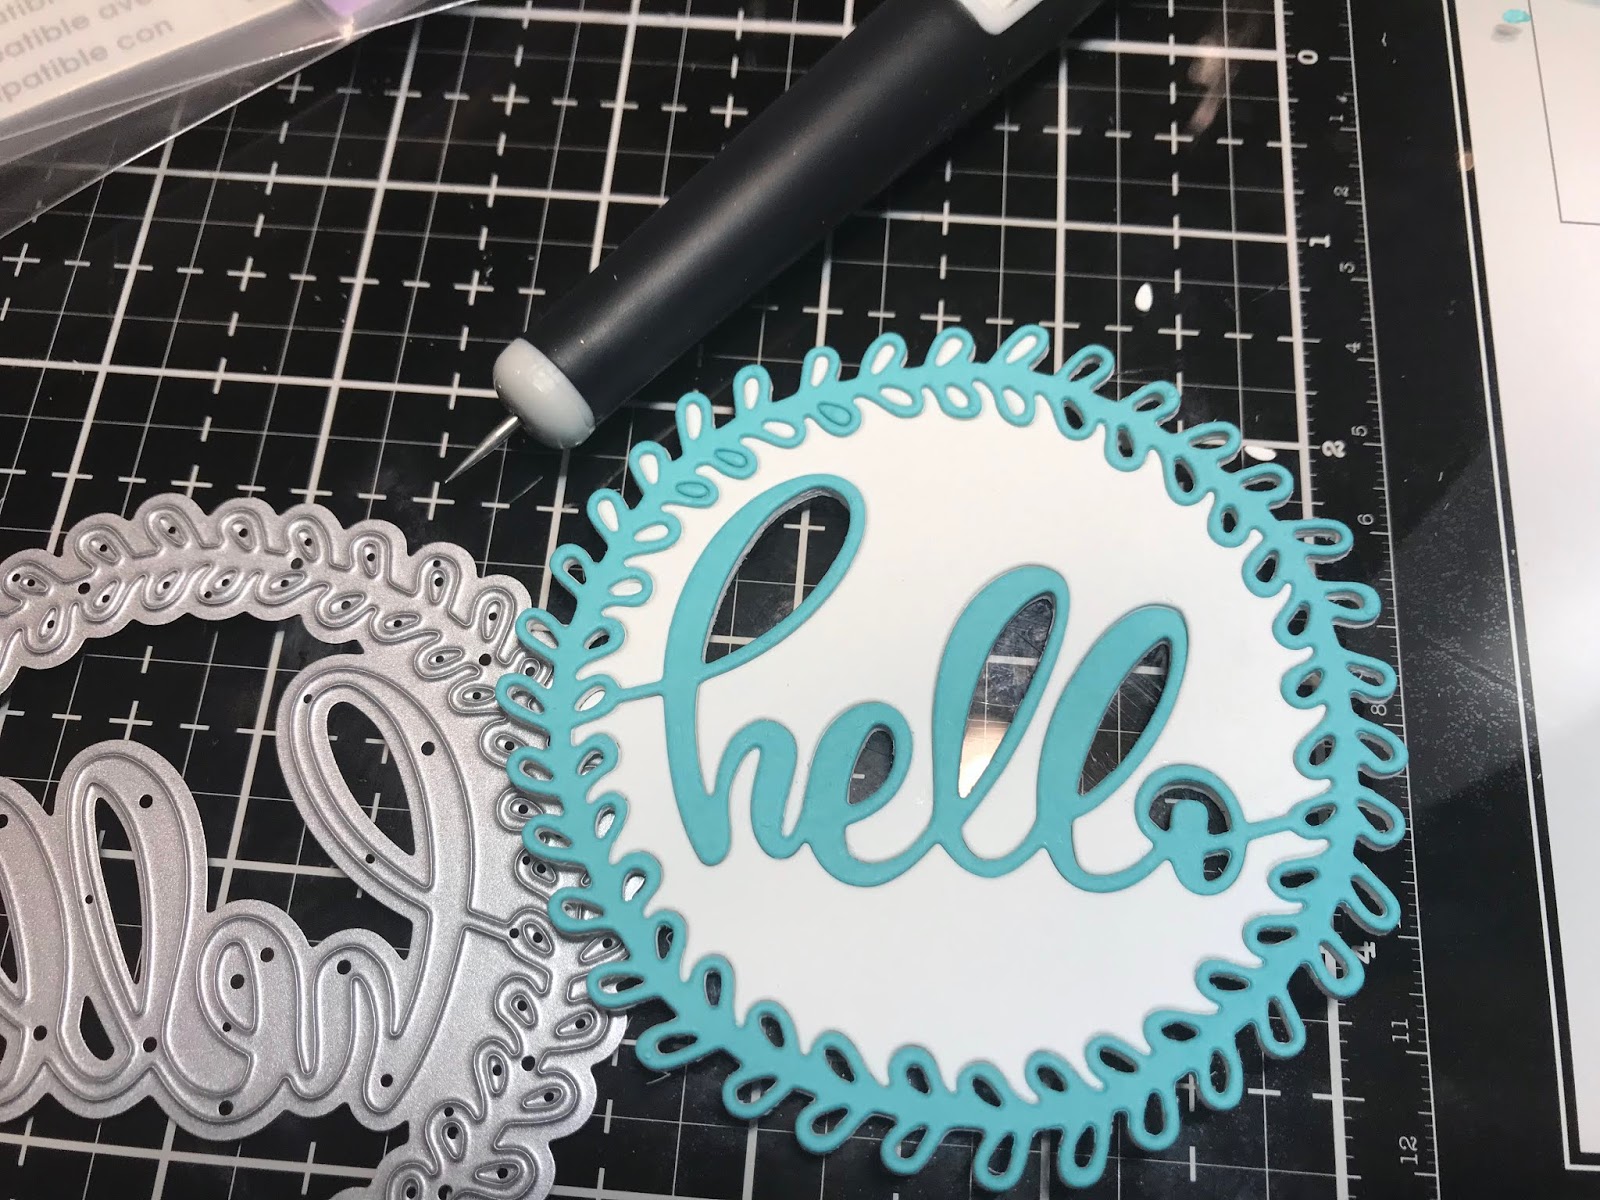
Momenta Hello Cutting Template
I had so much fun playing with these new goodies and look forward to playing with all of them.  

The background stamp is from Neat and Tangled called Mail Background and is stamped on card stock, sprinkled with white embossing powder and heat set.  Next Peacock Feathers Oxide Ink is used to blend around the edges fading to a white center.  Using my Gemini Jr, I die cut 3 white and one paradise using the hello cutting template.  They are stacked and glued together.

HINT:  Since this is a pretty delicate die, I stacked and glued before I punched all the tiny bits out.  There were so many bits and having them more stabilized made poking them out easier.

The die cut element was then glued to my background piece and a shimmer pen was used on the word only for some sparkle.

If you have chance, check out @cards.by.becca on instagram!  Thanks again Becca!

Have a great day and keep on crafting!

Affiliate links used at no cost to you.  Not all links are affiliate, I just want to share what I used.  All products were purchase by my unless noted.  I don’t sell anything nor am I employed.  This is my hobby and I hope to inspire you to play :)