Tuesday, May 21, 2019

Dad Nap Card

How many of you have a man in your house who falls asleep while watching tv?  Does this card look familiar...I know it is in my house.  That's why I bought this stamp set - it made me giggle when I saw it.  I'm all about the happy moments!

This card with the Lazy Boy stamp, stamped with onyx ink on watercolor paper.  Altenew watercolor paints were used to color and after it was dry, glossy accents were added to the chip bag and remote.  Stitched rectangles with the gemini jr die cut the image and a pen knife cut the black matting piece, this was backed with fun foam for dimension.  Shoppe on the Square by Paper Studio is the patterned paper I used.  Some gems, inking and pen work finishes this card.
http://beverly2hearts.blogspot.com

This card was made the same way, only the pattern paper is Garment District by Paper Studio.


Have a great day and keep on crafting.

Affiliate links used at no cost to you.  Not all links are affiliate, I just want to share what I used.  All products were purchase by my unless noted.  I don’t sell anything nor am I employed.  This is my hobby and I hope to inspire you to play :)

Wednesday, May 15, 2019

Crafty Cards - May My Monthly Hero Kit

Have I told you how much I love Hero Arts?  Especially their My Monthly Hero Kit?  This month is my absolute favorite, all crafty goodness images and dies along with other goodies!  Plus there were soooo many add ons for this kit...my wish list certainly got longer - if only my budget were bigger!  Oh the trials of crafters and their money woes....lol.

At the recent Creative Keepsakes Convention I purchased some Pearl Alcohol Inks and played with them.  I grabbed the large fancy die and backed it with a small piece.  Next, some shiny silver card stock to die cut knitting needles in my Gemini Jr.   Finally, a VersaMark stamped sentiment from the kit - heat embossed with silver embossing powder.  Fun Foam backs the panel and a glitter pen adds details.
May My Monthly Hero Arts Kit

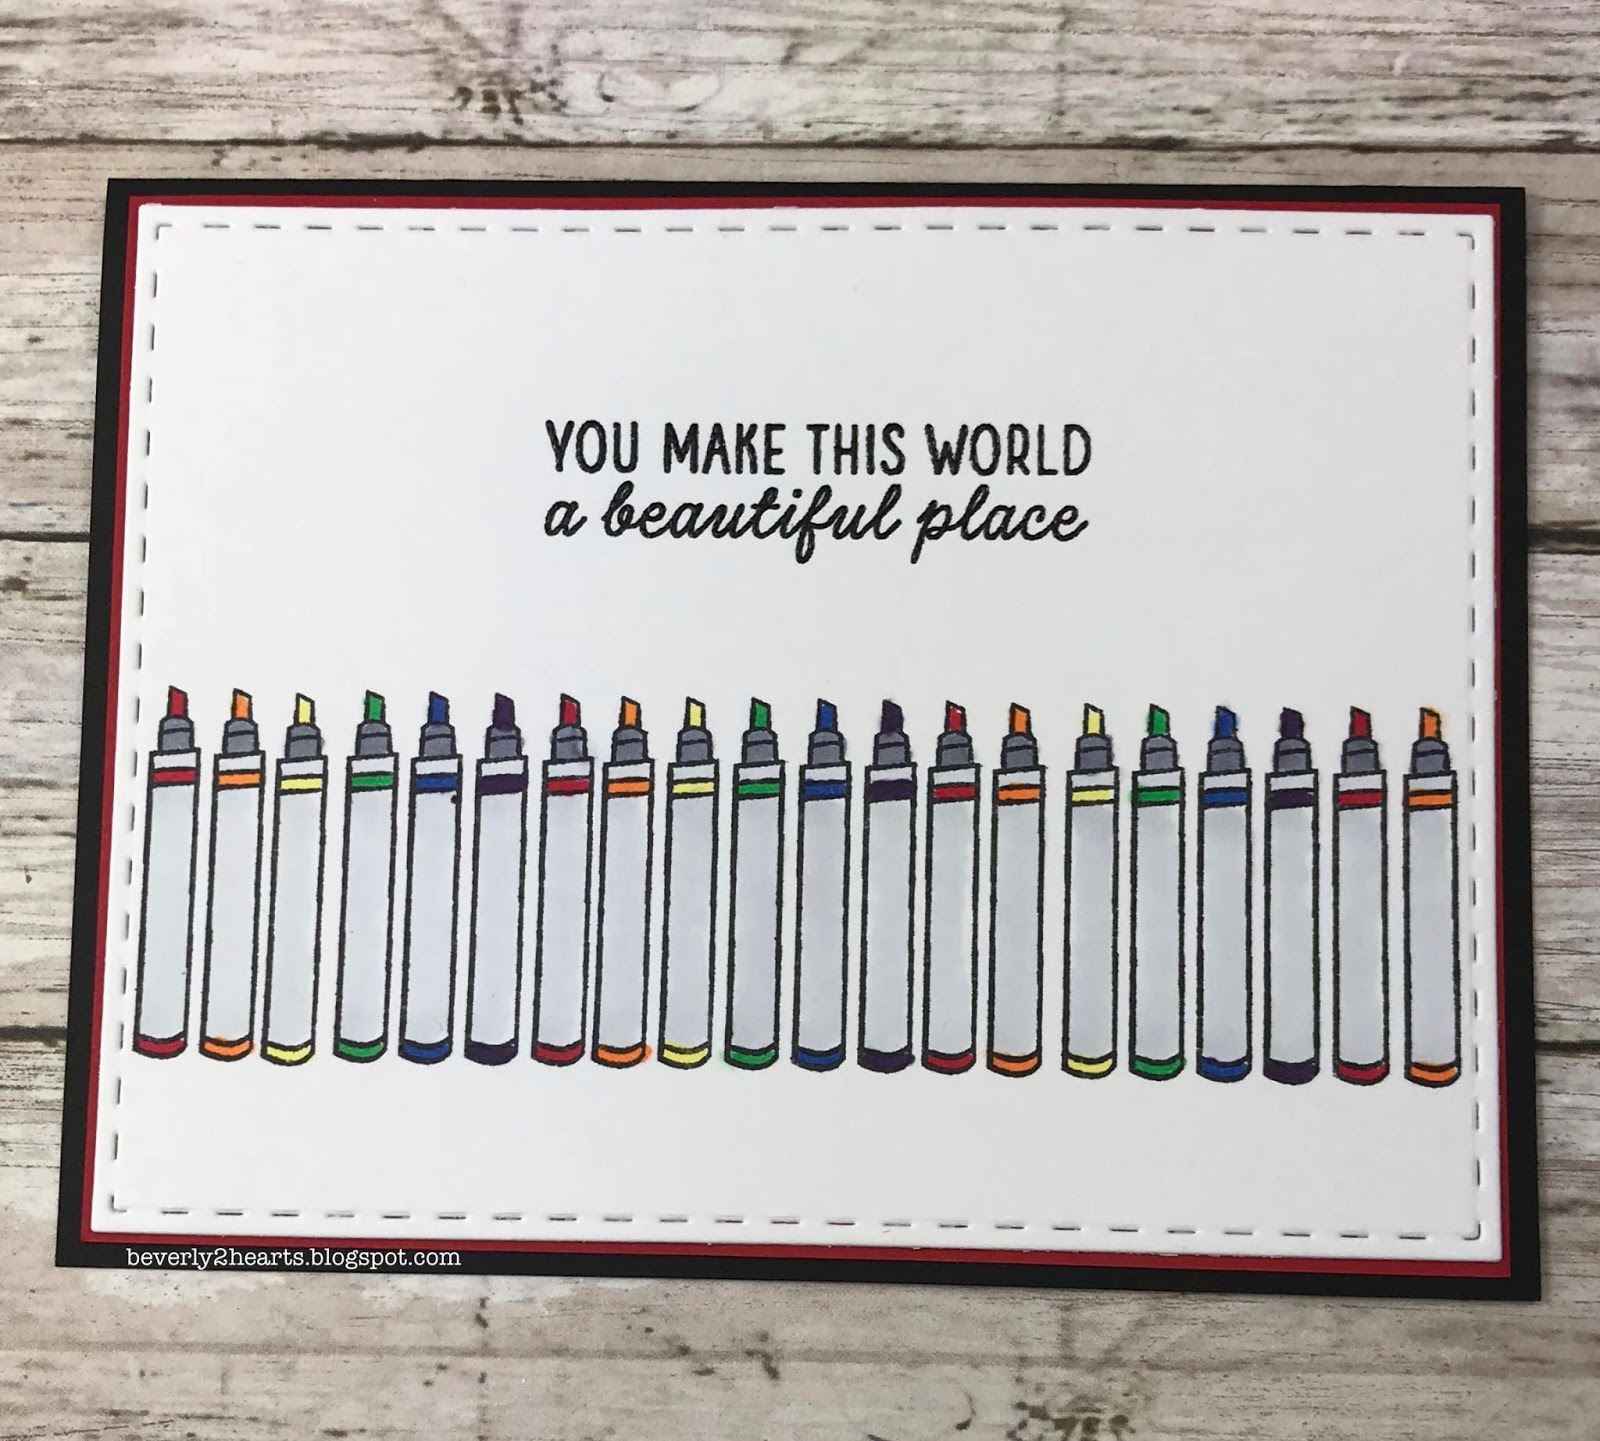
The next card is all about those markers.  Using my Misti, I stamped the marker repeatedly in a row using Tuxedo Black ink.  The sentiment is stamped with VersaFine Ink and heat embossed with clear embossing powder.  Using Copic markers, I colored them in rainbow order.  Stitched Rectangle die trims the piece and it's backed with red card stock and then mounted on my black card base.  A white piece is placed inside to sign.

I had a blast whipping out these two cards and can't wait to get back to the kit to play some more!

Have a great day and keep on crafting!

Affiliate links used at no cost to you.  Not all links are affiliate, I just want to share what I used.  All products were purchase by my unless noted.  I don’t sell anything nor am I employed.  This is my hobby and I hope to inspire you to play :)

Saturday, May 4, 2019

Cards made with Giveaway Goodies

On Instagram I enter quite a few Giveaways.  If I like what the creator posts, I am happy to follow them and share with like minded buddies.  Much to my surprise, I won a Giveaway and it had an item that I've had on my wish list.  Actually, I've put it I'm my cart many times, only to remove it because I couldn't justify another watercolor set on my budget.  Loraleeferguson offered this fabulous giveaway and I won!  Lora makes beautiful cards, click on the link above and check her out!  Here's a picture of what I won.  Check out her homemade card!


With this great giveaway, I made four cards and had a blast playing with the Altenew Water Color Set.  It's small and oh so fun to use!  The Floral Spring Stamp and Die Bundle was used with Onyx ink on Tim Holtz Water color paper.  After the image was painted and dried, I used stitched rectangles to die cut with my Gemini Jr.  Finally, I used that same ink and sprinkled clear embossing powder and heat set the sentiment.  Fun Foam is added to the back for dimension before adhering to my top folding card base.  Some of the cards have different ribbons and sequin embellishments.
Floral Sprig

Floral Sprig

Floral Sprig

Floral Sprig

Have a great day and keep on crafting!

Affiliate links used at no cost to you.  Not all links are affiliate, I just want to share what I used.  All products were purchase by my unless noted.  I don’t sell anything nor am I employed.  This is my hobby and I hope to inspire you to play :)

Saturday, March 30, 2019

I Run on Coffee and Chaos Card

Hello there, today's card is for all the Boy Moms out there.  A super cute stamp set from The Ink Road Stamps called Boy Mom is new for me and just loved creating this card.  I've said this before, that I like to create when the mood strikes and this time I used a background from one of those occasions.  It's made with direct to paper distress inking, a little blending and finally spritzing the back of a stencil with water, and applying it to my inked paper.  A paper towel soaks up extra water and once it's dry you get a cool background!  I've had the stencil for a long time and I'm sorry I don't have the name for you :(
Boy Mom

Boy Mom
I simply placed my images in my MISTI, stamped with onyx ink, sprinkled with clear embossing powder and heat set.  I went on to mat black card stock before adhering to my card base.  Pretty fast card and when you already have a background done - pretty easy also!

Have a great day and keep on crafting!

Affiliate links used at no cost to you.  Not all links are affiliate, I just want to share what I used.  All products were purchase by my unless noted.  I don’t sell anything nor am I employed.  This is my hobby and I hope to inspire you to play :)

Monday, March 25, 2019

Pretty Fly for a Little Guy Card

Hello there, today's card is all about my newest Grandson, Benjamin!  He'll be 3 weeks old tomorrow and we are all totally smitten.  No pictures of Ben, my daughter is taking the safe route and keeping photos off social media (smart move).  Ben was the reason I bought Spork, a stamp set that has awesome sayings.  If you like to quote shows or movies, The Ink Road Stamps are for you.  My cart had several items before I checked out!

Here's the card:


I started with the baby image and stamped all over with soft sky ink.  Then with baby blue pigment ink I stamped the sentiment, sprinkled with clear embossing powder and heat set.  Next, I got out my stitched rectangle and stitched squares dies with my gemini jr.  Fun foam was added to the baby image piece and attached to the base.  Ribbon (celebration from Michaels) was added with a button and floss on top. (A reverse tweezer held it all in place while the glue dried).  The blue card stock was from a random piece from my stash and the sentiment with backing also got some fun foam behind it.  And there you have it - pretty quick card.

Have a great day and keep on crafting!

Affiliate links used at no cost to you.  Not all links are affiliate, I just want to share what I used.  All products were purchase by my unless noted.  I don’t sell anything nor am I employed.  This is my hobby and I hope to inspire you to play :)

Thursday, March 21, 2019

I Won! Here's the Card I Made

Hello there,  I've got a picture I want to share with you.

This wonderful set of crafty goodness arrived by mail from @cards.by.becca on Instagram.  She had a giveaway to celebrate her 2000 followers.  Check out that decorated envelope and zoom in on that fabulous card she made!  Truly packed with love!  I won (clapping and jumping) and here is the card I made:

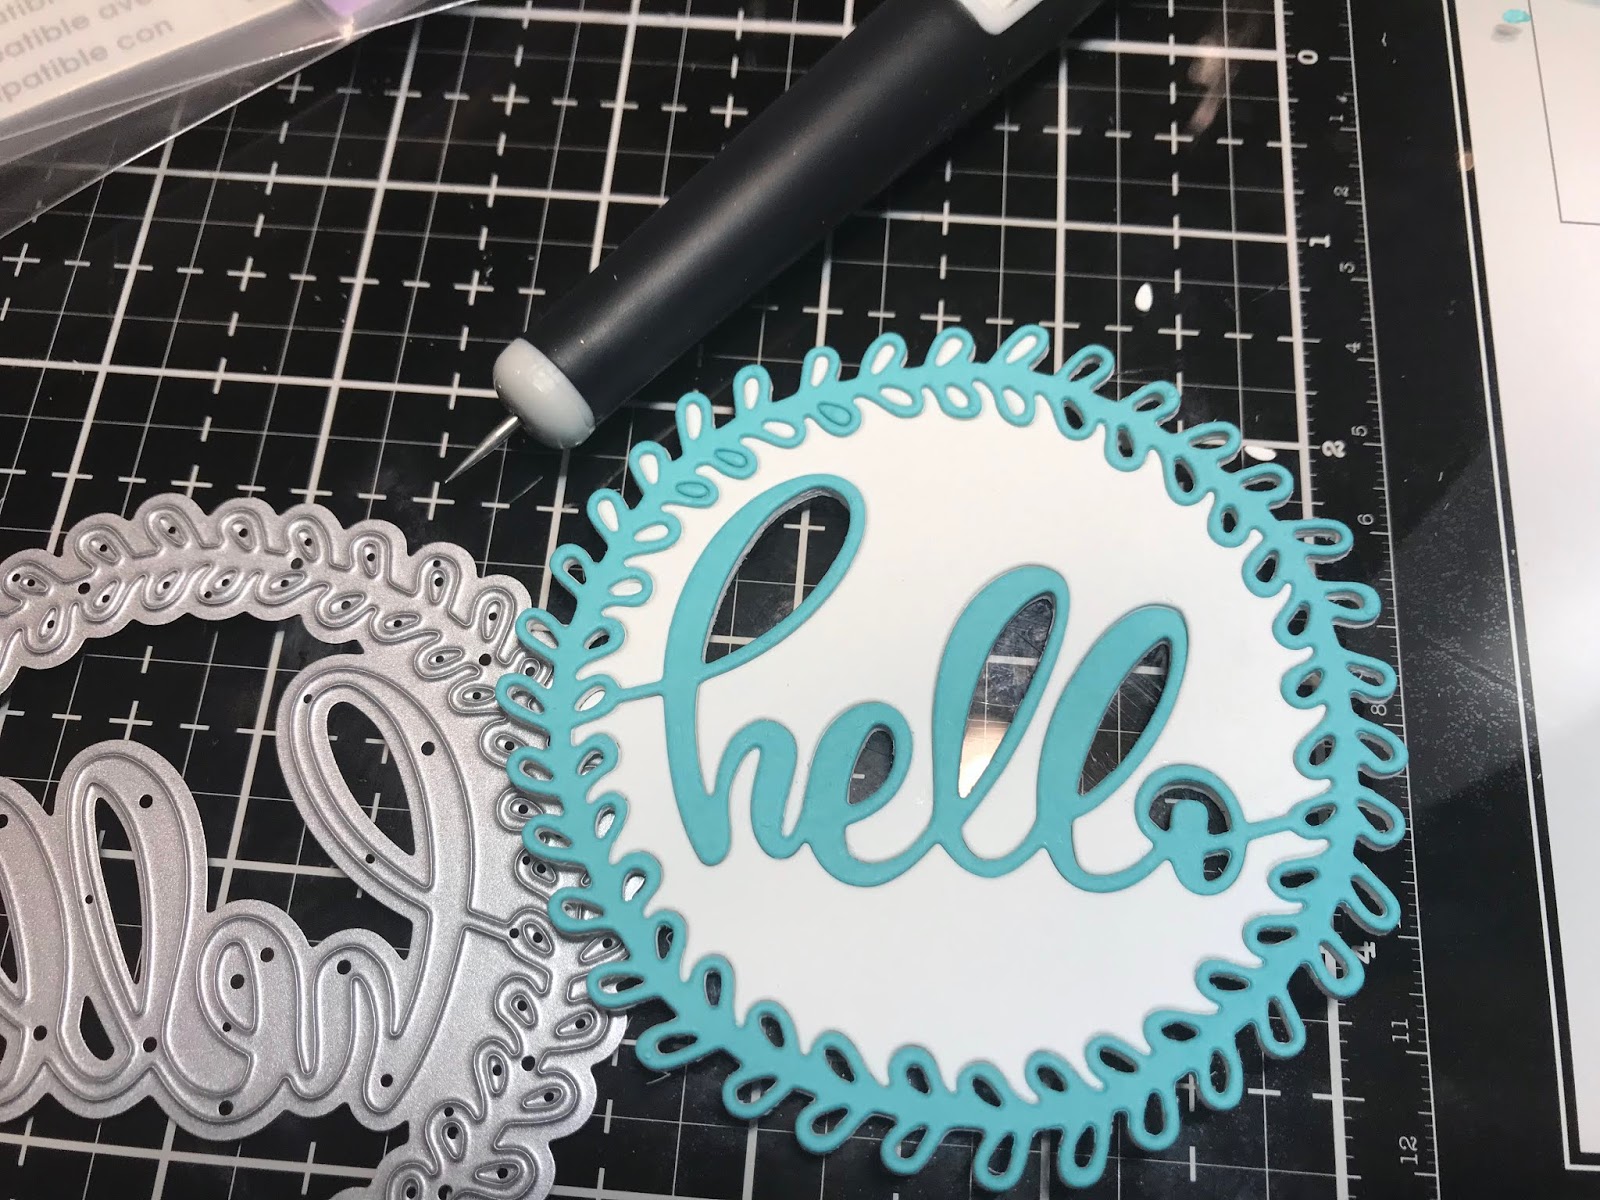
Momenta Hello Cutting Template
I had so much fun playing with these new goodies and look forward to playing with all of them.  

The background stamp is from Neat and Tangled called Mail Background and is stamped on card stock, sprinkled with white embossing powder and heat set.  Next Peacock Feathers Oxide Ink is used to blend around the edges fading to a white center.  Using my Gemini Jr, I die cut 3 white and one paradise using the hello cutting template.  They are stacked and glued together.

HINT:  Since this is a pretty delicate die, I stacked and glued before I punched all the tiny bits out.  There were so many bits and having them more stabilized made poking them out easier.

The die cut element was then glued to my background piece and a shimmer pen was used on the word only for some sparkle.

If you have chance, check out @cards.by.becca on instagram!  Thanks again Becca!

Have a great day and keep on crafting!

Affiliate links used at no cost to you.  Not all links are affiliate, I just want to share what I used.  All products were purchase by my unless noted.  I don’t sell anything nor am I employed.  This is my hobby and I hope to inspire you to play :)

Monday, March 18, 2019

Piece of Cake Birthday Card

Hello there, I'm using some new products on today's card.  I knew the moment I saw it, that I had to have the Piece of Cake stamp set from Honey Bee Stamps.  Let me tell you, the two stamps I ordered came super fast and was packed with love!  The other new element I used was an embossing folder that came with my gemini jr.  Normally, I stick with my big shot for embossing folders but the included folder worked just fine.  I do like the raised area along with the textured background.  

I started by stamping with memento ink on 80 lb Neenah card stock, knowing that I would be using my Silhouette to cut these images out.  Of course, I used the MISTI so for repeated stamping, then it was time to color with Copics.  This is usually my standard practice, stamp a lot, spend time coloring and then cut them all out - so when I'm ready to make a card, it goes pretty quick.   So to pull my card together, the embossed background was trimmed, fun foam attached behind, then I positioned my cake on the pedestal, added the other elements and glued them down.  The sentiment is stamped, sprinkled with embossing powderheat embossed and die cut with coordinating die.  All of this is attached to some new card stock from Hero Arts that has been inked and glued to my card base.
beverly2hearts.blotspot.com
Have a great day and keep on crafting!

Affiliate links used at no cost to you.  Not all links are affiliate, I just want to share what I used.  All products were purchase by my unless noted.  I don’t sell anything nor am I employed.  This is my hobby and I hope to inspire you to play :)