I do love it when I get crafty goodies in the mail! One way to guarantee it is to sign up for a monthly kit. Hero Arts does not disappoint! Love January's kit! Not only does it have a boat load of dies that I'll be using frequently it also came with simple perfect sentiments and a sentiment strip die.
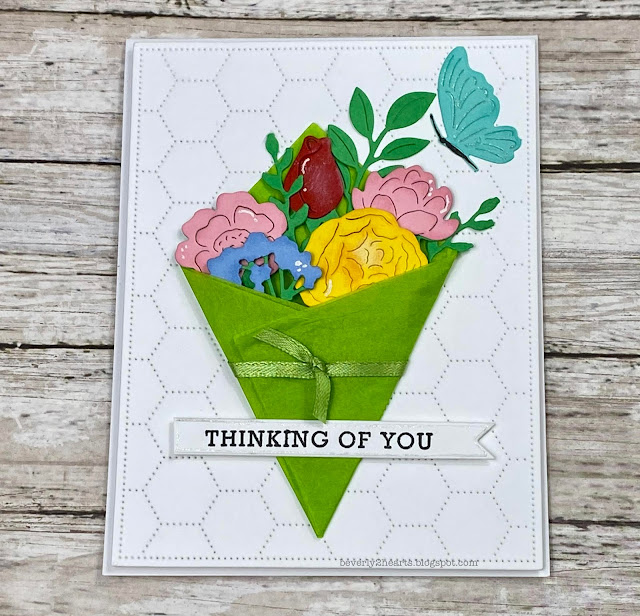

If you don't watch Jennifer McGuire Ink videos, you are missing out. Her video, using this kit, die cut the flowers twice, once with green and then another color for the bloom. She then colored edges with sponge daubers for dimension. Guess, what? It was fun and pretty fast. I then glued the blooms to stems. Next I used some tissue paper to wrap my bouquet - flowers come in tissue paper, right? A small ribbon tied it up after I arranged then glued the flowers and greenery. Some pen work adds detail. My background is the Stipple Hex Cover plate, it's backed with fun foam and adhered to my top folding card base. The sentiment and die strip is from the kit, a Stardust pen adds sparkle. Foam tape raises the strip over the bouquet.
Have a great day and keep on crafting!
Affiliate links used at no cost to you. Not all links are affiliate, I just want to share what I used. All products were purchase by my unless noted. I don’t sell anything nor am I employed. This is my hobby and I hope to inspire you to play :)
I hope everyone had a wonderful time celebrating the holidays! We did, but of course having a 9 month Grandson, added to the mix of his two brothers, made it a little more interesting! Always fun watching the kids enjoy.
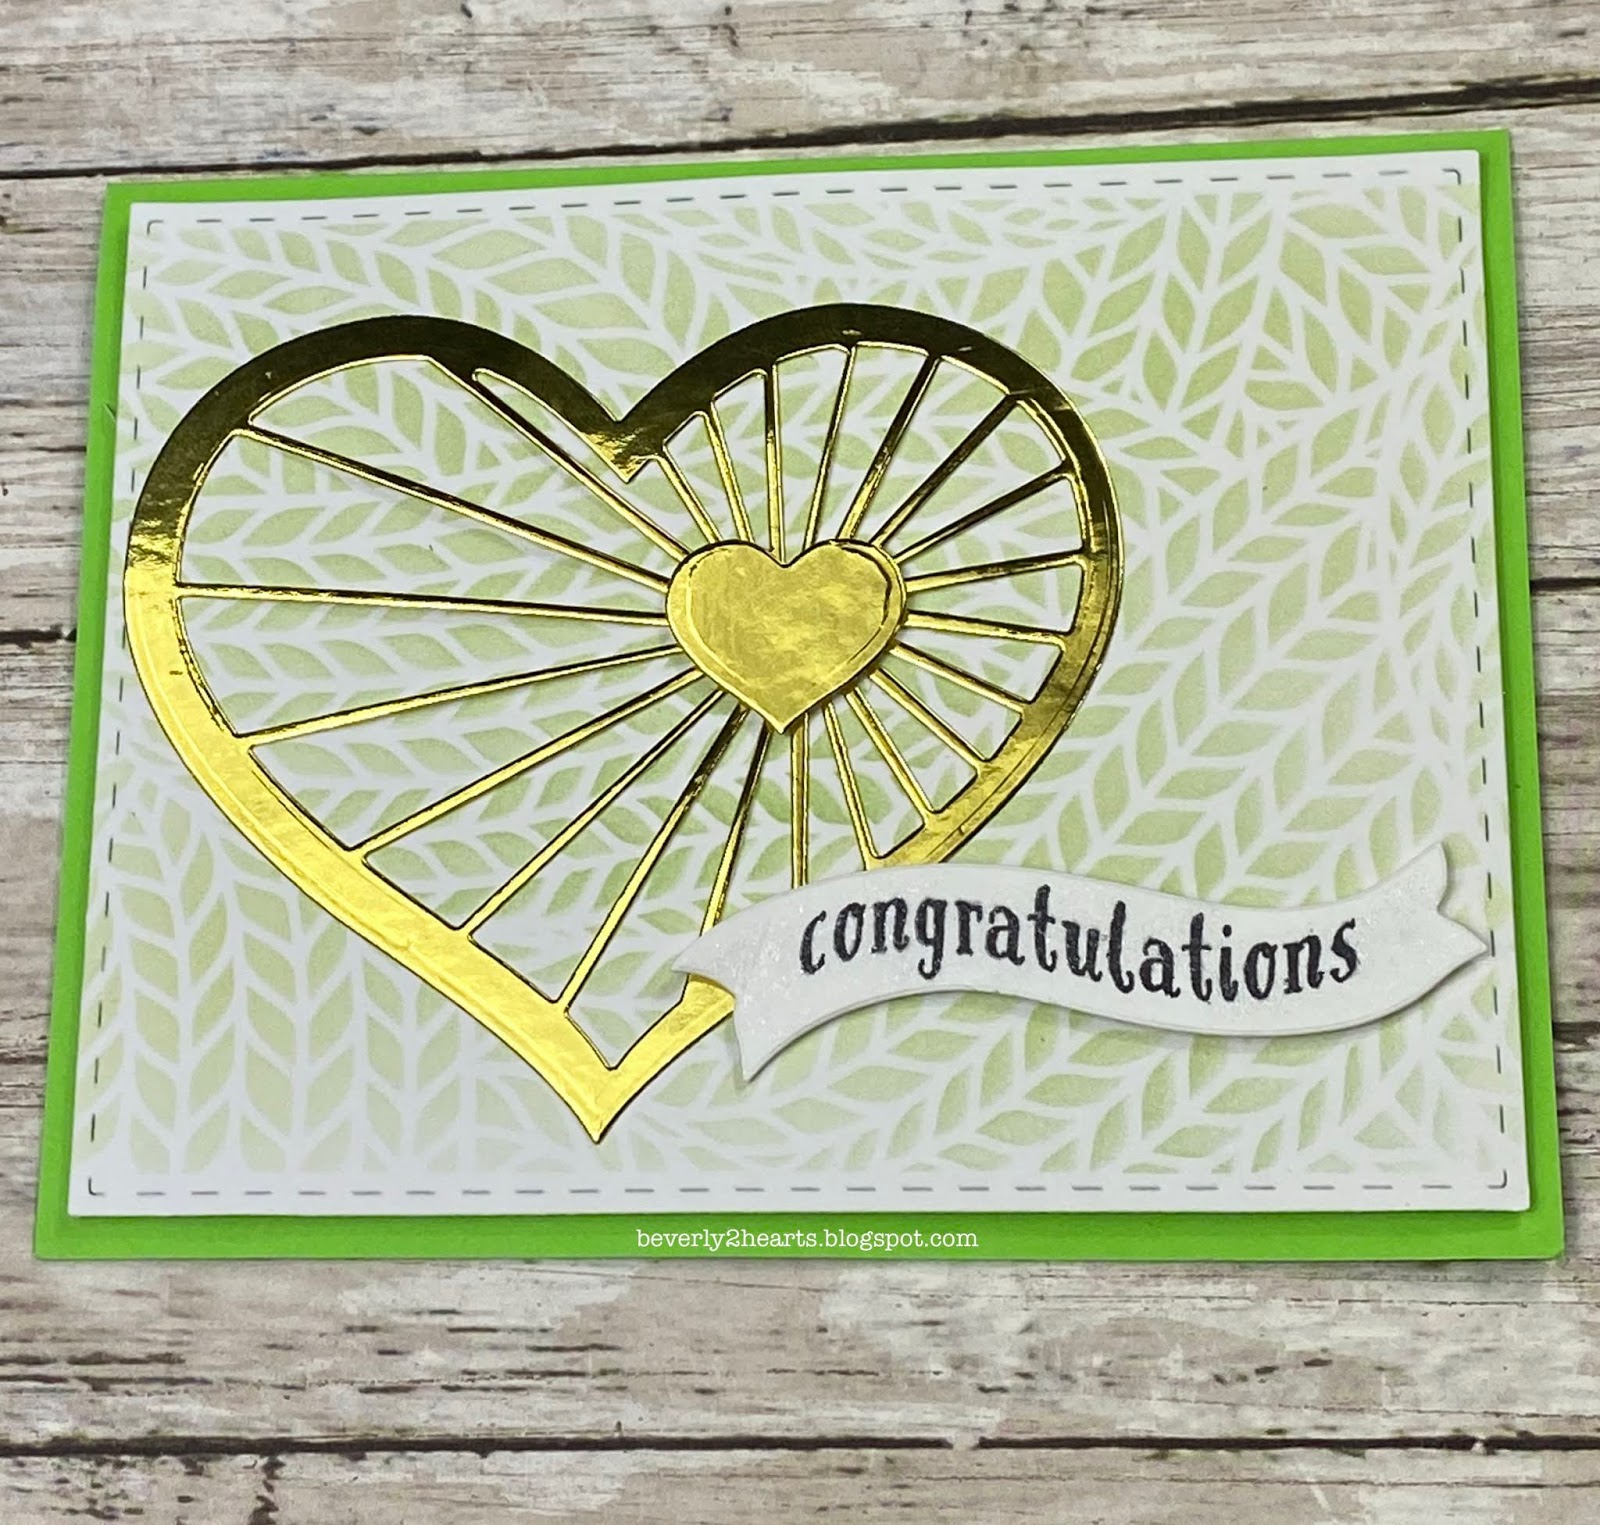
Todays cards are made with Heartstrings Dies that I purchased with a gift card from Christmas (thanks Sue!). A sale, coupon and a gift card makes this girl a very happy shopper! Starting with a piece of shiny gold specialty paper, I cut using the Gemini Jr. This die cuts the negative pieces but to get it as a separate piece you need to use the outline die. Did not realize this until I started to play and decided to make two cards.
I already had made some backgrounds using a stencil from Carabelle Studios called Tricot and some ink from Hero Arts. I tend to make more than one background at a time when I pull out stencils. They were die cut with Stitched Rectangles and then I began assembling the cards. The first card has the panel raised with a piece of fun foam and the smaller heart has foam tape under for dimension. The sentiment is from Ribbon Messages from Hero
arts and it includes a corresponding die. Congratulations was stamped with Tuxedo Black Ink and die cut with the Gemini Jr. It was also raised with foam tape. All of this is adhered on my green card base.
Card number two used the remains of the first gold die cut. They were pieced in place, with a lot of adhesive on the card base. The sentiment is from Ornate Love and stamped with Tuxedo Black in my Mini Misti. Thank goodness I did because several stampings were needed. Finally, some sequins were attached with glue. One of these will be an Anniversary Card for my parents who are celebrating 60+ years of marriage!!
Have a great day and keep on creating!
Affiliate links used at no cost to you. Not all links are affiliate, I just want to share what I used. All products were purchase by my unless noted. I don’t sell anything nor am I employed. This is my hobby and I hope to inspire you to play :)
I traditionally make 60+ Christmas Cards each year and it is a labor of love. I have one dear friend who has kept the past 9 years worth and displays them as decorations. When I saw the picture of them all, my heart melted!
My first card is made with Honey Bee Stamps Winter Bouquets Honey Cuts and a sentiment from a My Monthly Hero Kit. Those beautiful poinsettias caught my eye and I was hooked. I had my Gemini Jr working overtime to cut all those layers. Next came inking with 3 colors of distress ink. A stardust pen accents the pinecones and then the gluing began using Connect adhesive (it really holds together and dries fast). Using a My Monthly Hero sentiment I stamped using my Mini Misti with Versamark and Heat Embossed with Ranger Gold Embossing Powder. The background paper is The Paper Studio from Hobby Lobby. Finally all elements were attached to a white card base.

Now for the second card...I was at Hobby Lobby buying background paper and found the Merry Christmas Wreath from Momenta. Loved this delicate die and decided right then and there to add a second card. So my Gemini Jr chugged right along cutting more die cuts. So I said, I loved it...also hated it! It's so pretty but is really a booger working with and glueing together. Before I glued I sprayed Shimmer Spritz on the white layer, I know you can't see it in the photo but trust me it's there. Inking the background paper always adds a little extra so I did that too with Distress Ink. Finally all elements were attached to my red card base.
I chose no rhyme or reason when sending these out as to who got what card - I liked them both that much!
Affiliate links used at no cost to you. Not all links are affiliate, I just want to share what I used. All products were purchase by my unless noted. I don’t sell anything nor am I employed. This is my hobby and I hope to inspire you to play :)
I recently joined the Spellbinders Small Die of the Month kit club and was really excited to get this months kit. I thought my little Halloween guys would look good on the Box Card Kit.
Guys, these dies are tiny! Grab your jewel picker when assembling to make it easier. Once all the die cutting was completed, time to glue these together.
For the Box Die I used the Big Shot with the magnetic extended platform and cut purple paper for my base. Black glitter paper really stands out on the purple. The orange squares are stamped with this months My Monthly Hero Kit. A Stardust pen adds sparkle and the sticker is from my stash.
Have a great day and keep on crafting!
Affiliate links used at no cost to you. Not all links are affiliate, I just want to share what I used. All products were purchase by my unless noted. I don’t sell anything nor am I employed. This is my hobby and I hope to inspire you to play :)
Do you ever get overwhelmed when submitting items for contests, etc? I usually don't but for some reason, this year I did. I make it a point to not look at the already submitted items until my cards are completed. But these year I saw on social media people posting their submissions and boy were they amazing! Kind of took the wind out of my sail. Then I remembered, art is subjective and I like my art and trying to compare it is not a wise thing. But then I pulled up my big girl panties and soldiered on.
Clean & Simple Genius
Starting with Puddle Jumper, I stamped with Momenta ink, colored my image with copic markers and fussy cut him out. Using Radiating Rays and Grassy Edges Stencils I added the sun and grass. There are puddles in grass, right? The sentiment is stamped with Charcoal Ink and heat embossed with clear embossing powder.
Coloring Virtuoso
I bought the Holiday Cheer stamp a while ago and finally decided how I wanted to show my shopper - walking home in the snow carrying all her packages. I imagined a peaceful enjoyable walk instead of the rush and noise of the mall. I started by stamping with Momenta Ink and masking my image. Then using the Cloud stencil, light blue ink gave a soft look. Using Copic markers I added a tall tree on one side and finally a sidewalk for her to walk on. Then using various Copics I brought my colorful girl to life. Prismacolor pencils added more shading and a Sparkle Pen added highlights to her coat. Using Blueprint Sketch 24 I die cut my image The snow was created using a Snow Marker and a heat tool. Finally, the sentiment was stamped on a strip with Soft Granite Ink, outlined with a Stardust Pen and attached to the card. The whole thing was raised with fun foam onto my card base.
Inovation Master
For this one, I had a vision....and something in the universe did not want it to happen! I think I redid this card at least three times and that didn't include ripping things apart to try again. I persevered and finally had my entry.
Starting with Mixed Media paper and applied Wilted Violet, Blueprint Sketch and Picked Raspberry Distress Inks direct to paper and sprayed the whole thing down with water. My heat tool helped it dry and then put Black Soot down on glass and mixed with water and brushed it over the whole paper - again using the heat tool to speed drying. White acrylic paint watered down was then splattered over for the look of stars. Using Blueprint Sketch 24 Die, I die cut my background. Then placing the Shining Stars Die-namics I die cut the word, saving the inside bits. Using a separate piece of card stock I placed behind the diecut then glued the bits in place. Next I backed the top piece with acetate and on the reverse side I arranged two layers of foam tape around the word and edges. Sparkling crystals were added to make a shaker card and carefully adhered the backing piece. The sentiment from Written in the Stars was stamped with Versamark ink and heat embossed with silver embossing powder. This was cut into a strip and glued to the card. The card is backed with grey cardstock and mounted on to the card base.
So there you have it, my entries!
Affiliate links used at no cost to you. Not all links are affiliate, I just want to share what I used. All products were purchase by my unless noted. I don’t sell anything nor am I employed. This is my hobby and I hope to inspire you to play :)
Now I know that title sounds a bit weird. Backstory is that I was making a card for someone specific. I chose two colors of pink and gray. Turned out really cute but then I remembered something she said recently. She saw the new Starbucks reusable cup - it was textured and black - she "needed it because it was black, like my soul". So I remade the same card with gray, black and black glitter and it looked pretty cool too. I don't know if I'll give her just the black one or both. Here they are:
Both cards are made the same way, using my Gemini Jr to die cut the Floral Cover A & B dies. These dies make cards come together really quickly. Just glue the die cuts together and then to a card base.
The pink card has a sentiment from Sketched Flowers and was stamped with Soft Granite Ink and then again with Versamark Ink in my Mini Misti. Clear Embossing powder was heat set with my Heat Tool. This was die cut with Majestic Labels and backed with fun foam before adhering to the card. Cupids Kiss gems were added to finish the card.
The black card has black glitter card stock behind the die cuts.
Have a great day and keep on crating!
Affiliate links used at no cost to you. Not all links are affiliate, I just want to share what I used. All products were purchase by my unless noted. I don’t sell anything nor am I employed. This is my hobby and I hope to inspire you to play :)
We have a wedding coming up! My daughter Katie is marrying the love of her life and I wanted to make a special card for her bridal shower. Here it is:
I started with the Mr & Mrs Die from Momenta. I bought this on clearance at Hobby Lobby and unfortunately is not available at the sites I shop at. Using my Gemini Jr I die cut three times with white card stock and one with a smooth glitter card stock. The glitter card stock came with a My Monthly Hero Kit (www.heroarts.com). I stacked and glued the die cuts adding the glitter on top.
Then, using a gray wood grain specialty paper (also from My Monthly Hero Kit) I die cut my background using Stitched Rectangles. This was attached to fun foam (for dimension) and glued to my card base. Mr & Mrs was then adhered and Crystal Gems were added.
I was really pleased with the how the card turned out. Excuse the wet glue under the gems.
The shower was perfect! It was at a restaurant and was beautifully decorated by a cousin! Here is a picture of my three daughters and youngest grandson.
Have a great day and keep on crafting!
Affiliate links used at no cost to you. Not all links are affiliate, I just want to share what I used. All products were purchase by my unless noted. I don’t sell anything nor am I employed. This is my hobby and I hope to inspire you to play :)