Hello there, today's card is for all the Boy Moms out there. A super cute stamp set from The Ink Road Stamps called Boy Mom is new for me and just loved creating this card. I've said this before, that I like to create when the mood strikes and this time I used a background from one of those occasions. It's made with direct to paper distress inking, a little blending and finally spritzing the back of a stencil with water, and applying it to my inked paper. A paper towel soaks up extra water and once it's dry you get a cool background! I've had the stencil for a long time and I'm sorry I don't have the name for you :(
I simply placed my images in my MISTI, stamped with onyx ink, sprinkled with clear embossing powder and heat set. I went on to mat black card stock before adhering to my card base. Pretty fast card and when you already have a background done - pretty easy also!
Have a great day and keep on crafting!
Affiliate links used at no cost to you. Not all links are affiliate, I just want to share what I used. All products were purchase by my unless noted. I don’t sell anything nor am I employed. This is my hobby and I hope to inspire you to play :)
Saturday, March 30, 2019
Monday, March 25, 2019
Pretty Fly for a Little Guy Card
Hello there, today's card is all about my newest Grandson, Benjamin! He'll be 3 weeks old tomorrow and we are all totally smitten. No pictures of Ben, my daughter is taking the safe route and keeping photos off social media (smart move). Ben was the reason I bought Spork, a stamp set that has awesome sayings. If you like to quote shows or movies, The Ink Road Stamps are for you. My cart had several items before I checked out!
Here's the card:
I started with the baby image and stamped all over with soft sky ink. Then with baby blue pigment ink I stamped the sentiment, sprinkled with clear embossing powder and heat set. Next, I got out my stitched rectangle and stitched squares dies with my gemini jr. Fun foam was added to the baby image piece and attached to the base. Ribbon (celebration from Michaels) was added with a button and floss on top. (A reverse tweezer held it all in place while the glue dried). The blue card stock was from a random piece from my stash and the sentiment with backing also got some fun foam behind it. And there you have it - pretty quick card.
Have a great day and keep on crafting!
Affiliate links used at no cost to you. Not all links are affiliate, I just want to share what I used. All products were purchase by my unless noted. I don’t sell anything nor am I employed. This is my hobby and I hope to inspire you to play :)
Labels:
Baby,
Card Making,
Gemini Jr,
The Ink Road Stamps,
The Stamps of Life
Thursday, March 21, 2019
I Won! Here's the Card I Made
Hello there, I've got a picture I want to share with you.
This wonderful set of crafty goodness arrived by mail from @cards.by.becca on Instagram. She had a giveaway to celebrate her 2000 followers. Check out that decorated envelope and zoom in on that fabulous card she made! Truly packed with love! I won (clapping and jumping) and here is the card I made:
I had so much fun playing with these new goodies and look forward to playing with all of them.
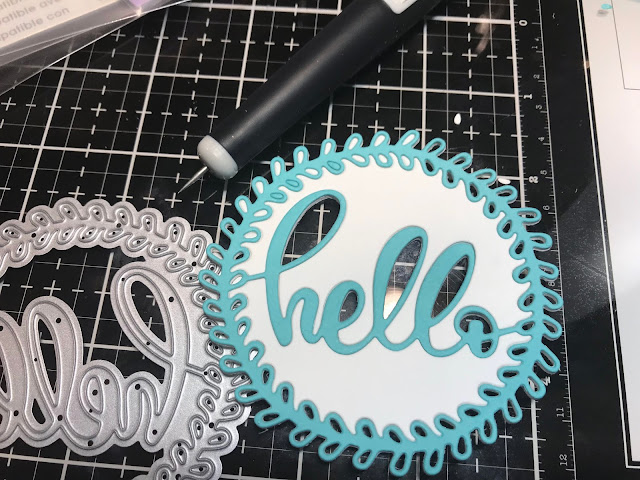
The background stamp is from Neat and Tangled called Mail Background and is stamped on card stock, sprinkled with white embossing powder and heat set. Next Peacock Feathers Oxide Ink is used to blend around the edges fading to a white center. Using my Gemini Jr, I die cut 3 white and one paradise using the hello cutting template. They are stacked and glued together.
HINT: Since this is a pretty delicate die, I stacked and glued before I punched all the tiny bits out. There were so many bits and having them more stabilized made poking them out easier.
Affiliate links used at no cost to you. Not all links are affiliate, I just want to share what I used. All products were purchase by my unless noted. I don’t sell anything nor am I employed. This is my hobby and I hope to inspire you to play :)
I had so much fun playing with these new goodies and look forward to playing with all of them.
The background stamp is from Neat and Tangled called Mail Background and is stamped on card stock, sprinkled with white embossing powder and heat set. Next Peacock Feathers Oxide Ink is used to blend around the edges fading to a white center. Using my Gemini Jr, I die cut 3 white and one paradise using the hello cutting template. They are stacked and glued together.
HINT: Since this is a pretty delicate die, I stacked and glued before I punched all the tiny bits out. There were so many bits and having them more stabilized made poking them out easier.
The die cut element was then glued to my background piece and a shimmer pen was used on the word only for some sparkle.
If you have chance, check out @cards.by.becca on instagram! Thanks again Becca!
Have a great day and keep on crafting!
Labels:
Card Making,
Distress Oxide Ink,
Gemini Jr,
I Won,
Momenta,
Neat and Tangled
Monday, March 18, 2019
Piece of Cake Birthday Card
Hello there, I'm using some new products on today's card. I knew the moment I saw it, that I had to have the Piece of Cake stamp set from Honey Bee Stamps. Let me tell you, the two stamps I ordered came super fast and was packed with love! The other new element I used was an embossing folder that came with my gemini jr. Normally, I stick with my big shot for embossing folders but the included folder worked just fine. I do like the raised area along with the textured background.
I started by stamping with memento ink on 80 lb Neenah card stock, knowing that I would be using my Silhouette to cut these images out. Of course, I used the MISTI so for repeated stamping, then it was time to color with Copics. This is usually my standard practice, stamp a lot, spend time coloring and then cut them all out - so when I'm ready to make a card, it goes pretty quick. So to pull my card together, the embossed background was trimmed, fun foam attached behind, then I positioned my cake on the pedestal, added the other elements and glued them down. The sentiment is stamped, sprinkled with embossing powder, heat embossed and die cut with coordinating die. All of this is attached to some new card stock from Hero Arts that has been inked and glued to my card base.
Have a great day and keep on crafting!
Affiliate links used at no cost to you. Not all links are affiliate, I just want to share what I used. All products were purchase by my unless noted. I don’t sell anything nor am I employed. This is my hobby and I hope to inspire you to play :)
Labels:
Birthday,
Card Making,
Copic Markers,
Die Cutting,
Gemini Jr,
Honey Bee Stamps,
Silhouette,
Sizzix
Friday, March 15, 2019
Happy Mail Cards
Hello there, today's cards are all about happy mail! Who doesn't like getting mail (happy mail, not bills)? Mail background and love mail dies are apart of all three of these cards, after all, I just got these in the MAIL! lol
The first card was stamped, sprinkled with embossing powder and heat set. Tumbled glass ink was blended around the edges with lighter touch in the center. The love die was cut with black and then outline in a silver vellum. The sentiment was stamped and heat embossed also. Those cute little envelopes were die cut out of very heavy card stock, almost too heavy. Bending those on the score line to fold took too much effort! The rest of those cuties are cut with regular card stock (much easier). Those tiny little hearts on the envelopes were colored with watercolor markers. The background was die cut with stitched rectangles and placed on fun foam to add dimension.
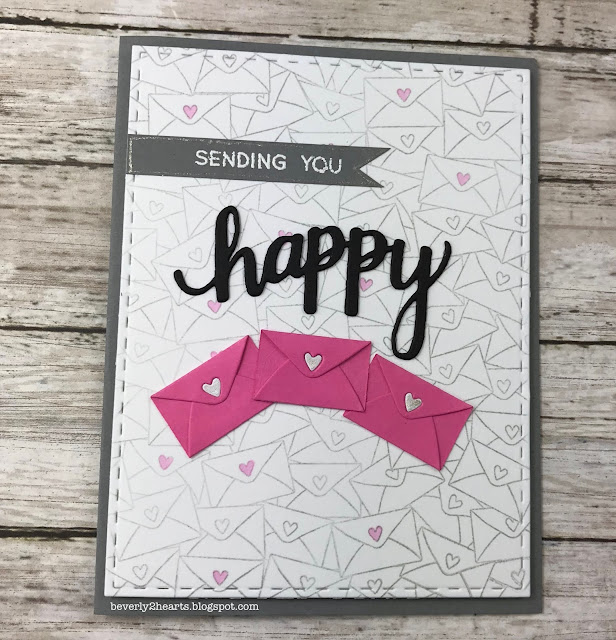
Next card is sending you happy mail, Using both the background stamp (in cloud ink) and love mail dies were used. The sentiment is stamped and heat embossed just like card above. The happy die was cut and glued three times for dimension. I colored some of the background hearts with Copic RV52. A touch of stardust pen on the envelope hearts add shimmer. The rest of the card was assembled just like the above card.
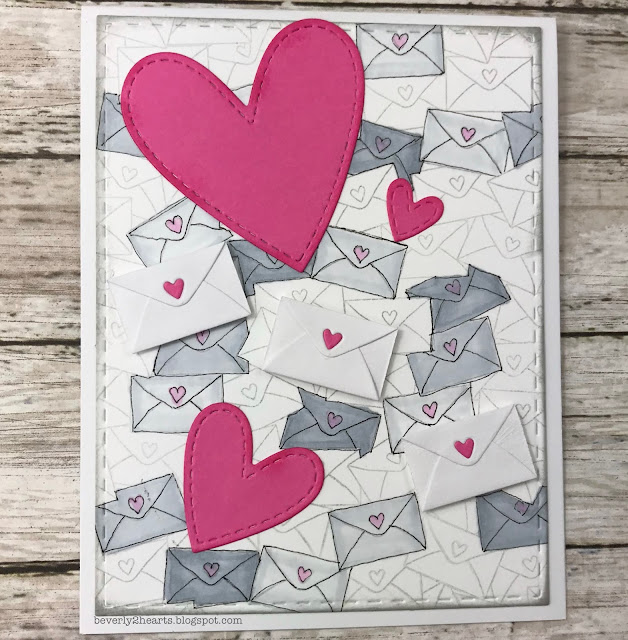
The last card was done slightly different. The background was stamped with cloud ink and then a few envelopes were colored with three different colors of alcohol ink. Then, using a micron fine tip pen, I outlined them. This one has no sentiment, that's for the inside, so this card can be used for more than one occasion. Using the same dies, this time I also cut hearts and inked them with bubblegum ink. The folded envelopes (cut with regular card stock - easier to fold) are raised with foam tape for dimension. The rest of the card was assembled like the above two cards, only without fun foam.
Have a great day and keep on crafting!
Affiliate links used at no cost to you. Not all links are affiliate, I just want to share what I used. All products were purchase by my unless noted. I don’t sell anything nor am I employed. This is my hobby and I hope to inspire you to play :)
Labels:
Card Making,
Die Cutting,
Gemini Jr,
Happy Mail,
Mail Background,
Neat & Tangled
Sunday, March 10, 2019
Gamer Birthday Card
Hello there, got a card today that I made for my Grandson Dominic. He's really into video games and happened on one of those great clearance section at Hobby Lobby and snagged this beauty on sale with him in mind. A personalized card is going to mean a lot to him, so I pulled out my luggage tag alphabet dies. Here's a hint - I didn't clip each letter out, I clipped each row and kept them together when I first removed them from the package (I'm talking about the little tabs that hold all the dies together). This way there is less to lose and I'll keep the extra letters in a plastic sleeve. I die cut his name and the game dies out of black card stock. The screen piece has lots of white pigment ink rubbed on. The sentiment was cut from mirror shiny card stock. My background is done with a stencil, stencil brush and two colors of ink. The borders of the stencil and backing piece are cut with stitched rectangles dies. Glue brought this all together - easy peasy.
Have a great day and keep on crafting!
Affiliate links used at no cost to you. Not all links are affiliate, I just want to share what I used. All products were purchase by my unless noted. I don’t sell anything nor am I employed. This is my hobby and I hope to inspire you to play :)
Have a great day and keep on crafting!
Affiliate links used at no cost to you. Not all links are affiliate, I just want to share what I used. All products were purchase by my unless noted. I don’t sell anything nor am I employed. This is my hobby and I hope to inspire you to play :)
Labels:
Altenew,
Card Making,
Hero Arts,
Sizzix Big Shot,
Spellbinders,
Stencil
Wednesday, March 6, 2019
Hugs Card
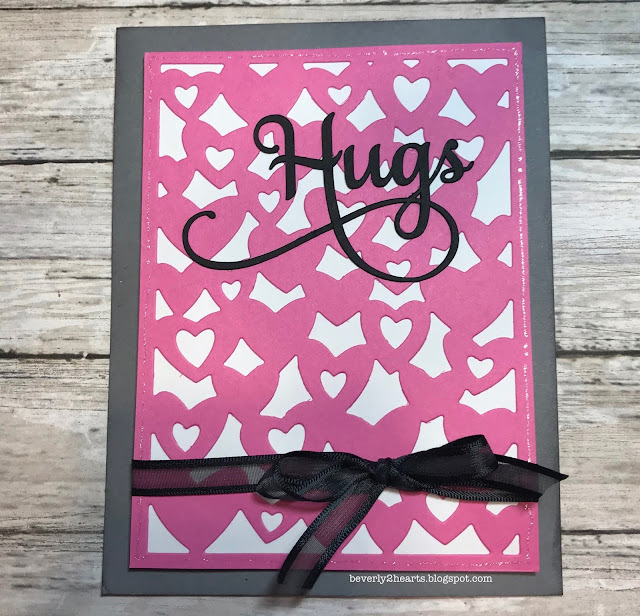
Hello there, todays card is a fast fast fast card. The heart background has an inner and outer die so you can cut just the hearts without a border, I wanted the border. I also cut a white rectangle to go behind the hearts. For the sentiment, I used my Silhouette and the Samantha Font to cut Hugs with the swirly. I stacked and glued together 2 of these before adhering to my card. It's on grey card stock from Michaels that has inking around the edge. A stardust pen adds shimmer and a ribbon completes the card.
Affiliate links used at no cost to you. Not all links are affiliate, I just want to share what I used. All products were purchase by my unless noted. I don’t sell anything nor am I employed. This is my hobby and I hope to inspire you to play :)
Sunday, March 3, 2019
More Fast and Easy Cards Using Dies
Hello there, I've got more card using stacking dies. Four of them actually, and it's really easy to get into a rhythm of die cutting a bunch and then taking time to stack and glue them together. Just choose the colors of card stock you would like and get going! This set of dies have an inner and outer circle making lots of possibilities for changing them up.
Putting the dies alone on a card is pretty but a bit plain, so I encourage you to use either stamping or embossing folders for added interest. I used two embossing folders from Park Lane, one with herringbone and the other with diagonal stripes. For sentiments I stuck with large word dies (congrats and celebrate) and one stamped embossed sentiment strip. (The sentiment is from a My Favorite Things Set that is no longer available for purchase) Fast and easy, I'm telling you!
Have a great day and keep on crafting!
Affiliate links used at no cost to you. Not all links are affiliate, I just want to share what I used. All products were purchase by my unless noted. I don’t sell anything nor am I employed. This is my hobby and I hope to inspire you to play :)
Subscribe to:
Comments (Atom)


